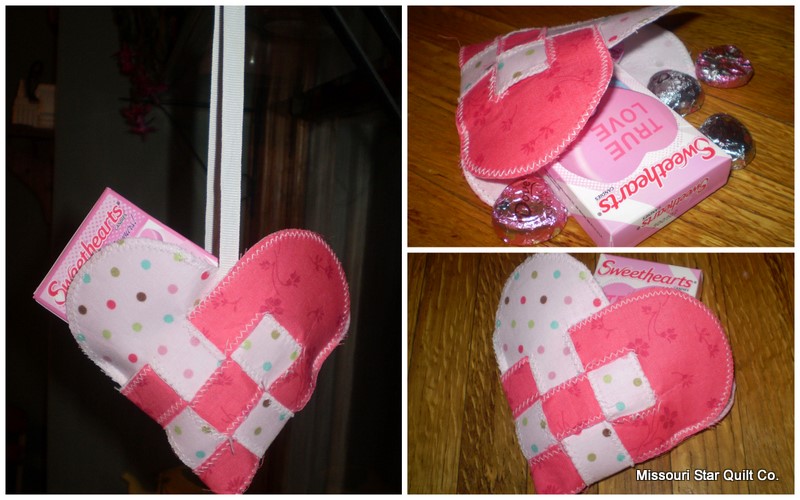
Today we have a cute little craft for you. This is a traditional Swedish heart. We usually make these around Christmas time and hang them in our tree but, we thought it would be cute to use these for Valentines day as well this year!
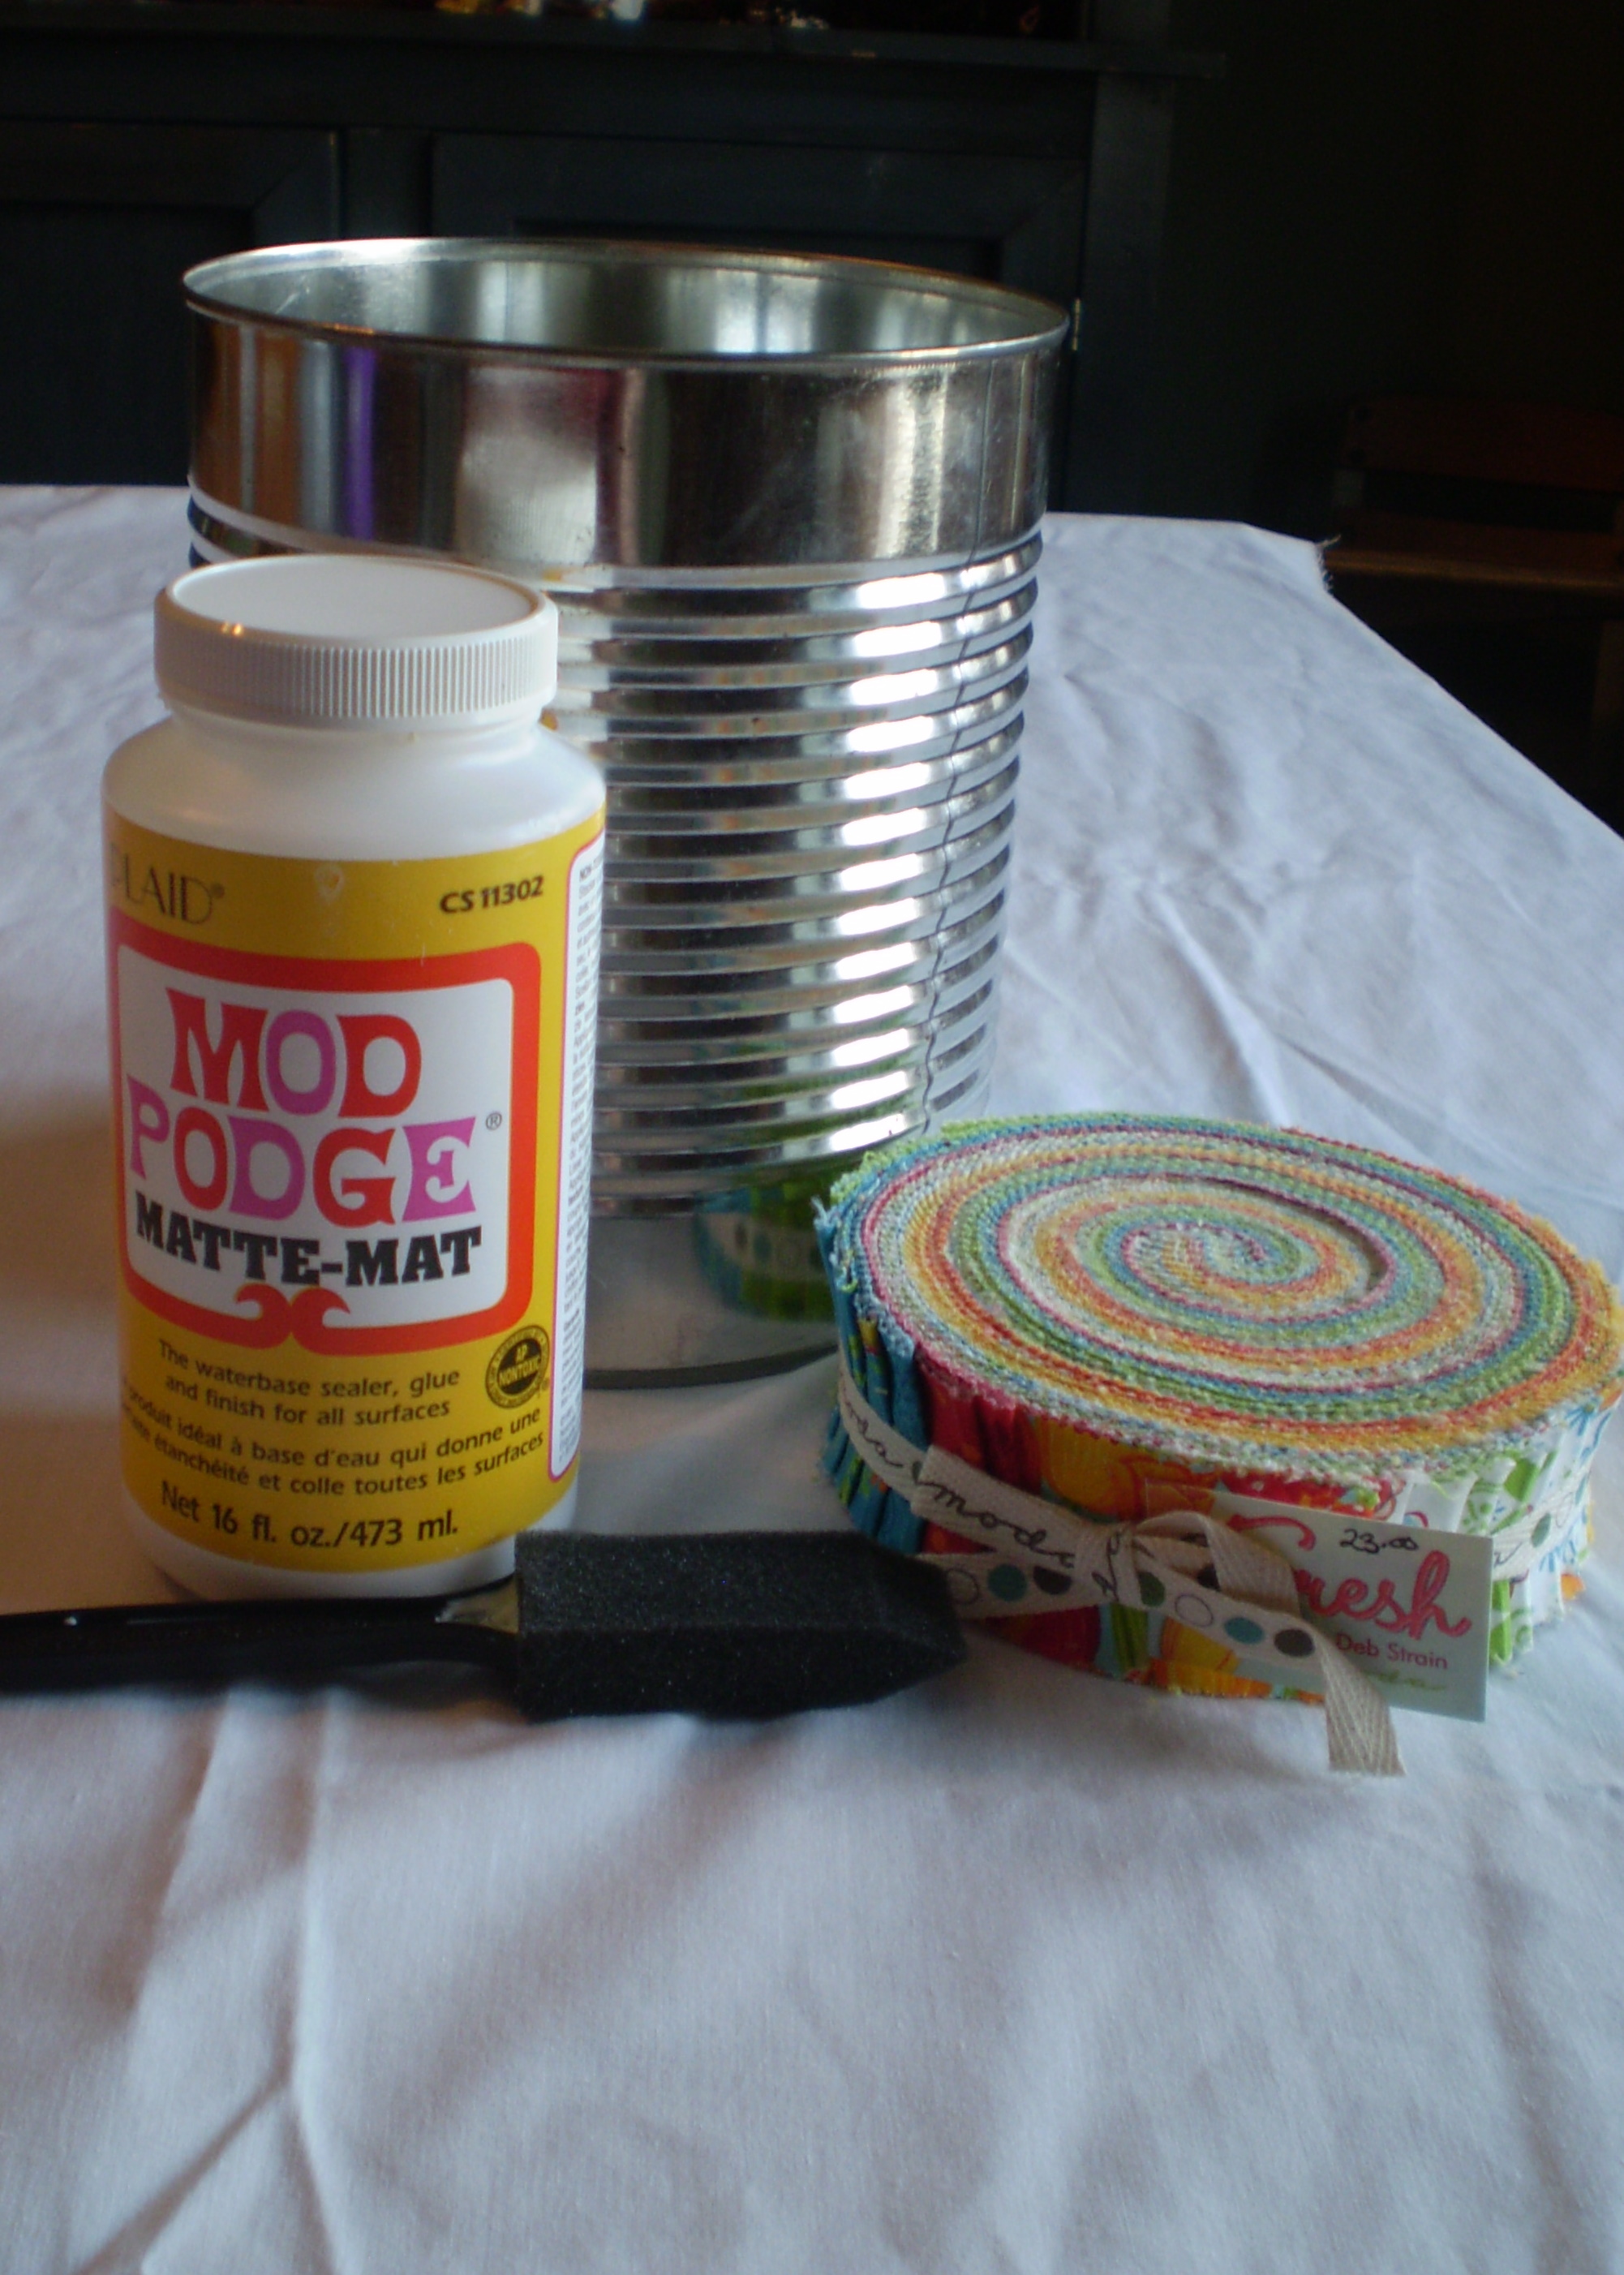
You will need:
two strips of contrasting fabric (a light and a dark will look best) 3″ x 11″
two strips of heavy fusible stabilizer 3″x 11″
scissors
*sewing machine optional!
First iron on your fusible stabilizer to the wrong side of your fabric. This will reinforce your fabric and give your basket some shape.
Next, fold your strips in half and round off the cut end. I use a small glass from the kitchen as a template. It doesn’t have to be perfect just round off the corners.
Then with your strips still folded in half, on the folded side, make 2 cuts perpendicular to the fold, 1″ apart from each other, and 3.5″ long.
Now comes the tricky part. We will be weaving through and around our strips as opposed to the traditional over and under type of weaving.
Keeping each strip folded, set them down so that the folded sides face each other. Now take the top strip of your light fabric and weave it in between the layers of your first dark strip.
Then weave the second dark strip in between the layers of your first light strip. 
Next weave the light strip in between the layers of the third dark strip.  Your first row is done. Now just repeat starting with the opposite color. Do this for each strip set and you will be done!
You may want to fray check your fabric if you don’t like the raw edge look. You could also do a decorative stitch around each of your raw edges. We did a zig zag on a couple of them and thought they turned out cute.
If you want a tighter seal on your basket just stitch a small seam at the top of the sides to keep it together You could also add a ribbon or ric rac handle by slipping your ribbon in between the layers of fabric at the center of the heart basket and stitching it down.
Now just fill and enjoy! 
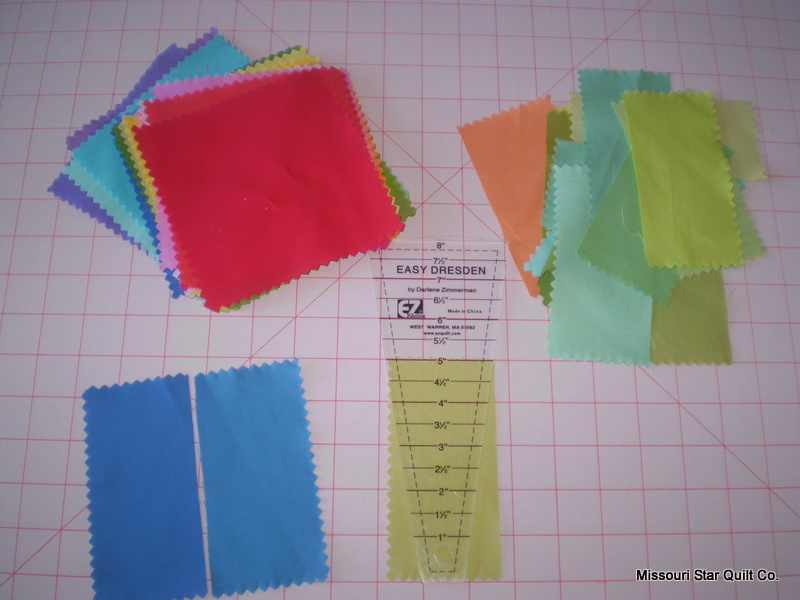


 Next take your large square ruler…see that diagonal line that runs from corner to corner?? That is a 45 degree angle line Now turn your ruler so that the 45degree line is at the bottom of your fabric and the corner is at the bottom edge of your fabric….
 Cut your fabric along the outer edge of the ruler to start your first triangle.
 Now slide your ruler up so the 45 degree angle is at the top of your fabric…
 Now, cut that angle. You should have a triangle that looks like this:
 Now you will want to continue sliding your ruler up and down and cutting triangles until you have four.
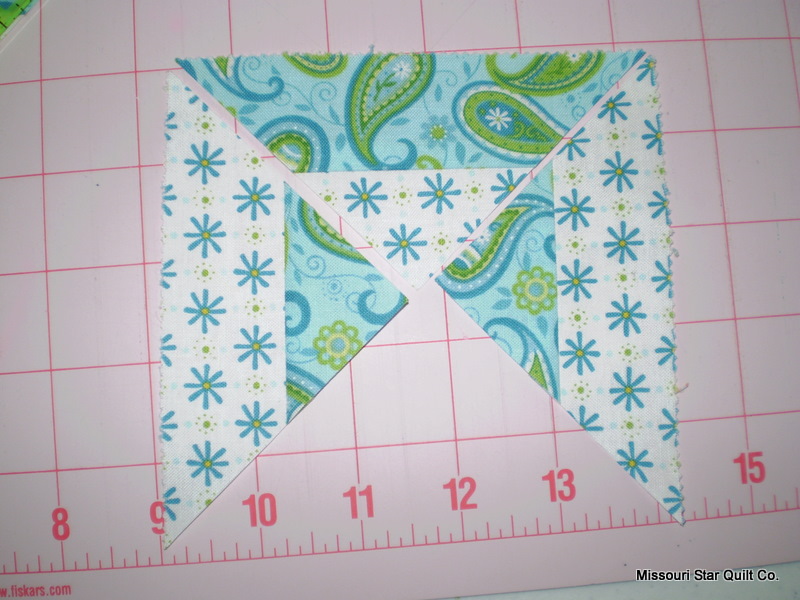
 You should have two matching sets of two that match each other…lay them out opposite each other,
  then pin like crazy,

 Here is your complete block…(I know the fabric doesn’t match) 🙂 (I didn’t quite have enough to do this last block! So, I had to improvise!)