Sugar Pop…

What a week I had last week!  Whew!  Glad it’s over!!  🙂  One thing I can always count on is that life is always interesting around here!!

We are just working like crazy on the website, getting everything updated and added.  I hope you have been able to see the improvements and additions!  Our little family business has just been growing like a weed.  (the good kind of weeds, you know the ones with pretty flowers on them.)

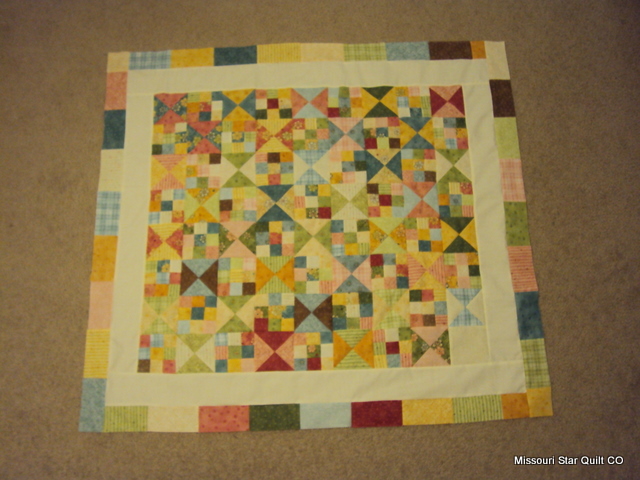
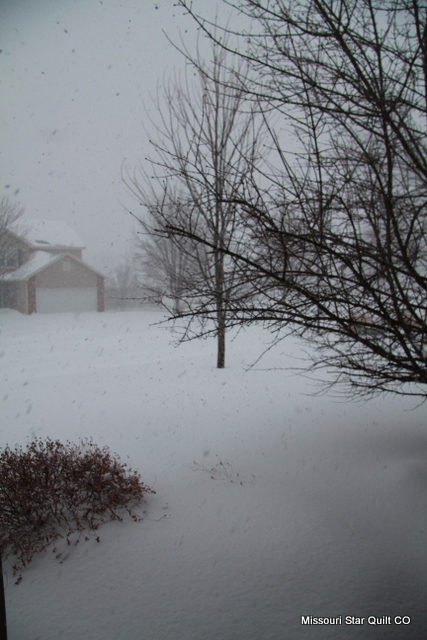
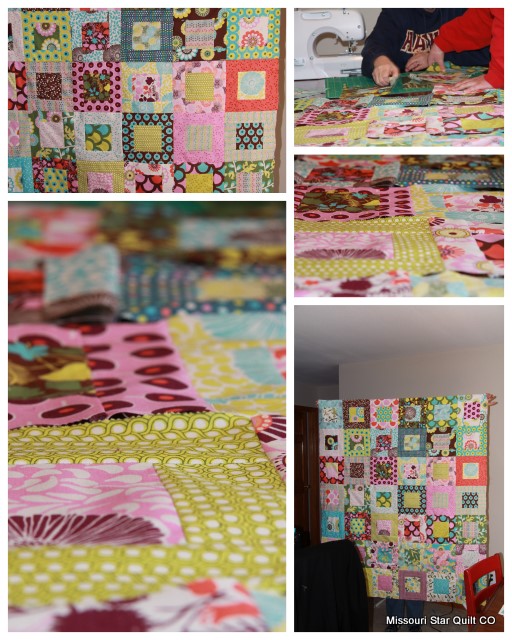
Anyway, here is a peak at the quilt top I put together using  the Sugar Pop line by Liz Scott from Moda. If you haven’t played with this line, you are missing out! It is so bright and colorful!  Just what I needed to keep the winter blahs away!

If you want the pattern for the top, here is Mom’s video tutorial:

Eden Quilt! A Jelly Roll and a Charm pack!

It is really a great, quick and easy top to put together!  All I need now is to pick out the border fabric and have it quilted!!  Don’t you worry, I will show you the finished project when it’s complete!

I hope you all have a GREAT Monday, and get lots done!  I am off to catch up on laundry and house cleaning.  (hoping I get it done fast, then I can work on another quilt idea I had!!)

Have a great day!

Sarah

An adorable tutorial,from YOU!

Our facebook friend Sandra, uploaded a picture of a quilt she made and several of us wanted directions!!  Well, it’s your lucky day!  Sandra emailed me her directions and I am thrilled to share them with you!  Oh my, don’t you just love it!!?

3 5×5 charm packs            iron and ironing surface

1/2 yard solid fabric          machine or hand sew
cutting matt                      rotary cutter
straight edge                    coordinating thread

To begin I lay out what i will need. ( sort of like cooking)
The first charm pack is cut into 4 triangles. I do this by laying my ruler from corner to corner and cutting with my rotary cutter. Then without disturbing the fabric i lay the ruler to the opposite corners and cut again. So you are cutting an X. That gives you 4 triangles the same size. These are mixed up and sewn into the hour glass block style using 4 triangles. Next the charms from pack number 2 are cut into 3 equal strips (approx. a scant 1 3/4″) You mix these up and sew into blocks of three strips each. Now cut each of these into 3 equal strips, mix up again and sew three strips each to make your nine patch style block. Now is a good time to iron each block if you haven’t after each step. Next you will sew together alternating 9 patch and hour glass for a total of 8 blocks in a strip. I do have one block at the end of the last row that is solid. I use this to either sign and date or embroider a message to the receiver. Then sew these strips together to form your quilt.

Cut your solid fabric into 3 1/2 x 44 (fabric width) this is your first boarder. Attach down the sides first then trim excess. Next sew top and bottom strips. Trim now as these pieces are too long as well. Charm pack number 3 is cut in half and the pieces are sewn end to end to make the outside boarder. These are also sewn down the sides trimed and then top and bottom.  Trim the extra fabric and you are ready to quilt.

FYI:  the fabric she used was Garden Song, by Nancy Halverson from Benartex.

Thanks so much for sharing your directions Sandra!  I can’t wait to make mine!  I am just in love with the quilt!

Have a great day to you all, and don’t forget to enter our giveaway, for your chance to win a free class with Jenny!  Go here!

Sarah

A Bakeshop Tutorial!! {squeal}

Okay, so I’d be lying if I didn’t say I was {more} than thrilled to be featured  on the Moda Bakeshop!  How fun is that?  Rubbing Internet shoulders with all those other talented Chefs!!  If you haven’t seen it yet, go take a look.  {and leave comments there.  We love comments!}

Well we are surrounded by WINTER out here!  This season has been crazy!  Yesterday we got over 18inches of snow with more coming in next Monday. Our city has basically shut down.  They are requesting that you don’t leave your house until Thursday at the earliest.  I doubt the roads in my neighborhood will be plowed by Friday!

My kids can’t believe how lucky they are.  {they think it’s the best thing ever}  Me, well we are running out of crafts to do  and my house needs a major makeover.  🙂  I am excited about the enormous snow fort we plan to build if it warms up.

Look at that snow! Brrrrr!

On the agenda today is more hot chocolate, of course.

I have a few more Valentines projects I am working on that I can’t wait to show you!!    Have a great day!!  I know I will.

~Sarah

DIY Heart Felt Wreath

So, I was browsing the Internet (*ahem, wasting time.  please don’t tell my husband)  and came across this absolutely adorable wreath on ‘The Idea Room’ blog. It is a great site full of eye candy and ideas.  I hopped in the car (after I dressed my three year old, who’d rather be running around the house in his ‘Lightening McQueen’ undies) and went to pick up some basic supplies.  I think it turned out fabulously and I LOVE it!

It did take forever to cut all the circles out!  I had a great helper (thank Heaven for snow days) and I found it quite therapeutic to cut out the circles.  (more proof that I am crazy)  One tip:  make sure that you cut inside the black line, unless you want that to show on the wreath!  (another helper of mine wasn’t very careful, so I had to fix a few of them)

Go here to get the tutorial if you are interested!  Thanks to the Idea Room for that great idea!

Is your house all decorated for Valentines Day yet?  Or are you like me….I kinda wait till the week before.  🙂

Have a happy day!

Sarah

Retreats with Jenny as your hostess!

Sounds fun, right!?!?  I mean really, who wouldn’t have a blast sewing and learning along side  Jenny!  She has more enthusiasm for quilting than anyone I know.  (and I know at least 3 other quilters, lol )

We have some way fun things planned for our FIRST ever retreat-experience! I can almost guarantee you will have a BLAST and learn at least one new thing!!  🙂

Here is some basic information about our retreat:  {squeal!!  we are so excited}

“These are a few of our favorite Precuts” Quilting Retreats

Series of five retreats- 2nd weekend in April, July, August, September, October, 2011

April Theme:  Depression Daze

Arrive: Thursday afternoon, April 14-Arrive at lodging

Depart: Saturday afternoon April 16-Classroom open until 4pm

Cost: $275 double occupancy, $325 single occupancy

Schedule:

Thursday evening: 6:30-Welcome, show & tell

Friday morning:  9-12 Sewing project at MO* featuring the Dresden tool

12-1:Lunch break at MO*

1-1:30 Jenny tutorial

1:30-4- Sewing project-Classroom open until 5pm

6:30-8:30 Dinner followed by program on The History of Feedsacks

Saturday morning: 9-10 Behind the scenes of MO* with Al and Sarah

10-12: Sewing project

12-1: Lunch at MO*

1-2: Jenny tutorial

2-4: Classroom open

This project is geared for quilters having basic sewing knowledge and use of a rotary cutter.  Bring a sewing machine in good working order and general sewing supplies.  The project will use a charm pack and coordinating 1/2 yard of fabric for background.  A kit may be purchased at Missouri Star Quilt Co.

Agenda and schedules subject to change, but we suspect they won’t. 🙂

For additional information you can email Carolyn at:  carolyn@missouriquiltco.com  She will be happy to answer any questions about the retreat you might have!!

Email or call to make your reservation!  Hurry,  spots are filling up fast!  (816) 583 7722