This edition of our Tutorial Reboot series comes from Liz Hawkins, who you may know as Mama Hawk from Mama Hawk’s Kitchen in Hamilton!

Well hello! I’m excited to share my “reboot” pattern experience with you all. But first, let me explain a bit about who I am. If you’ve ever visited Missouri Star Quilt Co in Hamilton, Mo, then you most likely know me as Mama Hawk…the baker, panini, pizza, salad and soup maker at Mama Hawk’s Kitchen located near the main shop. However, before I opened the bakery/cafe here, I’d been known as one of the Lizzie B girls for Lizzie B Cre8ive. A quilt/fabric design company started by my sister-in-law and I. I haven’t had much time, since opening the bakery, to dedicate to quilting, sadly. Which, I know, is crazy to think about as I am living in a town quite literally surrounded by fabric and everything a quilter could dream of! In fact, one night I was frantically trying to finish a gift for someone and happened to break my last needle, oh around midnight. Isn’t that always when your last needle breaks? Anyway, I tore apart my entire sewing room searching for a needle in a fabric stash proverbial haystack, looking disheveled and distraught as I knew my alarm would go off in a few short hours when I’d need to start rolling out cinnamon roll dough. My husband rolled his eyes at me and said, “You must be joking. You work ten steps from a shop that sells quilt needles and you actually ran out?” I’m sure you don’t need me to tell the rest of the story. You’ve all been there, right? Ok, maybe not in the exact circumstances. But at least you know exactly where my husband spent that night sleeping. Ha! Needless to say, I’ve stocked up on needles. And they got me through my reboot project without breakages!
The pattern I chose to do is the Cathedral Window pattern. I’ve always looooved Cathedral windows, real AND quilted ones! I’ve always wanted to make a cathedral window quilt, but have never taken the time. So I thought, alright, here’s my chance!
I watched Jenny’s nice little tutorial, and thought, no problem. This should be a breeze! She’s simplified it all nicely so there’s not all that hand stitching involved like in a traditional cathedral quilt. Plus, the block size was 7” finished, none of those teeny tiny blocks to deal with. Although, in Jenny’s tutorial she makes a table runner, and I thought, if I’m going to devote some time to this, I might as well make it into a whole quilt. Right? Wouldn’t you think the same thing? Sure you would!

Plus, my youngest child was graduating early from High School and would soon be off to college in January. So I also thought, perfect, this will be her college quilt! With that in mind, I went about choosing my fabric. I fell in love with a line by Melody Miller for Cotton + Steel called Jubilee. Not only did the colors appeal to me, but the prints were filled with little dresses, tubes of lipstick, mascara and nail polish. All the things my 18-year-old daughter adores! The designs have a wonderful retro 60’s element to them as well. Which I also love. Maybe because I wear funky cat-eye glasses, and have a retro vibe to myself? Or maybe it’s because I had just binge-watched The Marvelous Mrs. Maisel on Amazon with my family over the holidays. A show set in New York City in the 60’s. Featuring an amazing set, gorgeous dresses and a fabulous pink Pyrex dish I’ve been obsessing over ever since.
Whatever the reason, the fabric was picked, and I started my project. Now I’m a pretty quick quilt maker. Comes from years and years of deadlines to make for quilt market, sometimes only getting our fabric a couple weeks before. I’ve spent many flights to Houston hand binding quilts so they’re ready to hang in a booth. So I wasn’t really worried about not having enough time. And that is where I wildly miscalculated the amount of time this particular quilt would take. Not only that, but the amount of fabric as well!

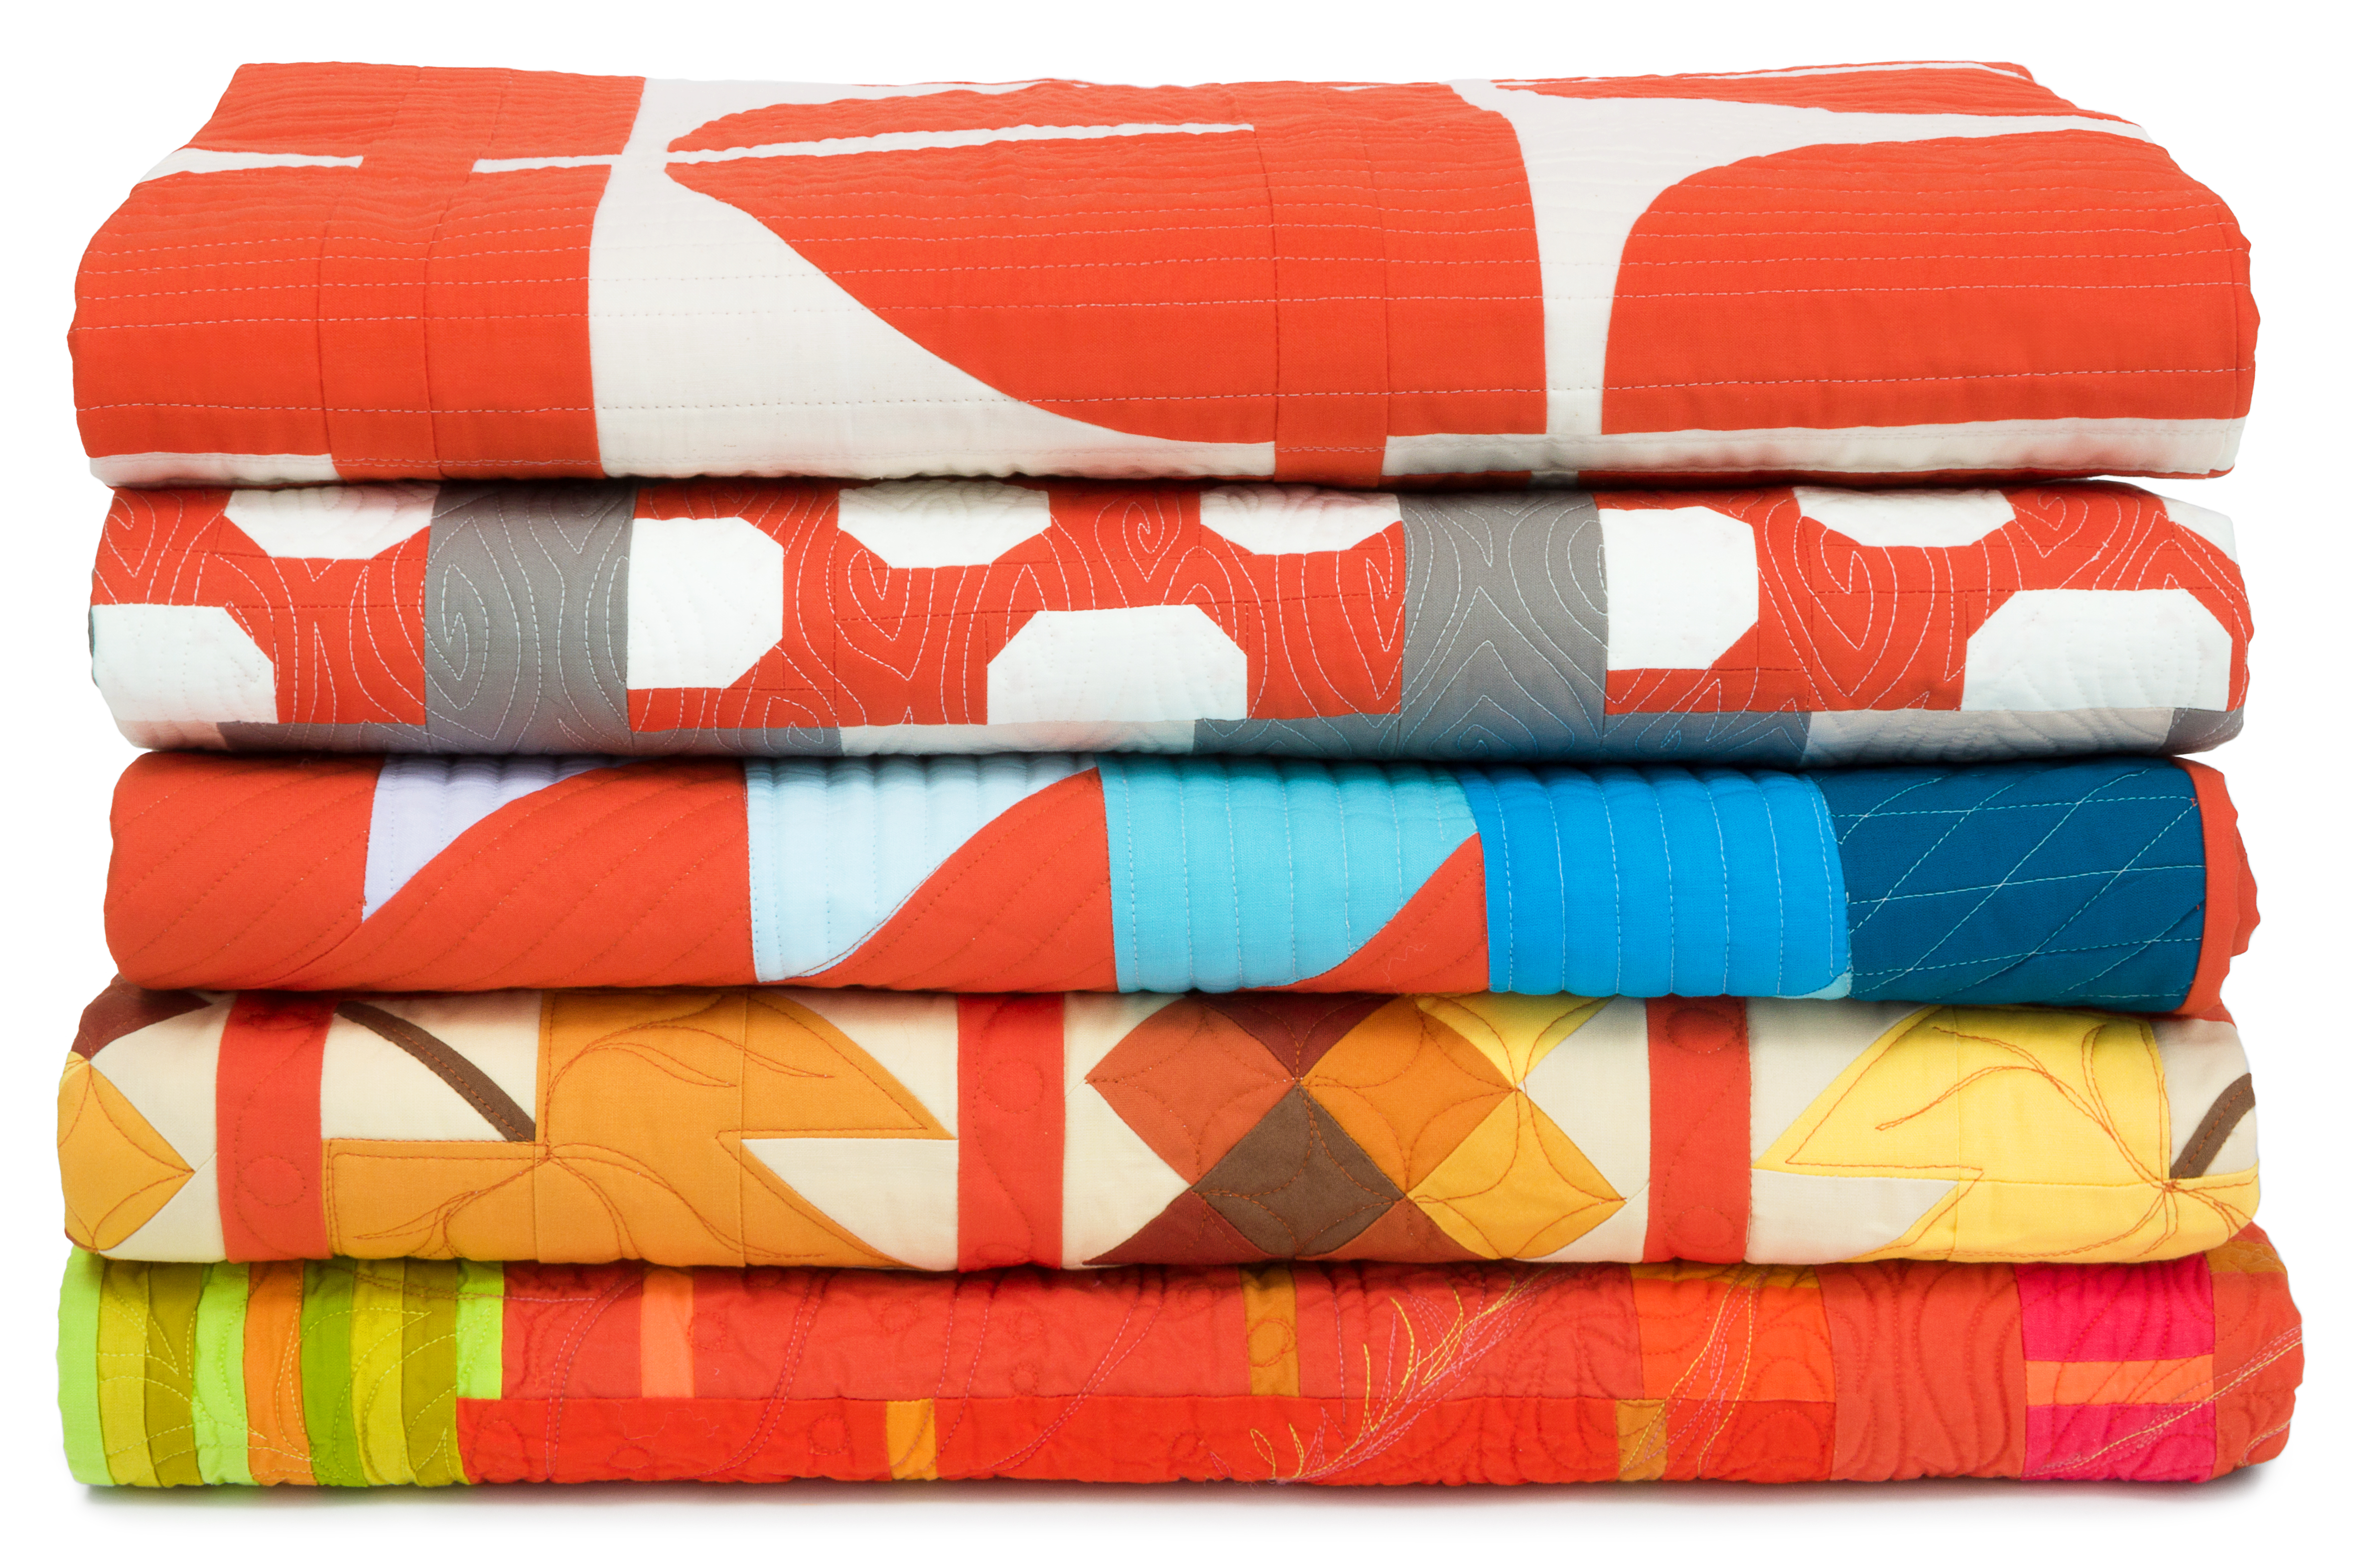
After I finished the size Jenny shows in her tutorial, it dawned on me the reason for the size. As a table runner, it’s a nice quick little project. Especially if you follow the instructions to quilt-as-you-go! But (add a dramatic pause here), as a quilt? Let’s just say you’re going to need a TAD more time. And more fabric! I started out with a nice pack of 10” squares which I cut into fourths to give me a good stack of 5” squares. I also started with 2 yards of an off-white Cotton + Steel basic with dots. I chose this basic instead of a solid print because, well, I just love a fabric that reads as a solid but has a little texture. Also, it just seemed to add to that wonderful 60’s vibe.

It didn’t take long to realize that in order to make an entire quilt, every single 5” square of fabric would require TWO 5” squares of off-white ironed in half on the diagonal. Which means each full block is made up of FOUR 5” printed fabrics, layered with TWO folded 5” squares of off-white per square, plus ONE more 5” printed square in the middle of the block. Yep, go ahead and do that math…that’s THIRTEEN 5” squares per FINISHED block. Needless to say, I had to go back and get one more package of 10” squares and more basic fabric to finish this quilt. And YES, it’s got some good weight to it, this quilt. It’ll keep my baby warm, that’s for sure! I worked one row at a time, choosing the more geometric prints for my background squares, and the prints with bolder motifs for the center of each window. I won’t lie. Each row took me a couple of hours with all that fabric to manipulate! But each row was so PREEEETY, I just had to keep going. Before starting each row, I would cut my basic off-white into 5” squares and iron them on the diagonal by stacking a bunch of them folded, and ironing at once. This quilt required a lot of pins, which aren’t my favorite, but quite necessary!

I decided to back this quilt with a nice soft cuddle fabric. When making quilts for my kids, they always request the cuddle. Last year, my husband even went so far as to let me know that all previous non-cuddle backed quilts are useless in keeping a person warm. So, thank you very much Shannon Cuddle Fabrics, for rendering most of the quilts I’ve ever made completely useless. Haha! I’m kidding. (But my husband totally is not.)

I also decided that this quilt didn’t need that much quilting because the pattern itself has so much going on. So I quilted it on my own machine at home, choosing just a straight stitch along the diagonal. I didn’t even need to use my walking foot, though some might prefer to, depending on your machine. I did lengthen my stitch to around 4. I love how the simplicity of the quilting made the “windows” in the pattern pop a bit more. Also, with cuddle on the back, a more intricate quilt pattern is lost, in my experience!

All that was left to do was bind this baby up. I chose another C+S basic, the pink with gold dots. It seemed to perfectly frame this sweet quilt for my daughter, who also happens to be obsessed with rose gold. I’m a hand stitch binding kinda gal, but since I’m also a baker, I’ll admit, some of that hand stitching took place in my kitchen at the bakery! You’ll notice some of the pictures I’ve added here. A few places you don’t normally see a quilt, or quilting tools. Also, the number of sugary treats, and non-sugared caffeinated soda required for me to get a quilt done with a deadline. It’s a delicate balance, for sure!

I love how the quilt turned out, and can’t wait to send it to my sweet daughter. Follow Mama Hawk’s Kitchen on Instagram and Facebook to see her reaction when she gets her package in the mail! Until then, happy quilting. And buy some more needles. You’ll thank me at midnight.


If you want to make a Cathedral Window quilt like Liz’s, which is about 54″x63″, here’s what you will need:
2 packages of Cotton + Steel Jubilee 10-inch Stackers (cut into 5-inch squares)
6.5 yards of Cotton + Steel–Dottie Kerchief
1/2 yard of Cotton + Steel Cotton Candy for binding
3.5 yards of Shannon Cuddle Hide Rose Water 60″ Minky for backing
Be sure to share all of your creations with us on Facebook and Instagram using #msqcshowandtell!