The Jelly roll pattern we are featuring today is called
“Gooseberries”

This was inspired by a quilt I saw several weeks ago though but I don’t know who to credit for it or even it’s original name. This is somewhat different than the original though, what I loved about the original quilt was how the geese flew through the blocks! So I took that idea and ran! I framed them in a jelly roll friendly pattern that I thought would look good with our geese and decided on the “Berry Delicious” jelly roll by Sew Treasured for Moda. It worked perfectly! The colors and patterns split just right and I couldn’t be happier with how it turned out!
Just so you know I used 40 different fabric strips on this quilt with scraps leftover to fix a few mistakes 🙂 (Always cut and sew carefully!) And I completed the top in 2 afternoons with only a few whining children and 1 helpful husband!
To start you need to separate your strips.
I began by finding my darkest and lightest since they would be focal points of the blocks
You’ll need 6 solid or dark strips and your 12 lightest strips set aside.
The rest are brights and can be arranged interchangeably as desired.
Cutting Instructions
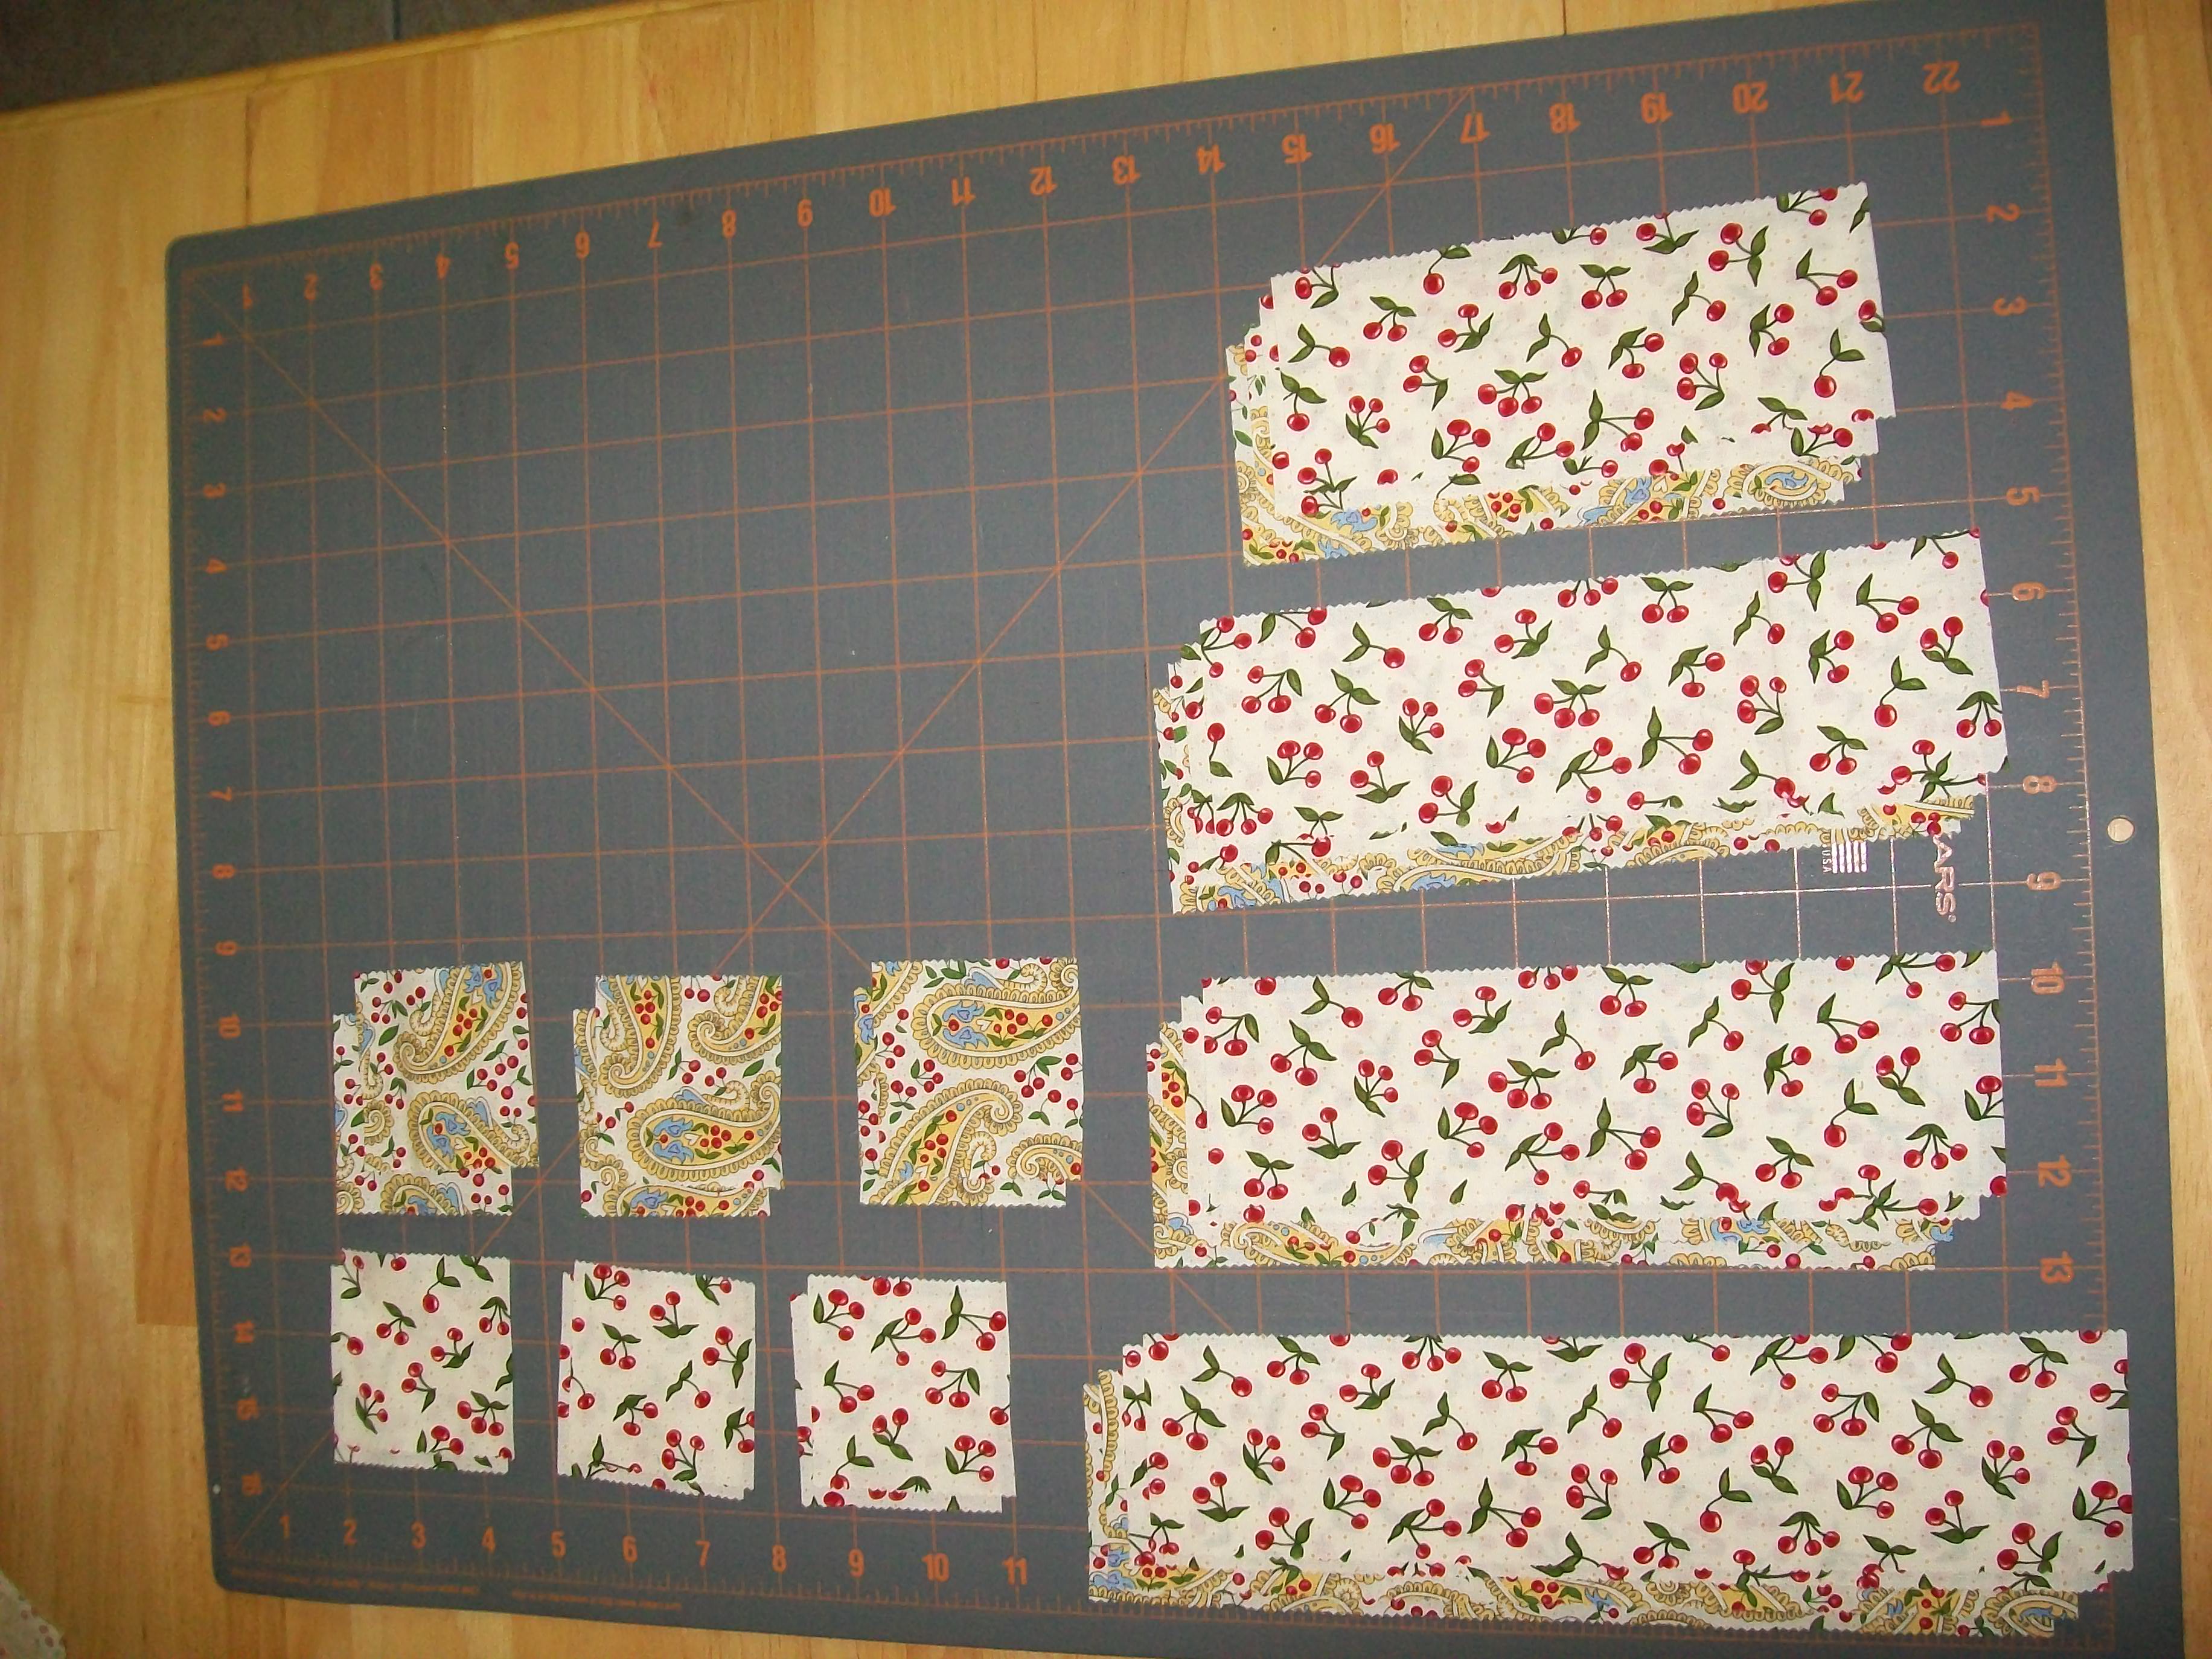
Cut the light strips each into-
1-10 1/2″ strip
2- 8 1/2″ strips
1- 6 1/2″ strip
Pair these into 12 stacks 1 for each strip. Containing the matching 10 1/2″ strip, 2- 8 1/2″ strips, and 1- 6 1/2″ strip
From the lightest scraps cut 12-2 1/2″ squares
Set aside these and all other excess for later use
13″ src=”https://msqcblog.wpengine.com/wp-content/uploads/2009/09/100_1313-300×225.jpg” alt=”100_1313″ width=”300″ height=”225″ />
Choose the 6 brightest strips and from each strip cut
2-6 1/2″
4-4 1/2″
2-2 1/2″
Pair these also into 12 matching strip piles of 1-6 1/2″, 2-4 1/2″, and 1-2 1/2″
From a contrasting strip (I chose a yellow one since the brights of the previous step were all pinks and blues)
cut 12-2 1/2″ squares
(You can feel free to cut the entire strip into 2 1/2″ squares just set the extras aside they will be used for the Geese blocks)
These pieces are for the Square in a square block.
Put this together as shown in the picture

Begin with a 2 1/2″ bright square. Choose a set of matching brights and add the 2 1/2″ bright to the top. Iron and press the seem out. Turn the block and add 1 of the 4 1/2″ pieces again to the top. Press the seams and turn the project. Add the second 4 1/2″ piece. Press the seams and turn the project. And add the final 6 1/2″ piece to make the full square.
Continue in this manner with the light strip sets

Using one light strip set add to the top of the block the 6 1/2″ strip. Press the seams and turn the project. Add to the top an 8 1/2″ strip. Press the seams and turn the project. Again add the second 8 1/2″ strip, press the seams and turn the project. Add your final strip, the 10 1/2″ strip to the top, press your seams and set aside your block!
Yay, one down!
Repeat with the other 11 strip sets. You should end up with 12 Square in a Square blocks.
More Cutting Directions!
(This time for the Geese blocks)
Take your 6 dark strips and using the 45 degree angle
–Cut 16 triangles from each strip for a total of 96 triangles.  I know it sounds crazy but it really doesn’t take that long!
You should have 3 yellow strips left for the inner row, plus the extra squares cut from the yellow strip previously, and 6 pinks and 6 blues for the outer row.
From 3 pink strips cut 12- 8 1/2″ strips
From the other 3 pink strips cut 12-6 1/2″ strips.
(4 from each works well for block variety.)
-Pair into 6 piles of 2 matching 8 1/2″ strips and a coordinating set of 2-6 1/2″ strips.
-Repeat with the blue strips you should have 12 strip sets going now.
From the 3 yellow strips
Cut 2 yellow strips into 18-4 1/2″ strips.
-Pair into 9 sets of 2 matching strips.
-Pull from the excess to make 3 more sets of 2 matching 4 1/2″ strips.
-Add 1 pair to each strip sets.
-From the remaining yellow strip cut enough 2 1/2″ squares so you’ll have a total of 24 including the ones already cut. You’ll need to pull from the excess fabric to finish these as well.
-Place 2 matching squares in each strip set.
-Take the 12 light 2 1/2″ squares you cut at the beginning and add 1 to each strip set.
-You should at this point have 12 strip sets each containing 2-8 1/2″ strips, 2-6 1/2″ strips, 2-4 1/2″ strips, 2-2 1/2″ yellow squares, 1-2 1/2″ light square
Now let’s make some geese!
Using 2 matching triangles right sides together sew 1 short side and press seams to make 1 large triangle.

Trim the dog ears and repeat with all remaining triangles. You now have 48 large triangles. Add these to your strip sets in groups of 4 matching triangles for each set.
These are my strip sets all divided!

Choose one strip set to work with at a time and begin with the light 2 1/2″ square and add your other 2 1/2″ squares to both the top and the bottom of your center light square
Next take the 4 1/2″ yellow strips and add them to the opposite ends and opposite sides of your block for a bow-tie effect.

Next we will take your ruler and trim off the double pointed sides

When you line up your ruler take care to straighten it along the diagonal of the center square and outer corners. Also place the edge of your ruler 1/4″ from the corner point of your center square.
And now, on those just trimmed edges, we will add our first and second geese!

Next we add the 6 1/2″ strips to the top and bottom of our block.

We will again create the bow-tie effect by adding the 8 1/2″ strips to opposite ends of opposite sides as shown below


Remember to carefully line up your ruler 1/4″ from the corner of your previous goose, and along the diagonal. This time you can line it up against the straight line of the previous goose.

And finally you get to add your last 2 geese to the block!

Repeat with the other geese blocks and it’s time to layout your quilt!
Yay!!!


Whether you go with a scrappy layout or if you decide to give it some order Auditioning the blocks is half the fun! Seeing how they come together and getting excited for the end!
I love this part!!
Once you decide on your layout all you have left to do is put it together. I did mine in horizontal rows then combined the rows in segments of 2 so I could more easily handle the growing bulk of the almost finished quilt 🙂
Once you’ve sewn together your rows add some borders and quilt it up!
Check out the cute stitching they did for me at the Missouri Star Quilt Co.
I love a finished quilt! Doesn’t it feel good!
I hope you enjoy jelly roll week and get some new ideas and projects on your to do list!
Watch for those jelly roll deals in the shop and the deal of the day! You can also join us in the forums to talk about your favorite quilting projects, comment in the Fabric Free for All weekly giveaway, or start a topic on anything you want to talk about or have a question on! With all these helpful people someone always has something to say!