We’ve been working on building out the Kansas City chapter of Quilts for Kids (a charity sponsored in part by Downy’s Touch of Comfort campaign)for a while now and are excited to host our first event. Now if you’re not from Kansas City, don’t fret, you can either mail in the quilt tops and we’ll quilt and bind them when we have our big day, or you can find a local chapter of your own to work with. Either way, what a great cause to be involved in. Quilts For Kids is an organization that’s mantra is “Volunteer quilters saving unwanted fabrics from landfislls and transforming them into patchwork quilts that comfort children in need.” Children’s Hospitals all over the US are benefited by this organization. One story (of many stories) I thought was appropriate was shared by a mother of a child in a Children’s Hospital – (hope we’re allowed to share this 🙂
QuiltsForKids.org Story
Thank you so much!! I can’t put into words how much Gillian and I both were touched by your gift! I show everyone who has
visited us the quilt and they all think it is beautiful – and a wonderful thing to do. I think Gillian would like to try and hand out quilts when she is better. That would be fun.
Missy K.
I LOVE the idea that we can use some our stash, or maybe one of the great Quilter’s Daily Deal’s, or wherever our fabric comes from, to put a real quilt on the bed of a child instead of a generic hospital blanket. These kids have to go through so much, it will be nice to give them something that is a bit more personal.
So let’s do it! We’ve planned a Sew-A-Thon
Saturday, October 24th from 1pm to 5pm
So here’s the skinny, get started now, don’t wait till the 24th to start thinking about it. You have a full month to work on this so let’s see what we can do. We don’t need a ton from everyone, we just need one from everyone. We’ll do this throughout the year, so pace yourself, but lets get this started with a bang.
When you bring in the quilts to be machined we have a special label you can sign and attach to your backing. Just ask us! If you have any questions, email Misty at quilts4kidskc@gmail.com and if you’re mailing them in from out of town, or need to know where we are to join us, the mailing (and driving) address is –
Missouri Star Quilt Co
100 N. Ardinger
Hamilton, MO 64644
If you’re mailing it in, be sure to put on the package somewhere that it is a Quilts For Kids donation so we can get it handled appropriately and include a check for the $10 machine quilting and batting fee. And now….
The Quilts –
SIZE: They specify 36” Square NICU quilts or approximately 38” x 45” crib/lap quilts, but anywhere from 25″ x 25″ up to 55″ x 60″ will work. (Think preemie baby to teenager)
FABRICS: 100% cotton (regular or flannel). Please do not use polar fleece. The kids love brightly colored, kid friendly fabrics. Remember, some of these kids are going through chemo, so please try to color coordinate your quilts.
BATTING: 1/8” – 1/4” LOW LOFT batting – can be polyester, cotton or a blend as long as it is a low loft batting. (Or just bring it to the shop, we are discounting the Machine Quilting and batting to only $10 per quilt)
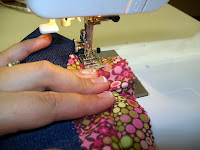
ASSEMBLING THE QUILT: All quilts must be machine pieced and machine quilted (please do not use mono-filament thread). The quilts require a good amount of machine quilting since they go through a washer and dryer cycle daily. Don’t forget to quilt in the borders!
PATTERN: Use any pattern you want, be creative, try something new, have fun with it!
PLEASE DO NOT HAND TIE THE QUILTS. Hand tied quilts can be a potential choking hazard and do not hold up to the daily washings they go through.
Childrens Mercy Hospital
PLEASE CHECK FOR PINS! WASH AND DRY ALL QUILTS BEFORE SENDING TO US.
A tax donation form can be sent to you if you would like one.
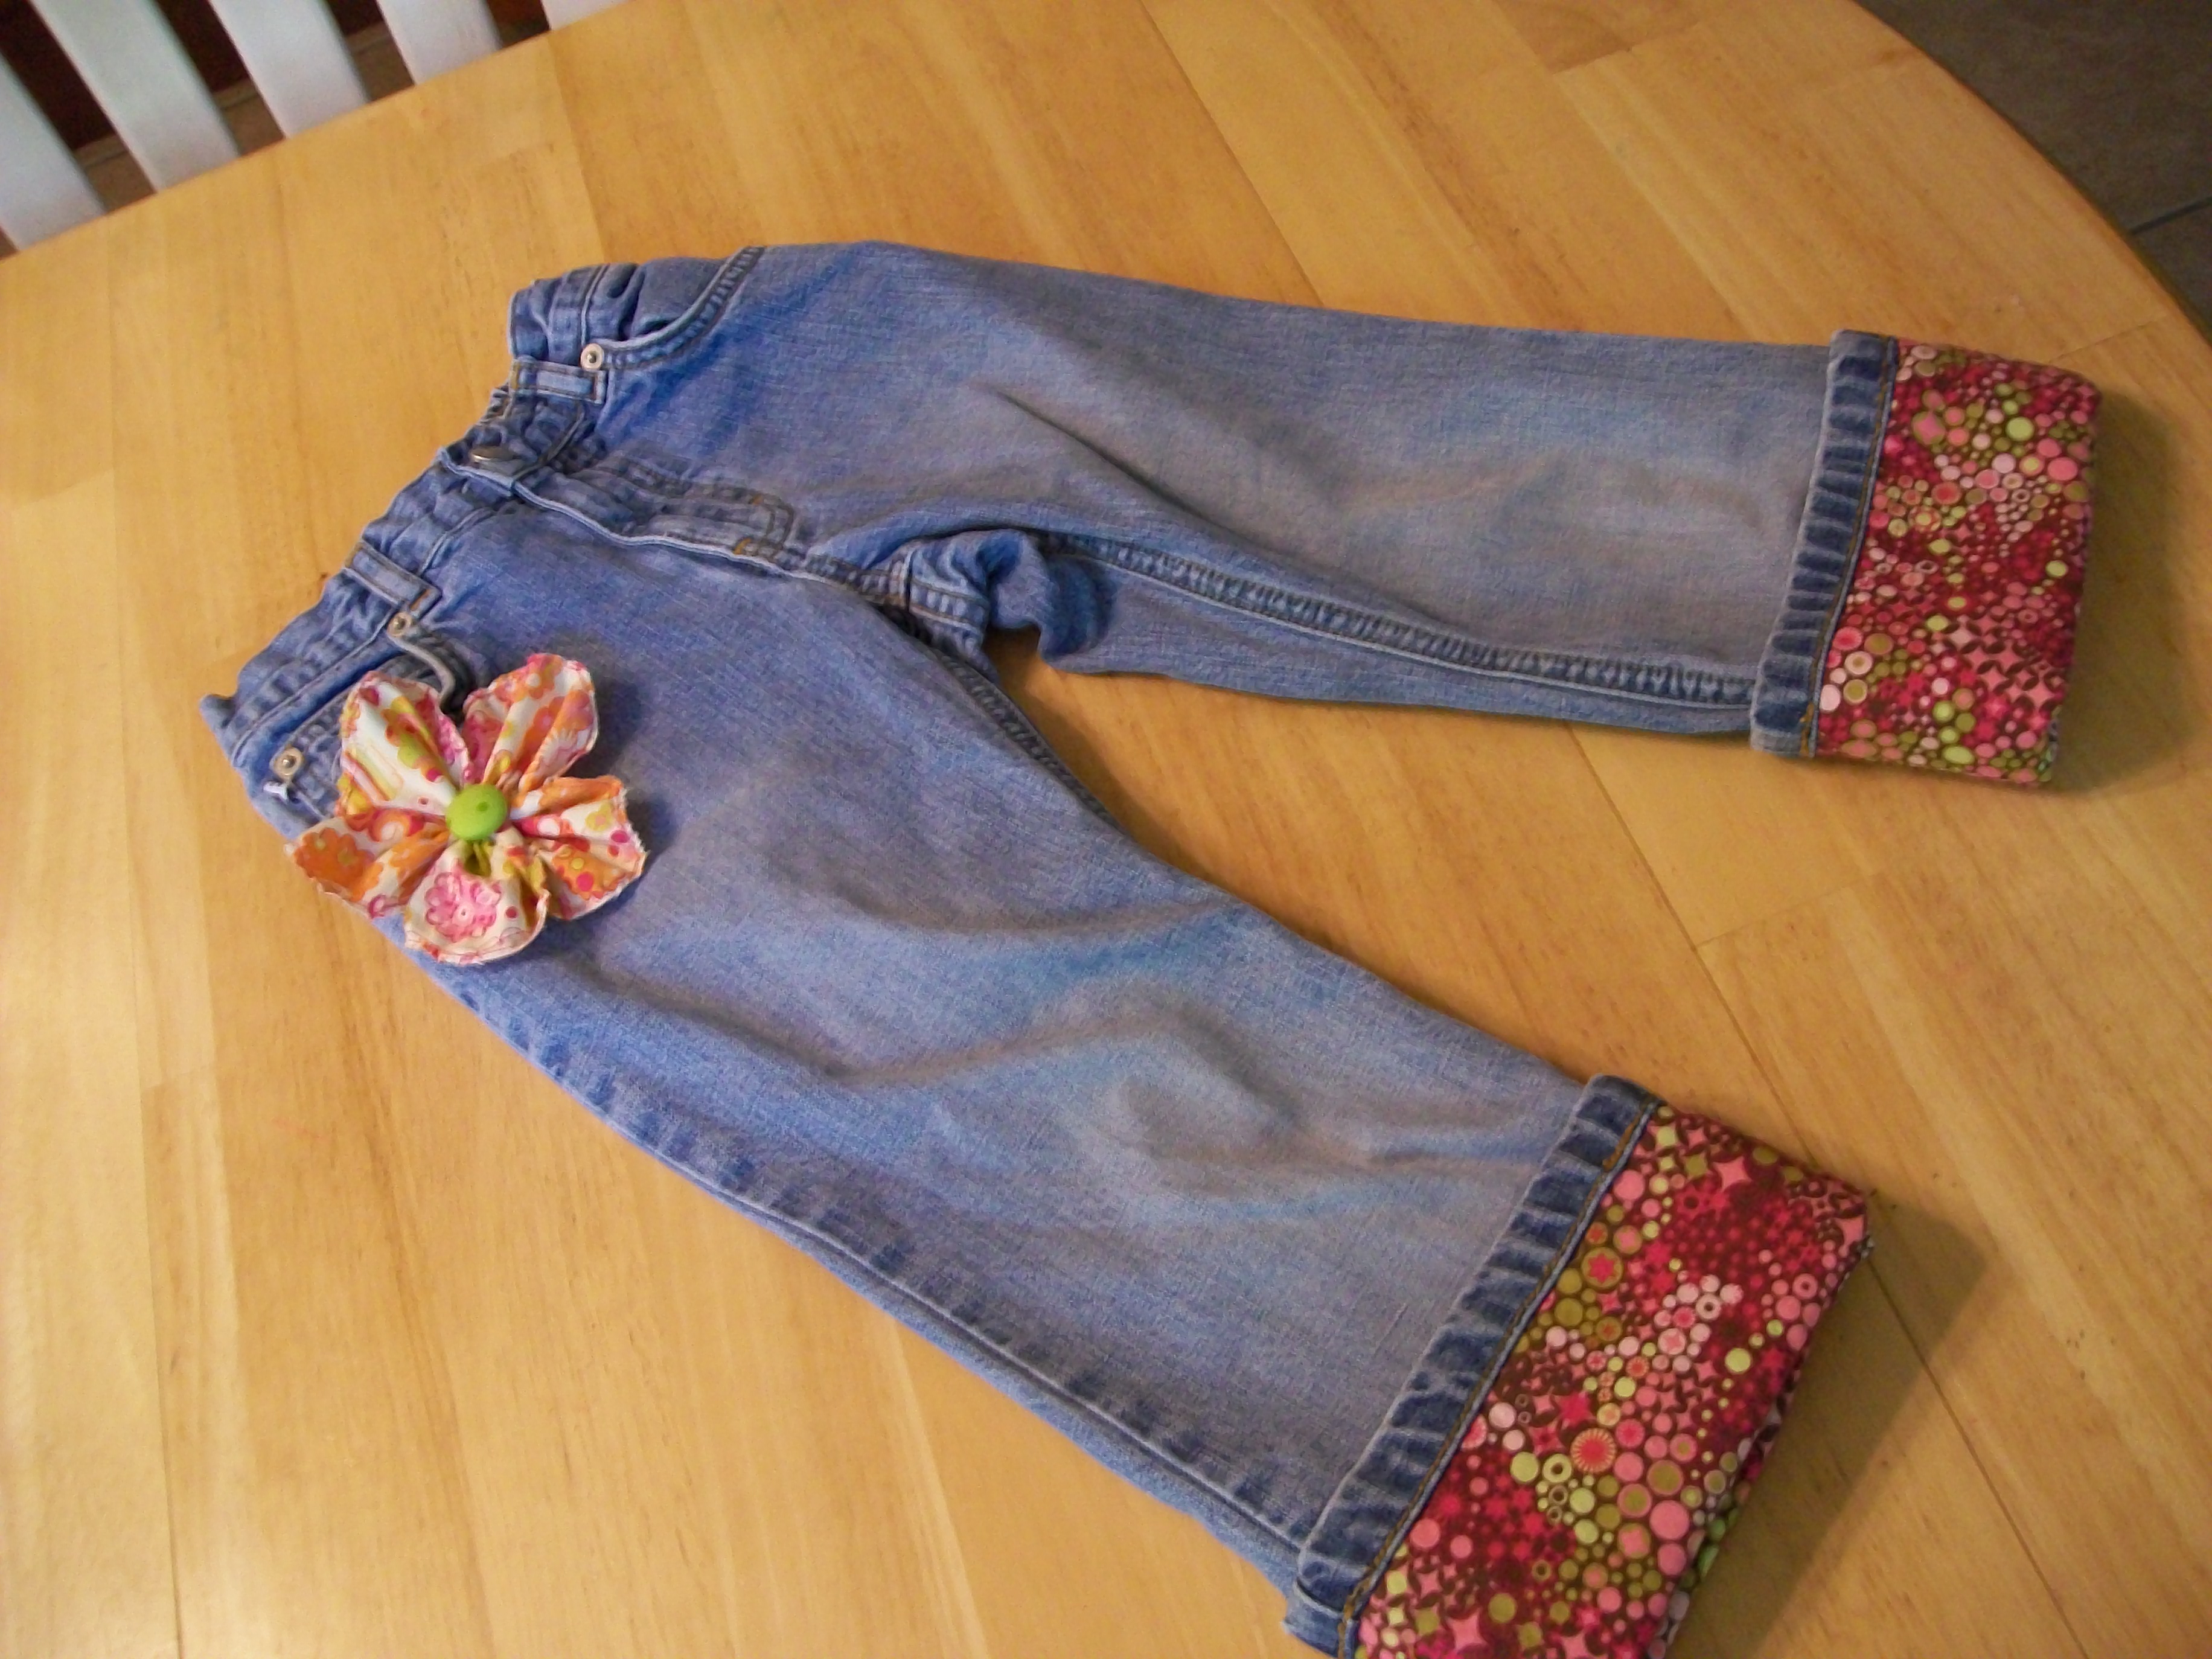
How many of you have made cutoffs you wished were cuter?
Well here you go!
Measure your jeans to the desired length, add 4″ and cut off. It’s ok if there is a whole in the knee, 3″ will be folded up as a cuff so just make sure it’s within the cuff area that will be soon covered in new fabric!
Measure the width of the pant leg double it and add a 1/2″ for seam allowances. Using that measurement cut 2 pieces of fabric and 2 pieces of iron on inter-facing to that length x 6″ wide
Iron your fabric to your interfacing and sew the 6″ wide side together to make 2 tubes the size of the pant leg. Leave them with the right sides to the inside and slide a tube inside one pant leg lining up your seam with the inner seam of the pants.
Fold the edge of the pants down 1/2″ line the fabric edge up with the raw edge of the pants and fold down another 1/2″ to enclose both raw edges.
Sew around the hem with a heavy coordinating thread. Go up the leg about 5 inches and sew the inside of the fabric down with a thread that blends well with the pants. It doesn’t need to be perfect just try to keep your fabric and interfacing flat!
Fold up the cuff and admire your work! You can tack the cuff up if desired by stitching in the ditch of one or both of the side seams. You now have some adorable embellished and possibly re-purposed pants!
Cute Cutoffs!
___________________________________
is a guest blogger from the Designing Happy blog who is known for her creative uses of fabric and unique sewing style.
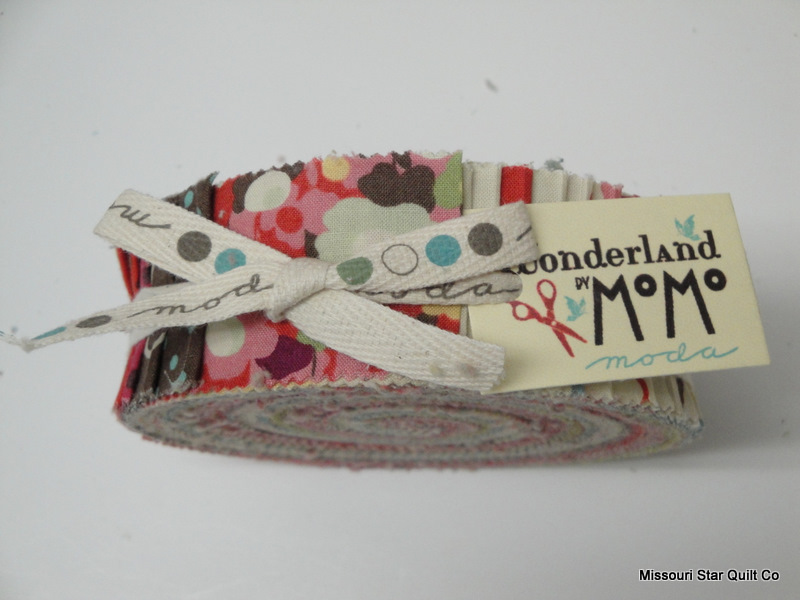
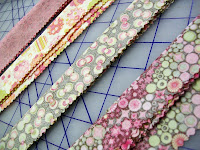
Wow, hard to believe that Jelly Roll week is coming to a close! Darn, but like Moda Lissa said, every week is a jelly roll week! 🙂 Let’s be honest….we are all addicted to those sweet rolls of 2-1/2 inch bliss.
Anyway, thanks for hanging out with us, and commenting away. The winner of the Jelly Roll is Mel. Congratulations Mel, let me know which one you want. ( I know this will be a tough decision!) 🙂
We have tons more ideas swirling around in our heads and look forward to sharing them with all of you!
Have a great day!
Sarah
and don’t forget our giveaway in the forums. A new giveaway EVERY. SINGLE. WEEK!
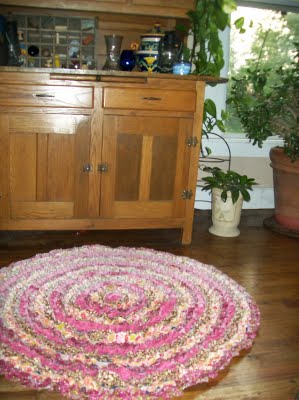
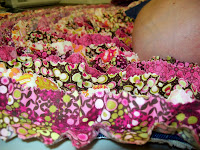
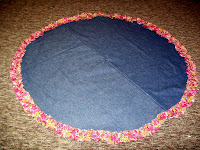
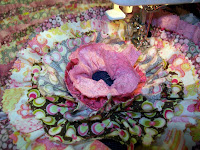
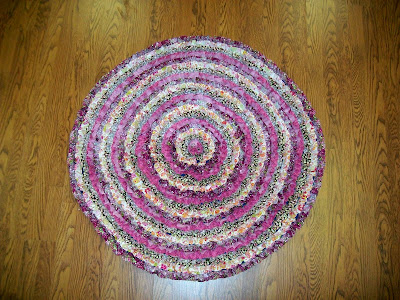
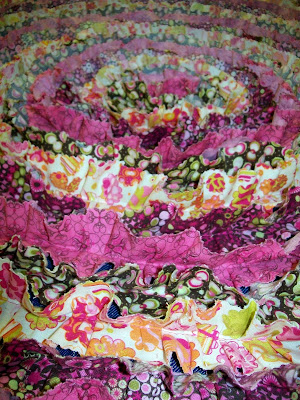
I made this rug for my daughter’s bedroom. And thought I would share a couple thoughts on things I love and don’t love. First I would probably suggest sewing your strips on with the right sides facing out instead of in. So, that even when it’s been stepped on you’ll still see the pretty colors! I love that it’s heavy enough to carefully vacuum! With minimal toe holding this rug in place I was able to vacuum it! Yay! And I love that it’s starting to show it’s fringy edges! Though I do try to keep a little pair of scissors nearby for this beginning, fringing stage 🙂
Without further ado here’s my quick tute of a fabulously fun, little circular rug for you to enjoy!
Supplies~
1 yard of Textured of base fabric 1 yard of Heavy upper base fabric approx. 44-2.5″ strips wof or Jelly roll strips Basting spray
I’m gonna talk base fabric first. I chose random fabric that I simply had in my stash and I have a lot of random fabrics! I chose something textured for the bottom as this is likely going in front of a dresser in my daughters carpeted room. I chose a denim for the top because I had it, it was sturdy for light traffic, and it was dark so hopefully it will not look dirty to quickly.
You may choose whatever fabrics you like for your base.
You might consider
a piece of canvas,
or heavy drop cloth,
or a light, thrifted rug
(though I would try to avoid anything to thick for sewing purposes and without a plastic bottom.)
The idea is that it will be completely covered anyway!
Making the base~
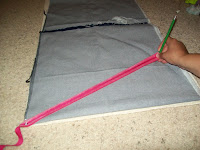
Fold your fabric square into fourths and stack both pieces. Using a push pin and a length of ribbon that reaches from the folded corner to the raw edge pin the ribbon down to the folded corner of the fabric. Stretch the ribbon across and holding the ribbon and pencil to swing across the edge mark a quarter circle on the top layer of fabric
Use this as a guide to cut through all thicknesses of your base fabrics.
Lay your base circle’s out right sides together with the wrong side of the heavy layer on the top. Pin around the edge and sew together leaving a small 4″-6″ opening for turning.
Spray the wrong side of the heavy upper circle with basting spray and turn the base piece right side out smooth the circles out immediately so the basting spray can hold it correctly in place.
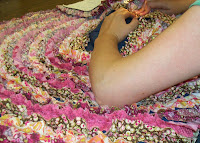
I did my fabric in circles of receding sizes. If using an actual Jelly roll I would recommend a spiral pattern instead do this by simply curving in slightly as you approach the end of the circle you are working on and continue following the edge never finishing a circle round till you reach the center. I recommend this because of the lack of matching fabrics in a typical jelly roll. Spiraling just gives a more scrappy look.
Add your ruffles~
Start by ironing your strips in half lengthwise and trimming the selvages from your jelly roll strips.
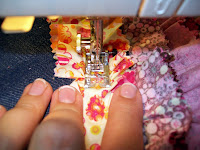
Sew your strip down as close to the outer edge of the upper base layer as you can (less than 1/4″ from the edge), finger ruffling it slightly as you go.
(If you want to follow my learning experience suggestion this is where you’ll want to flip your strips and sew them face down instead of face up like in the picture so that your rug will show more bright colors while it’s in use)
When you reach the end of one strip simply add another by butting the 2 raw edges together.
My outer row took approx. 4 1/2 strips.
If you are spiraling simply curve inwards slightly once you have made a full circle to the next row. If you’re doing full color circles finish a row by ruffling your fabric and trimming it to meet the beginning of the row you were working on and doing a small back stitch.
Then simply scoot in and add another row.
When you add your inner rows pull the ruffles from the outer row away from the fabric strip you’re working with and line up the edge of the new strip with the sewing line of the first to get your placement spaced right.
Continue in this manner adding circles or spiraling inward till you reach the center.
For spiralling simply curve till you get there do a little back stitch and your done!
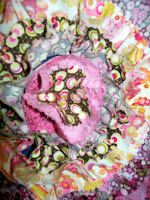
For circles you will take a scrap of one of your strips and using pinking shears cut out an approx. 2.5″ circle.
When you reach the center there should be a hole about the size of a quarter or slightly smaller left to fill.
Place your 2.5″ circle directly over this space and do a little back stitched X in the center!
Hurray we’re all done!
These are super cute! And fun for a kitchen, bathroom, or bedroom depending on your jelly roll 🙂
Like Mom was saying it was such a fun way to put together those stars. ( All with strips from a jelly roll.) This pattern was such a blast to make.
I look at that quilt and can see it in bright crazy colors….or Christmas colors or red, white and blue or black and white (with a little hot pink in the mix) Endless possibilities again, huh!
We hope you are enjoying our ideas and tips. If you have any questions about things, do ask. We love to chit chat and will try to help you in any way that we can.
Enjoy the weekend. (and hopefully you’ll get that sewing machine out and play a little!) 🙂