DIY Fabric Flag Holiday Decoration with Easy Gathering Technique – Step by Step Tutorial

During a recent Facebook Live video, we taught a simple technique for gathering fabric. It’s great if you don’t have a lot of time (or patience). You also have the option to find a gathering foot for your machine, but this way is my favorite! We featured a cute project we came up with just in time for Independence Day, so here are the step by step instructions to make it!

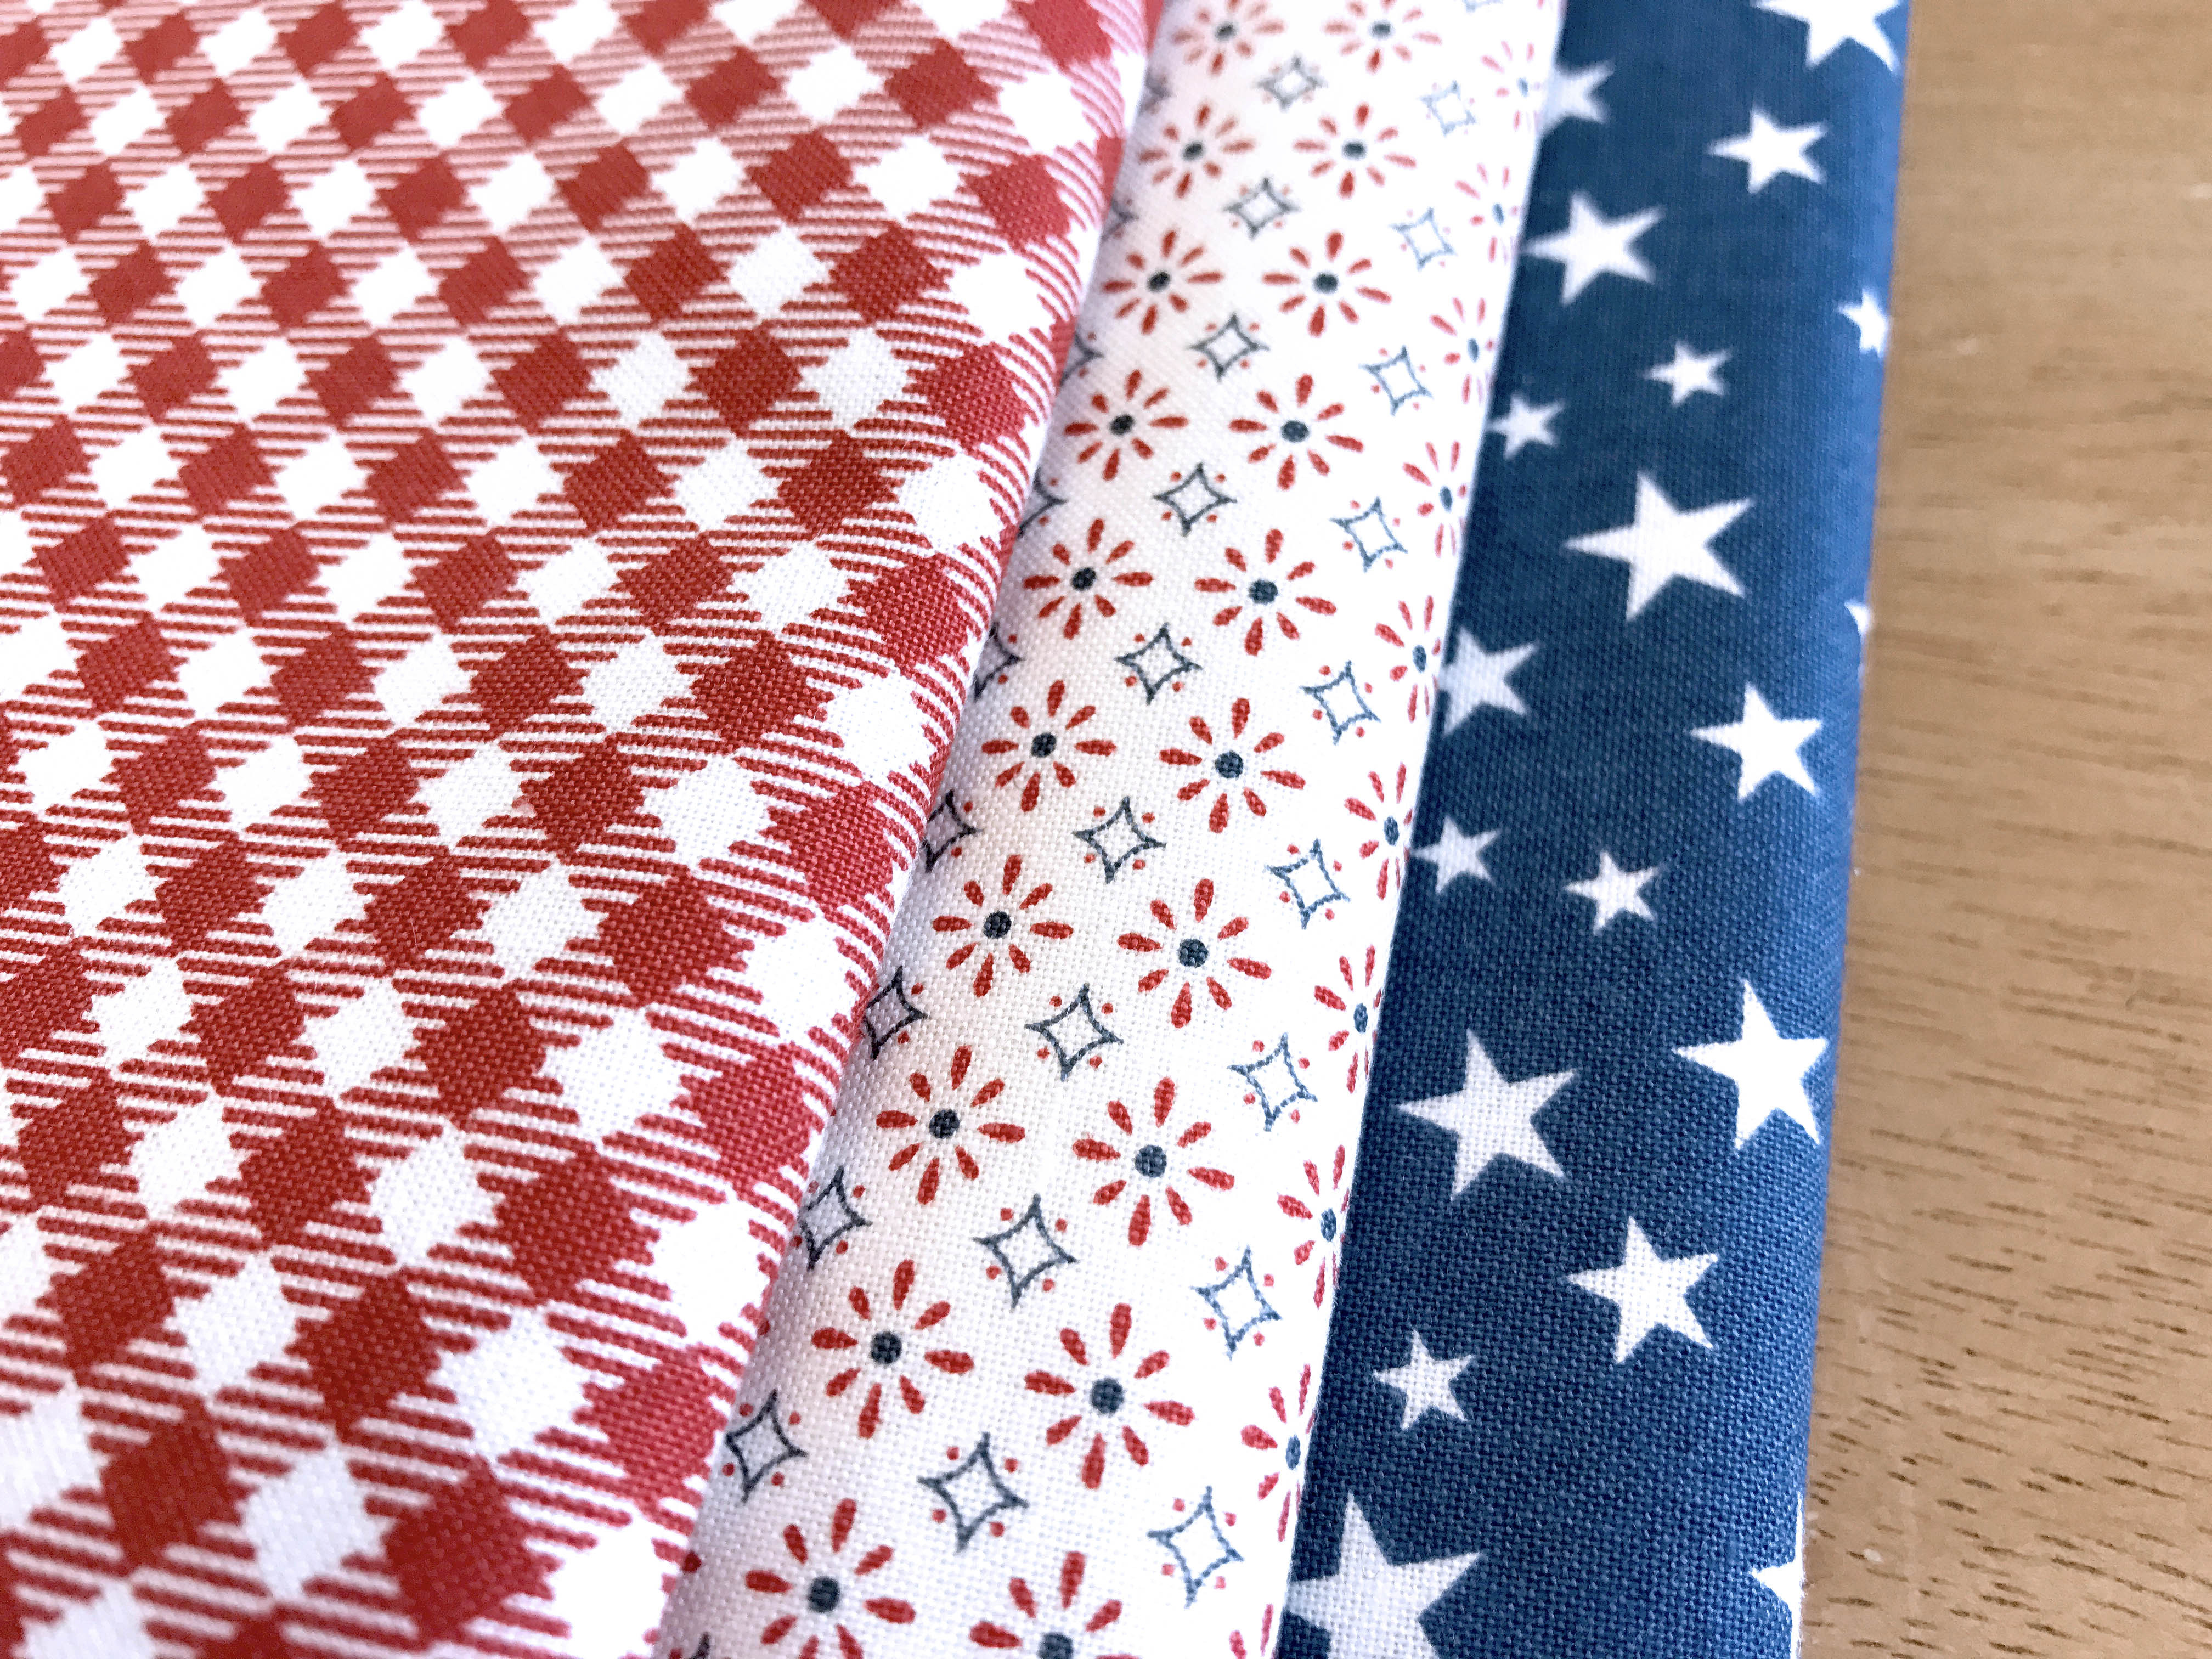
Let’s start with the fun part! Pick your fabric! We used fabrics from Freedom by Sweetwater for Moda (Picnic Apple Red Yardage and Bandana Vanilla Yardage) and Lost and Found America by Jen Allyson for Riley Blake Designs (Americana Mini Stars Blue Yardage)

You will need 1/4 yard of Blue, 3/4 yard of white, and 3/4 yard of red.

Additional Supplies:

  • 1 Fat Quarter (I used a neutral color that blends with my fabric choices)
  • Thread (& Sewing Machine)
  • Pins/Wonder Clips
  • Heavy Weight Thread (12wt would work great) or String or Dental Floss or Fishing Line (whatever you prefer)
  • Ruler/Cutting Mat/Rotary Cutter
  • Hot Iron

First, you will start by cutting your fabrics into 3.5″ strips! You need 7 red, 6 white, and 2 blue.

Set aside your red and white strips, and grab the blue strips. Stack the 2 strips and cut them them into thirds, so you get 6 strips that are approximately 3.5″ x 14.3″ (this does not have to be exact).

Take 3 of the red strips and 2 of the white. Trim off 14 inches from each strip. These will be the first 5 strips at the top of the project to show the stars and first 5 stripes. Put them right sides together and sew a 1/4″ seam to attach the 2 fabrics. Press the seams open (as pictured below).

Fold in about 1/4″ on each end and press (as shown).

At this point, you would fold the fabric in half lengthwise and press so the right side is facing out. At that point you will have 5 strips that look like this.

Repeat the previous step with the remaining red and white strips, so that they are all folded lengthwise with the raw edges folded in.

Once all of your strips are prepped like in the photo above, it’s time to add a top stitch to the ends! This will just give you a clean, finished look, so that your raw edges don’t show! Just like you would do a top stitch, get close to the edge and I like to backstitch for some extra security.

This is where the magic begins! It’s time to begin the gathering process! Set your machine to a loose zig zag (these are my settings).

For this next part, you need some kind of string. I used crochet cotton because I had it on hand, but a heavier thread would be great for this, like this Sulky 12 weight thread! You can also use dental floss, fishing line… anything strong that won’t get caught in your zig zag!

Line up the raw edges of your folded strips so that your zig zag won’t come off the edge, and line up the string with the small center marker on your foot. That will help you keep the string nice and centered, so it doesn’t get caught in your zig zag. You do not need to back stitch! Here’s how it should look.

Tip: Think about which side of your strip is the back and which is the front. If you put the zig zag on the back, it will make it harder for the string to accidentally show on your project!

Then, you just pull on one side of the string and gather your fabric together! It’ll twist and turn at first, but don’t let that worry you! That’s what pins and wonder clips are for! 🙂

Once all of your strips are prepped, you can work on the background fabric. I used a neutral colored fat quarter. Square it up to approximately 16×20. Use your iron to double fold each edge (except the top edge) toward the back. That means, fold 1/4″ inch in and press, then fold over and press a 2nd time. Top stitch over the left, right, and bottom edges (left and right sides first, then the bottom) and this will conceal your raw edges. On the top edge, you’re going to fold your edge toward the front side, press, and stitch down the edge. This will be important at the end, once you’ve stitched down all of your gathered strips.

To space your strips evenly, draw straight lines every 1.25″ starting from the bottom of your base fabric.. This is the line you will use to pin your gathered strips to the base fabric.

Tip: Use wonderclips to anchor the strips on each end, then pull your gather string to get even spacing in your gathering. Pin ever 2-4″. Notice that my gathering string is on the underside of the strip to make sure it’s nice and hidden.

To sew your gathered strips down, you will want to set your machine to a smaller/tighter zig zag than the one we used before. I set my stitch length at a 2 and my zig zag width at a 2.5.

Once you get all your strips sewn on, you will want to take the top loop of your background fabric and loop it forward over the raw edge of your top gathered fabric strip. Pin it in place and stitch over it to finish the top edge and create a loop for hanging your finished project!

Happy National Sewing Machine Day!

Happy National Sewing Machine Day! A world without sewing machines… I don’t even want to think of it.

Picking out a sewing machine is like buying a new car. There are endless options with varying features and details, all of them will get you from A to B, but the best part is the ride. If you’re going  to log a solid 12 hours on the sewing machine, you better enjoy the ride because everyone knows that the best sewing machine is the one being used!

Which brings us to today’s subject, the Baby Lock Jazz Sewing Machine! Baby Lock Sewing has so graciously offered a machine for us to give away, so we just had to choose the Jazz! It is fast, smooth, and easy to operate.

Here are some of the reasons we love it:

  • 12 inch workspace to the right of the needle… plenty of room for maneuvering large projects
  • Sews up to 1,000 stitches per minute… super fast and super accurate!
  • 28 unique stitches… well-equipped to take your creativity to new heights
  • 9 feet attachments
  • Needle Threader
  • Knee Lifter
  • …and so many more features!

Choose how you want to enter below and we will choose one winner for the sewing machine on Monday, June 19th, at 5pm! We will also choose 6 people to each win two yards of a sewing-themed fabric!

a Rafflecopter giveaway


Prairie Flower Tutorial Reboot – Featuring Guest Blogger Natalie Barnes

Make a Prairie Flower Table Runner with Natalie Barnes!

Hi there, everyone!  It’s Natalie Barnes, here.  Proprietor of beyond the reef pattern company, licensed designer for Windham Fabrics, and author of A Modern Twist (Martingale/TPP).   

Table Runner Tutorial -- Prairie Flower Pattern

I’m just so excited to be here at Missouri Star Quilt Co.’s blog!  This year, I had the great opportunity to participate in the Missouri Star Quilt Co. Birthday Bash with Windham Fabrics. I just fell in love with the work that MSQCo. has done with Hamilton, Missouri!  Every detail you could possibly want or imagine is available for your visit. They have beautifully organized each and every one of the different shops, provided great dining and food options, and even created a retreat center!  For me, with a background in interior design/architecture, I loved seeing the buildings being restored to their original grandeur, and it was fascinating to hear about the local history that MSQCo. is keeping alive!  Thank you, Jenny, for making all of this a reality.

Natalie Barnes visiting Missouri Star Quilt Company!

There’s no getting around it.  As quilters, we are precise.  And we are organized.  Each and every one of us, organized.  Well.  In our own way.

Personally, I fall into the “controlled chaos” method of organization.  If you look at Amy Ellis’ charts and graphs manner of calculating yardage, you’ll see another way.  Or Angela Walters’ ribbon candy quilting.  Precise.  Organized.

We know exactly where a 1/4″ seam lies on any sewing machine we come across.  We always know where our sewing scissors are and where we keep (read: hide) the rotary cutters.  We know how much yardage we need for binding, and like Mama Jenny, we know that there are twelve (12) 5″ squares in a fat quarter, and fifty six (56) 2-1/2″ square “snowballs” or “dog ears” in a fat quarter, as well.  

Precise and Organized.

That’s what I’m going with.

Until someone calls and says, “You’re hosting Tuesday’s luncheon”, and we go into a sort of….well….you know the drill.  How many 10″ square napkins can I get out of two yards of fabric?  What is the standard size of a placemat?  Can I just turn them right sides out and quilt?  Will anyone notice they’re not bound?  I need something to go with the runner I have on the dining room table!!!  Oh.  Wait.  Food.  She said luncheon, didn’t she

That drill.

Jill Marie Landis, writer, best girlfriend, and inspiration for my pattern company, beyond the reef, would say, “If I walked in to Natalie’s house before a party, and didn’t find her just stepping out of the shower, I’d think I was in the wrong home.”   

“But the placemats are done”, I would reply, “and they match the runner”!  

One day it hit me.  Make the table runners in pairs, run them along the short side of the table, and voila!  The table is coordinated.   Table runner as placemat.  Two for one!

Table Runner Tutorial -- Prairie Flower Pattern


And with the amount of resources that Missouri Star Quilt Co. gives us, a quick review of the youTube channel is all we need to select a fool proof block large enough to use for our runners doubling as placemats.

This project is made using the pattern “Prairie Flower“, and Hand Maker Fabrics – my very first line of fabric, I’m proud to say – by Windham Fabrics.

Table Runner Tutorial -- Prairie Flower Pattern
Once the fabrics are chosen, create a “color recipe” for the project.

Table Runner Tutorial -- Prairie Flower Pattern

The Blossoms will be made using the three medium value prints.

The Leaves will be the bright/dark prints, and they are scrappy – the more the merrier.

The Center of the Blossom will be the grey print, and the snowballs will be a mottled solid.  (Palette by Marcia Derse for Windham Fabrics)

Select a favorite print from Hand Maker for the backing – and use a contrasting binding.  This will give you two runner “looks”  from one set of runners!

For the two 13-1/2″ x 67-1/2″ runners, 1 x 5 blocks each, cut a total of:

Blossoms:   (40) 5″ squares

Leaves: (40) 5″ squares

Centers: (10) 5″ squares

Snowballs: (160) 2-1/2″ squares

Remember, your piecing accuracy is only as good as your cutting accuracy.  Here’s my first hint – – take time with this step, and enjoy the process.  Using the 2-1/2″ ruler and the 5″ ruler from the MSQCo. shop is really time efficient.  There’s no stopping to confirm the dimension is 5″ not 6″  (admit it, you know you’ve done it.  I’ve also cut tons of 3″ squares, thinking they were 2-1/2″, too.  Precise 3″ squares.  I’ll admit it….)

Table Runner Tutorial -- Prairie Flower Pattern

Snowballs: 1 yard mottled solid

Binding: 2-1/4″ straight binding / 2/3 yard

(10) 40″ x 2-1/4″ strips

Backing: 2-1/8 yards

(leaving 4″ top and bottom for machine quilting / placing two runners

side by side when machine quilting)

Use Mama Jenny’s proven method of ironing the snow balls from corner to corner, and settle in with a good wholesome “lots of dialog” movie and start stitching until all of the snow ball corners complete.  

Here is Jenny’s full tutorial:

Table Runner Tutorial -- Prairie Flower Pattern

Here’s another little hint – press open your snow balls and be sure they align with the corners of the 5″ square BEFORE trimming the fabric from the back.  This will help keep your 5″ squares “square”.

Table Runner Tutorial -- Prairie Flower Pattern

Once all of your pieces are completed, head to your design wall, or other flat surface, and lay out the pieces, until you are satisfied with the look of your runners, and the colors are dispersed evenly throughout your project.

Finally, it’s time to pop in the second movie, and begin sewing your 5″ squares together to form your runners.   

Table Runner Tutorial -- Prairie Flower Pattern

Now that the tops are complete, it’s time to let Angela Walters do her magic.  Angela is an author, instructor, lecturer, Robert Kaufman Fabrics licensed designer and Owner of Quilting is My Therapy in Liberty Missouri.    If you’re looking for a private long arm quilting lesson, or even want to purchase your own Handi – Quilter long arm machine, head to Quilting is My Therapy. Having a machine quilter is the closest I can come to having four hands!  It gives me time to cut, sew, and prepare the binding for the quilt as it’s being quilted. Thank you Angela, for taking time to quilt this project!  

Once the quilts have returned, I like to reconnect with my project.  So, I use “natalie’s quilted binding” – by sewing the binding on to the wrong side, and turning it to the front.  Then I use a pearle 8 cotton and a running or quilting stitch close to the folded edge of the binding to attach or “quilt it’ on to the front of the quilt.  Finally, I look for a consistent area in each block to add in some big stitch pearle cotton quilting.  It adds a different texture, and, well, it’s just my “finishing touch”.

Table Runner Tutorial -- Prairie Flower Pattern

Precise and Organized, I say.  That’s how Hand Makers get things done.

So, give me a call.  Schedule a luncheon.  The table will be set, and I’ll be ready!

And if you’re looking for a new recipe, here’s my mother’s version of Waldorf Salad….just in case it’s your turn to host next month’s luncheon…

Waldorf Salad Recipe from Natalie Barnes

Many many thanks again to Missouri Star Quilt Co. for letting me stop by today and visit with all of you!

HappiestDays.

Natalie Barnes

be.do.create

Table Runner Tutorial -- Prairie Flower Pattern

Here’s where you can find out more information about Natalie Barnes / beyond the reef

www.beyondthereefpatterns.com

www.instagram.com/beyondthereefpatterns

www.facebook.com/beyondthereefpatterns

www.pinterest.com/beyondthereefca

twitter@beyondthereefca


please post your projects using Hand Maker fabrics by Windham Fabrics using

#handmakerfabrics

we’d love to see what YOU make!!

New Friday Tutorial: The Self Binding Baby Blanket with Shannon Cuddle

MSQC New Tutorial on the Blog!

Quiz: What’s the softest thing in the universe? Teeny baby kittens? Not even close. Downy ducklings? Spring lambs? Puffy white clouds? Nope, nope, nope!

I can't wait to make this super quick, cuddly blanket with Jenny's Self Binding Baby Blanket using Shannon Cuddle fabric!

Truth be told, you just don’t know how soft “soft” can be until you wrap a chubby-cheeked baby in Jenny’s new Self Binding Baby Blanket made out of super-fluffy Shannon Cuddle fabric! This blanket is as cute as it is soft, and it can be whipped together in mere minutes! This self binding technique is even easier than in our original Self Binding Baby Blanket tutorial! With Cuddle, they edges don’t fray, so you don’t even have to fold over the edges. It really comes together so quickly!!

I can't wait to make this super quick, cuddly blanket with Jenny's Self Binding Baby Blanket using Shannon Cuddle fabric!

Mary Gay Leahy, who is a teacher for Shannon Fabrics and a Cuddle Expert, likes to travel with the first quilt she ever made with Cuddle, which also has flannel on it. The flannel parts are all pilling and faded now, but the Cuddle all still looks as good as new, even after over 150 washes! So, not only is this a quick, easy project, but it will last forever!

Jenny creates this blanket with two layers of Cuddle, but you can also use two layers of Embrace Double Gauze or one layer of Embrace with a layer of Cuddle!

If you’re new to using Cuddle, here are some tips to make life easier: Use a walking foot, a longer stitch length (about 8 stitches per inch), and if you have a stretch needle handy, that will make things go a little smoother. And when you first cut it, it will shed, but if you throw it in the dryer with a clean lint trap, so it can finish shedding, then it will never pill or shed again!

Click on the button to watch the tutorial and get all the supplies you need to make your own Self Binding Baby Blankets!

watch tutorial shop supplies

Motivational Monday Free Printable: Part 2

Motivational Monday on the MSQC Blog
Strive for Progress not Perfection! | Free Art Printable Download
Click on the image to download your free printable!


As a quilter, I often find myself looking to other quilts for inspiration. There are so many amazing quilts being made every single day (check out our #msqcshowandtell on Instagram for some excellent examples), so between that and weekly MSQC Tutorials, it’s pretty easy to come up with a long quilting bucket list, meticulously prioritized by how excited I am to try out a pattern.

The part that kind of sneaks up on you is that it’s also easy to go to those same sources of inspiration and then compare your quilt to theirs. Maybe your points aren’t as pointy or your squares don’t line up as perfectly as theirs. I’m here to tell you that it’s okay! Don’t compare your work to that of a professional quilter. You are on your own quilting journey! Your latest quilt is probably a little bit better than the last one or maybe you’re more confident to try slightly more difficult patterns. Wherever you are on your quilting journey today, decide to BE HAPPY with the progress you’ve made since your first quilt!

So, enjoy your quilting journey and take the time to celebrate successes. While you’re at it, click on the image above to download your own copy of this adorable word art, so you can print and display it in your sewing room! We hope you can display this printable somewhere that will help you remember how good life is when you  make time for quilting! Happy Motivational Monday and Happy National Quilting Week! #makesomethingtoday