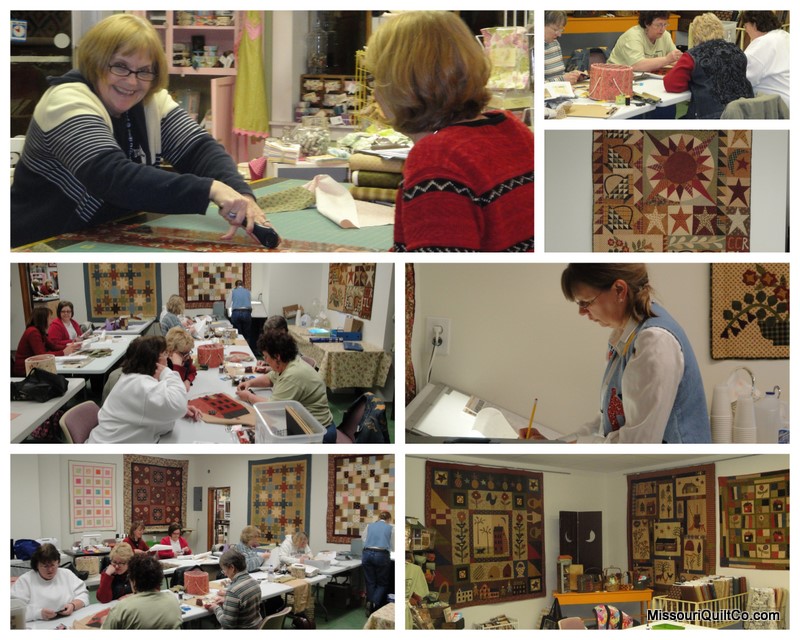
We are just having a blast with Jan Patek every month. She is teaching us all the tips and tricks to make applique so much easier. What is more fun than a bunch of women getting together, doing what they love (sewing) and sharing a snack!?
If you haven’t been in lately, you will have to see all the new stuff we have in. We have some really (awesome) displays of Jan Patek quilt kits, fabric, patterns and finished quilts. They are just beautiful.
Hope you are having a lovely weekend, wherever you are!
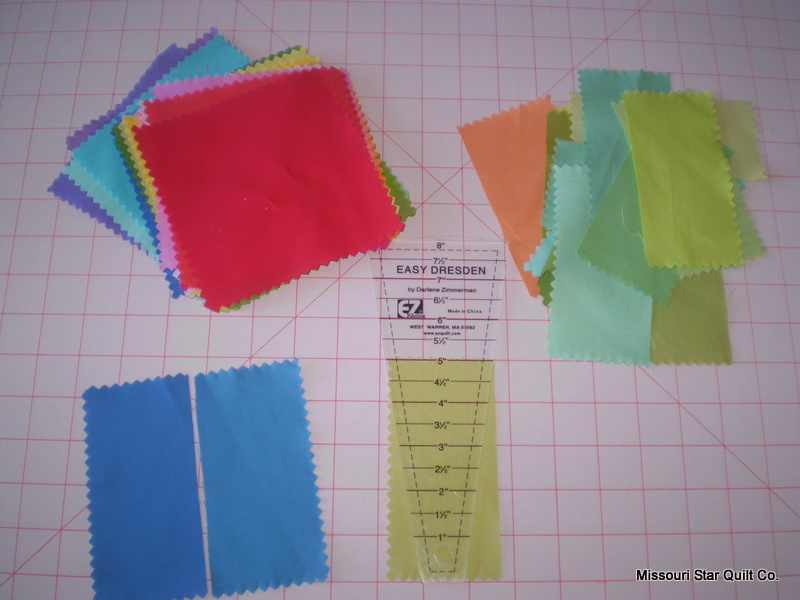
So yes, its been snowing, and its really cold! I don’t know about all of you but about this time of year I start to miss the sunshine 🙂 So, I thought, what could I do to brighten up my day? Well sewing something usually helps and sewing something bright is even better!
I took one charm pack and cut each 5″ square into a 2.5″ rectangle.
Then I took my dresden ruler and cut twenty of them into dresden plate triangles.
lovely scraps!
I assembled the Dresden plate and machine appliqued it onto a black background (15.5″ square). I also machine appliqued the black center circle.
Then I took the remaining rectangles from the charm pack and made a piano key border for the dresden. It measures approx. 25 inches square.
I still need to decide how to quilt it. and what color thread to use! (the really tough choices:) I absolutely love this little mini quilt! It is so bright and cheerful! and so easy peasy… This is a perfect project for a dreary winter afternoon! Enjoy!
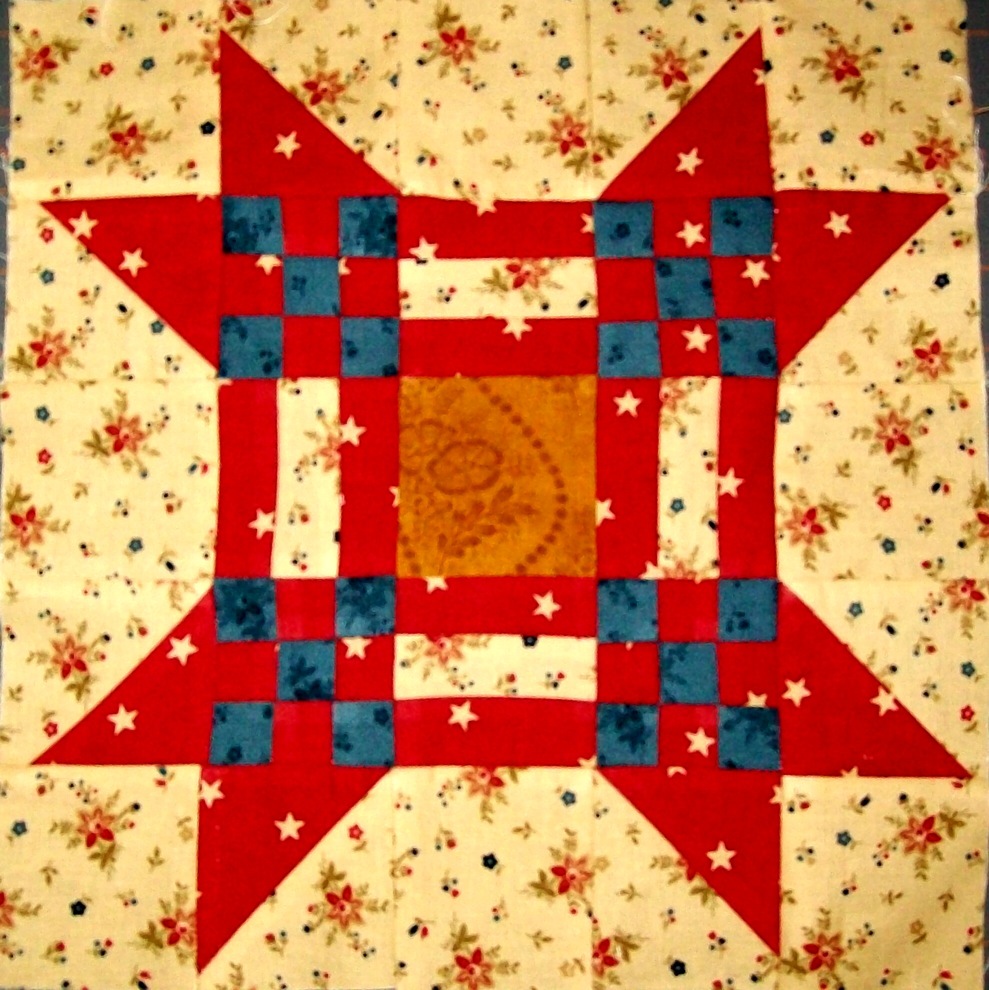
I’ve been having a great time working on the Kansas City Star Quilt!
This is a quilt pattern that is provided free through the Kansas City Star newspaper on a monthly basis. They do a new one every year and the patterns usually have a historical link of some kind. I’m really excited to see the new blocks each month. I’ve been using the provided fabrics from the Missouri Star Quilt Company, and watching Amy’s (our resident applique specialist!) sample blocks closely, and working hard to try to stay at least close to on time! Hahaha! I’m already two months back since the May block just came out 🙂
These blocks are done in period style fabrics, I’m thinking it would be pretty cool to see one done in brights just for the fun of it!
This is my January Block
and February’s
and March
April and May are still in the bag. 😀
I’m working on it, but it’s exciting to know that when I’m through I will have a serious treasure, that would have been quite an ordeal to attempt if I was picking up the pattern as a whole and trying to do it all at once.
It’s so cute! It’s not big enough for a twin size bed but it’s going to be a fabulous playtime, picnic, & cuddle blanket!
It takes 1 honeybun, a partial charm pack and some background fabric (I think it’s around 1 3/4 yds… don’t quote me on that though 🙂 ) It calls for it to be mostly fat quarters on the pattern, and the strips are instructed to be cut to 2 1/2″ x 17″ but I had access to a honeybun in Soiree whose strips are precut at – 1 1/2″ so I decided that I would just double the amount of 17″ strips and it would be perfect! So off I went arranging strips… …and skipping most of the cutting section of the pattern. Woohoo! I love being able to skip a step! It did require most of the honey bun, with only a small section leftover.
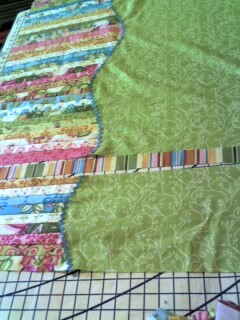
Camille of Thimble Blossoms singled out one section as tricky, the part of cutting and applying the wavy edge. After reading it over I thought “shoot, no problem” and started off. I ended up not cutting my applique seam ‘n’ sew material right, though not tragically. I cut on the lines I drew, instead of in-between them, so I had to draw an extra section of the wavy line. Then after applying it and securely stitching the edge down your supposed to trim the excess strip pieced material on the underside of the quilt. Here’s the picture I took while thinking I might tutorial this…
… If you’ll notice I had the fabric spread apart, lined up my scissors, and took the picture without a second thought. Until I was checking the picture and realized my scissors were in place to cut off the top of the quilt… oops!
I had to laugh at myself!
So, I reset my fabric and scissors, took the right picture and thanked my lucky stars that I had been trying to tutorial this because other wise I might have royally screwed up this quilt top!
It was a good reminder to go slow and pay attention! While this part is not incredibly tricky you do still want to pay attention 😉 The only real problem I had was that it calls for one strip to be pieced together to a length of around 60″ because it needs to go across the entire bottom of the quilt.
As shown here.
Since I was using a honeybun you know that they traditionally only have one strip of each fabric… hmm… so, I had to find two strips that were similar enough that when pieced together it wasn’t that noticeable that the two fabrics were different… Thankfully the multi colored stripes were perfect and I just had to line up the seam under one of the applique petals (which was not hard because really you can put the flower wherever you want!) and voila! I had an approximately 88″ long strip which I then trimmed 17″ off of. Then I added the 17″ piece to the tall section of 17″ strips for the side of the quilt and was left with a piece approximately 70″ long. Still, plenty long enough to stretch across the bottom of the quilt to give it that fun pieced look!
Everything else was pretty simple.
The pattern was well explained and the applique was mostly simple large shapes that were easy to work with (This was my first applique project on my own so I appreciated the large shapes 🙂 ).
I did a straight stitch, free motion, faux applique technique on the polka dots and flowers. It worked out pretty well, though needle turned would also be beautiful!
I think the biggest thing to remember when making this pattern is that it is not a bed size quilt. It could easily be made into one with a little measuring and planning ahead. As it stands, it will make a fun, happy quilt that any little girl would love to cuddle up and play in!
I would definitely recommend this pattern!
I would place the level of this pattern at beginner to intermediate.
It’s the perfect pattern for the beginner looking to explore the world of applique, without too much stress!
Yup, It’s kind of a theme around here. We like table runners! Mostly because they are easy-peasy and go together in a snap. As an added bonus it makes your table cute and festive!
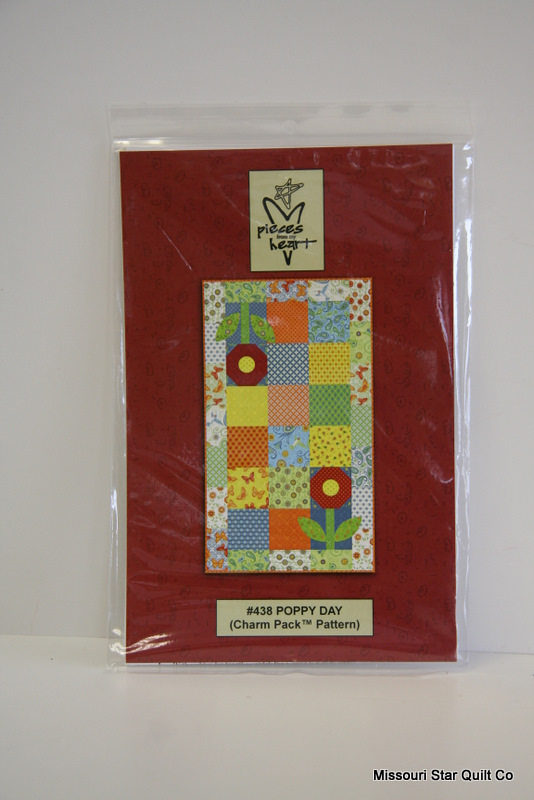
So here you have the newest table runner we have mastered. It is called Poppy Day, by Pieces of my Heart. (gotta love that Sandy Gervais!!) We used the Urban Chiks’ Sweet charm pack. I think it is adorable!! All that’s left to do is applique the flower middles on and quilt it!! WooHoo.
Don’t you worry…..I will show you the finished product!
We do have so much going on right now in the shop. I can’t wait to show you all that we have going!! I will hopefully get another [works in progress] post up later today!! Hope you are all having a fab Tuesday!


 If you haven’t been in lately, you will have to see all the new stuff we have in. We have some really (awesome) displays of Jan Patek quilt kits, fabric, patterns and finished quilts. They are just beautiful.