A Guide to Appliqué

In the intricate world of quilting, there are so many different ways we can make a sewing project unique! Appliqué is a fun (and super easy!) way to decorate a quilt with personalized designs and patterns.

  • Appli-Glue or Lapel StickUse this to hold fabric pieces in place while hand stitching.
  • Freezer PaperDraw a design on the dull side, cut it out and lay the shiny side down on the project to use as a guide.
  • Bias Tape MakerUse this to make stems and more, especially when doing floral applique!
  • Marking PenUse this a pen to trace designs onto projects.
  • Precision Applique ScissorsA smaller pair of scissors come in handy for cutting smaller pieces.
  • Hand Needles A smaller point for hand stitching, but also a bit enough needle to prevent hand cramping.
  • Mini Iron – A tiny iron will give more control over tiny fabric pieces.
  • Applique PinsThese come in handy when fitting several pieces into place.
  • Fusible Web (optional) – Melts to adhere the fabric pieces together.
  • Applique shapes (optional) – Precut shapes come in handy for quick and easy projects

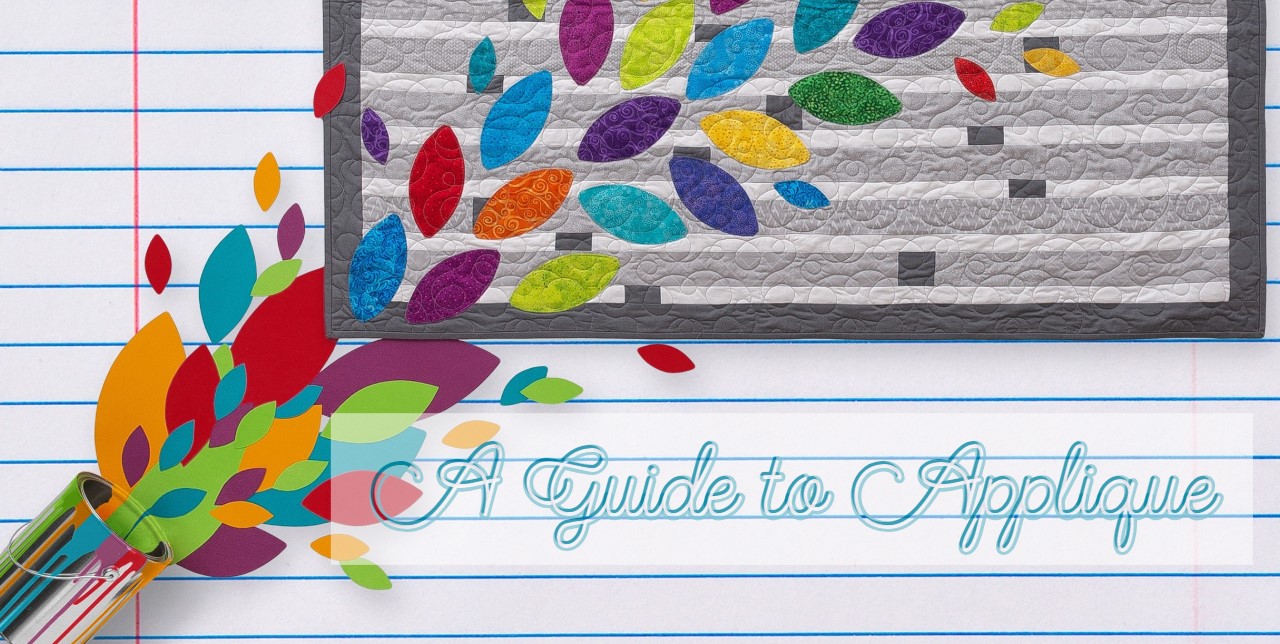
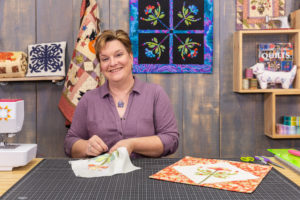
 Learn the basics of appliqué with Jenny and Jan Patek in this four-part tutorial series. They teach the essentials needed for hand appliqué along with tips and tricks for applying leaves, stems, circles, stars and more onto your sewing project.

Beginning Hand Applique Online Class

For a more in-depth look into hand appliqué, join our newest online class! Beginning Hand Appliqué is an online class taught by our very own Courtenay Hughes. Courtenay teaches two different hand appliqué methods, troubleshooting techniques for tricky shapes, how to make reusable templates, and clean appliqué hand stitching!

Discover new ideas within our appliqué tutorials. The Finish Line Quilt can be found in our latest issue of BLOCK Magazine. The appliqué project uses two of our favorites; the orange peel template and 2.5″ strips!

The Itty Bitty Club Pattern pack is a great way to add some fun springtime decor to your home. Stock up on warm, fuzzy wool though because this pack comes with five different appliqué project patterns!

For antique blocks (or any finished blocks that haven’t found a home yet), watch Jenny’s “What to do with vintage blocks” tutorial to make a pretty, antique looking appliqué quilt!


It’s a Fabriflair Christmas in July!

Most people can procrastinate when it comes to putting out Christmas decor, but as quilters we’re always planning months in advance in order to add a stylish new piece of decor to our collection. From wall hangings and Christmas quilts to cuddle under to ornaments and tree toppers the ideas just keep rolling in we’ve got to start working on them now to ensure they’ll be displayed all season long. Find the latest holiday fabric trends HERE.

When it comes to decor and other fun little projects, Amy Barickman always comes to mind for us! We’ve asked her to gather a couple of her favorite fun and simple Christmas projects to share below and they’re just darling.

Hi! It’s Amy Barickman founder of the pattern company,  Indygo Junction and inventor of Fabriflair®. I was so excited to be given the opportunity to share more about Fabriflair Stars and the beautiful Morris Holiday Metallic collection by Victoria & Albert Museam for Moda Fabrics. If you have not heard about Fabriflair® – think dimensional paper piecing. Heidi and I did a Facebook LIVE awhile back where we gave some great information on our original kit line with pre-cut matte board templates for hand sewing as well as our new sew by machine method which uses our Fabriflair Stabilizer.

FabriFlair Stars

When I was asked to create our Wall Art Star Pattern in this collection- I chose the crimson and pine palette, but once I received the fabrics I was inspired to also design version of our Tree Topper and Ornament Pattern in the indigo color palette. Aren’t they both gorgeous? 

FabriFlair and Morris Holiday Fabric

The prints and the scale in the line were ideal to work with the two patterns!

So let’s start with the Wall Art Star Pattern. There are three sizes to choose from in the pattern and several options to configure fabric for your star. You can create a single fabric “ray” or arm or a two fabric or split arm style. We did both options – one large star and one in the medium size.

FabricFlair Wall Art Star

On the Tree Topper and Ornament Pattern you only have the option to make the single fabric arm. Since this star is two-sided or three dimensional on the Tree Topper we created a 5 fabric version on one side and a single fabric version on the other side. On the ornament we chose a different fabric for each side.

FabriFlair Tree Topper

Embellishing Your Stars

Once you have your fabric planned for your star the fun begins – deciding on any embellishments you want to add! When I saw the indigo colorway in this collection I remembered a vintage beaded necklace I had that needed re-stringing hoping it was a match to this fabric. And it WAS!!

Embellished FabriFlair Tree Topper

Attaching beads to your stars can be a fun and easy process using pins and a dab of super glue. Beading pins from Dritz are ideal because they are a shorter length, but regular length pins work too. See this photo, we simply push the pin through the hole in the bead and secure with a tiny dot of super glue. The pearlized pin heads work especially nice with the indigo colorway and gold heads for the green and crimson colorway.

FabriFlair Tree Topper


There are many ways to embellish your Fabriflair® stars. How about mother-of -pearl buttons, a vintage favorite of mine! If you did not know it, my mantra is vintage made modern – I love any opportunity to upcycle or recycle vintage notions and fabrics from the past in modern projects!

Embellished FabriFlair Wall Art Stars

Keep in mind adding a button can be a great way to cover any imperfection at the center meeting point of the arms of your star. Another option that is fun for Christmas is bells. I added the gold jingle bells and decorated a wreath with the medium size Wall Art Star. With a wreath or on it’s own, the star is perfect for your front door to welcome your holiday guests! You can even make a “welcome” star for every season!

Chloe, our resident studio cat, loved the Morris Holiday prints as well. She helped me pick out which fabrics to pair together and I think we’re both pretty pleased with the holiday decor we created. 

Chloe Cat

Browse the entire Fabriflair® collection at Missouri Star HERE and be sure to share your holiday projects with us using #msqcshowandtell

Watch THIS video to learn more about the Wall Art Stars.

Merry Christmas in July!

We Quilt This City!

We Quilt This City!

Every summer we host thousands of visitors from near and far in our happy little town of Hamilton. Many of these visitors come to us as their end destination or as part of a detour on their road trip. No matter how our visitors get to us, we do all we can to make sure that they have the best experience in Hamilton.

If you needed another excuse to come visit Hamilton this Summer, starting June 21st we are participating in the Row by Row Experience again this year!

The Row by Row Experience is a wonderful program started in 2011 by Janet Lutz to help quilt shops get more visitors in what might otherwise be slow summer months. All the quilt shops participating in Row by Row have their very own free pattern to help you make a quilt block, and if you are the first to complete a quilt using at least 8 different rows from 8 different 2018 participating shops, you win a stash of 25 fat quarters and you win a bonus prize if you use our block and bring it in to our store!

The theme for Row by Row this year is “Sew Musical” and we have our very own pattern called “We Quilt This City.” The pattern features a beautiful appliqué town and music notes, hopefully not bringing just your quilts, but also your community in harmony.

"We Quilt This City"

To get your free Missouri Star Row by Row pattern all you need to do is come to Penney’s Quilt Shop and ask for our Row by Row pattern! Each customer is limited to one pattern. Sorry to all of our online customers, this pattern is only available in person!

The Row by Row experience will run from June 21st to September 4th, 2018, and you will have until October 31st, 2018 to submit your quilt for a prize.

DIY Flat Doll: Chuck the Chicken-Duck

Celebrate National Quilting Month

It wouldn’t be National Quilting Month without a visit from our favorite quilting mascot, Chuck the Duck! He is always here to offer words…ahem, quacks of encouragement, and a helpful hint or two. This week, we are sewing up a fun, flat-ish version of Chuck just in time for spring.

DIY Flat Doll

To get started, download the FREE Chuck the Duck printable HERE! Follow along with Misty as she shows us how to create one of these soft, fabric friends. Watch the replay of our Missouri Star Live Video below: 

Supplies:

Directions:

  1. Download the Chuck the Duck printable HERE. Not a fan of Chuck? No worries! You can create any shape you would like. We think this would look super cute as a dog, cat or even a bunny if you are wanting a spring creation. 🙂
  2. Cut out the duck outline, nose, eye, and wing. Just follow along the black lines on the template.
  3. Fold your fabric right sides together before tracing the Chuck outline on the wrong side of the fabric. Keeping both layers together, carefully cut around Chuck using the Shark Applicutter or a pair of fabric scissors.
  4. Repeat the process for both the nose, wings, folding fabric right sides together. If you would rather cut one piece at a time, just be sure to reverse the template for one of the cuts for each of the elements, including the body.
  5. Attach the wings, noses and eyes to a piece of fusible.
  6. Peel off the backing of the fusible and attach to the Chuck the Duck body.
  7. Start sewing! To give this doll the charming, rustic look, we top stitched around the right sides, so that the stitches show. (If this isn’t your style, feel free to sew the right sides together and leave an opening to pull right sides out before filling.)  Be sure to leave an opening so it can be stuffed.
  8. Fill up Chuck with a bit of Poly-Fil. Be careful not to overstuff, since it is a flat doll.
  9. Finish top stitching, and you have your very own Chuck the Duck flat doll!

Have fun sewing, friends! Be sure to share your creations with us on Facebook and Instagram throughout National Quilting Month using #makesomethingtoday and #msqcshowandtell!

Scrap-Busting Holiday Crafts

It’s beginning to look a lot like Christmas in downtown Hamilton! With wreaths and candles in every window, a living tree adorned with lights, ornaments and ribbons, and window displays in all the shops, our little town is overflowing with Christmas cheer!

On Saturday, we celebrated the season with a town-wide Christmas festival, featuring make and take fabric crafts in the Missouri Star Quilt Co. shops. Some of our talented team members showed off their creativity with mug rugs, fabric bracelets, felt poinsettias, fabric scrap ornaments and fabric holiday cards.  

We enjoyed diving into our scrap stash and creating these festive projects so much that we wanted to share with all of our friends far and wide how to create a couple of them as well! Read on to learn how to create our Felt (or Fabric) Poinsettias and Fabric Bracelets.

Fabric Bracelets

Courtenay from our Sewing Center showed us how to create these fashionable fabric scrap bracelets that would be awesome to show off remnants of those most loved fabrics you have in your scrap bin.

Supplies

Cotton clothesline

Strips of fabric (½ inch. 30 inches long)

Hot glue gun or fabric glue (either will work)

Assorted beads and trims

Scissors

Painter’s Tape  

Steps

1. Measure wrist with clothesline. It doesn’t have to be perfect, and be sure to allow a little room to slide the bracelet on and off of your wrist.

2. Tape the two ends of the clothesline together with painters tape to form a ring (make sure you use about a two-inch wide tape, such as painters tape or duct tape to ensure the ring holds).

3. Put a small bead of hot glue to one end of the fabric strip.

4. Start wrapping the bracelet.

5. Once you are finished wrapping the entire ring with fabric, add another bead of glue at the end of the fabric strip to secure it on the clothesline

6. Embellish as desired. Courtenay added a thin metallic cord or thin craft wire to her bracelet. Just add a dot of glue to one end and start wrapping it around like the fabric and voila, a fashionable fabric bracelet!

You may have noticed that we filmed a Facebook Live of Courtenay creating these darling accessories, and you can watch the video below or on our Quilting Deals Facebook page!


Felt or Fabric Poinsettias

Heidi, a member of our Product & Sales Team, and who you may recognize from our Facebook Live videos created lovely Felt Poinsettias in the Main Shop. She used felt and a Sizzix Fabi machine along with a circle die cutter to make these beauties, and was inspired by the DIY Candy tutorial that you can view here.

We recreated the poinsettia ornament using some leftover batiks from another project. You don’t need very much fabric to make this, and although we used Christmas-themed fabric, we would love to see these flowers made in other colors too!

Supplies:

Fabric or felt (2 colors preferably)

Jute, twine or string

A circle template (we used the bottom of a spool of thread)

Scissors

Buttons

Hot glue gun

Mini orange peel template


Steps

1. Cut out 18 circles from one of the fabrics. We used 16 circles to create the petals and 2 more in later steps. Depending on the size of your circle you may need more or fewer than the number we used.You can use a Sizzix like Heidi did, but we traced our circles and cut them out with a pair of fabric scissors.

2. Fold the right side of one circle over to the left side to create a cone shape. You will alternate folding one side to the other, so left to right and then right to left to create the petals. Be sure to keep the end of cone fairly tight, and add a small dot of hot glue to secure it. 

3. Arrange the petals in a circle shape to make sure you have enough to make a flower.

4. Glue the petals together, and be sure to use as little of glue as possible.

5. Turn the petals over and glue a fabric circle to the back to add stability to the flower.

6. Using a mini orange peel template, cut out two leaves and glue them to the back of the flower.

7. Cut off a 6 to 8 inch piece of jute, string or ribbon, create a loop and glue it to the back of the flower. Using the last circle cut out, cover the glued ends of the string on the back of the poinsettia.

8. Turn the poinsettia over and glue buttons or a small circle of fabric to create the center of the flower, there you have it, a fabulous fabric poinsettia ready to adorn a Christmas tree!

All of us from Missouri Star Quilt Co. want to wish you happy holidays and a very Merry Christmas! We hope you enjoy these fun, fast and festive fabric scrap projects!

Be sure to share your scrab-busting holiday crafts with us on social media using #msqcshowandtell!