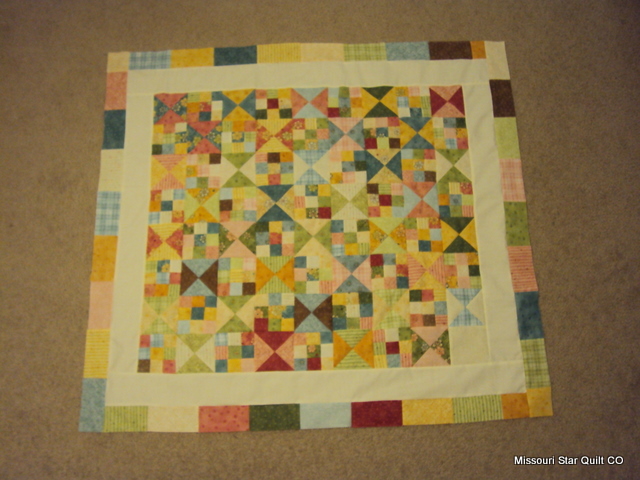
Our facebook friend Sandra, uploaded a picture of a quilt she made and several of us wanted directions!! Well, it’s your lucky day! Sandra emailed me her directions and I am thrilled to share them with you! Oh my, don’t you just love it!!?
3 5×5 charm packs iron and ironing surface
1/2 yard solid fabric machine or hand sew
cutting matt rotary cutter
straight edge coordinating thread
To begin I lay out what i will need. ( sort of like cooking)
The first charm pack is cut into 4 triangles. I do this by laying my ruler from corner to corner and cutting with my rotary cutter. Then without disturbing the fabric i lay the ruler to the opposite corners and cut again. So you are cutting an X. That gives you 4 triangles the same size. These are mixed up and sewn into the hour glass block style using 4 triangles. Next the charms from pack number 2 are cut into 3 equal strips (approx. a scant 1 3/4″) You mix these up and sew into blocks of three strips each. Now cut each of these into 3 equal strips, mix up again and sew three strips each to make your nine patch style block. Now is a good time to iron each block if you haven’t after each step. Next you will sew together alternating 9 patch and hour glass for a total of 8 blocks in a strip. I do have one block at the end of the last row that is solid. I use this to either sign and date or embroider a message to the receiver. Then sew these strips together to form your quilt.
Cut your solid fabric into 3 1/2 x 44 (fabric width) this is your first boarder. Attach down the sides first then trim excess. Next sew top and bottom strips. Trim now as these pieces are too long as well. Charm pack number 3 is cut in half and the pieces are sewn end to end to make the outside boarder. These are also sewn down the sides trimed and then top and bottom. Trim the extra fabric and you are ready to quilt.
FYI: the fabric she used was Garden Song, by Nancy Halverson from Benartex.
Thanks so much for sharing your directions Sandra! I can’t wait to make mine! I am just in love with the quilt!
Have a great day to you all, and don’t forget to enter our giveaway, for your chance to win a free class with Jenny! Go here!
Sarah


