Would you like to make a diamond? Here is my recipe: Add 725,000 pounds of pressure to ¾ cup pure carbon. Bake at 2000° for one million years. That’s it!
Pro tip: If you’re short on time, stick with fabric diamonds!
How does the poem go? “A quilting tool with many uses is a joy forever!”
The Binding Tool was invented for bindings, but that’s not all it can do! (Jenny has an entire collection of Binding Tool quilt tutorials HERE!)
This week Jenny has whipped up yet another Binding Tool masterpiece! Starstruck is a gorgeous pattern with big star blocks made out of 2.5 inch strips. Click HERE to watch the video!
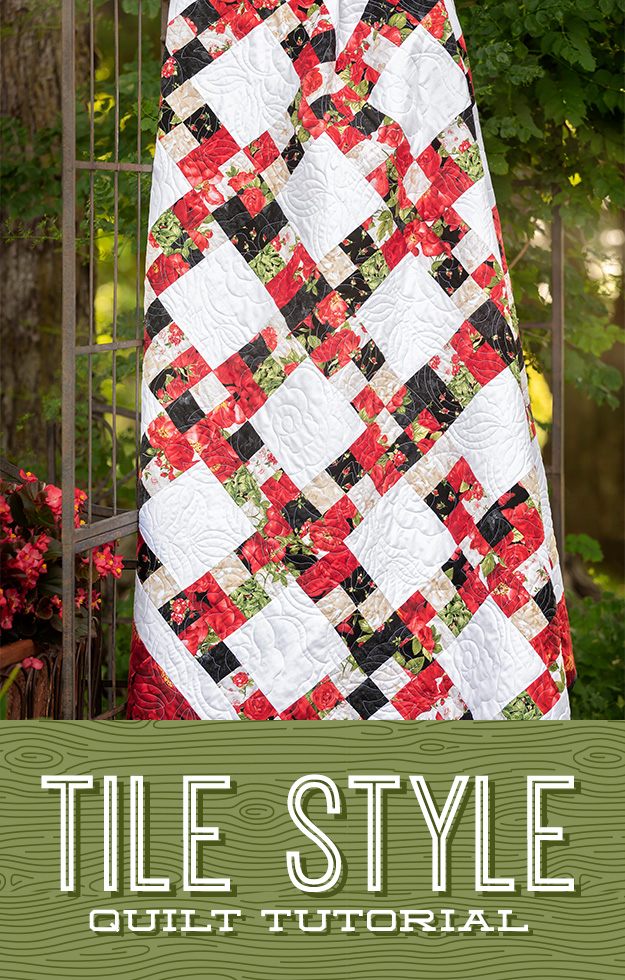
Have you ever admired a stained-glass window and thought, “That’d make a great quilt block!”
We quilters find inspiration everywhere we look! We see quilt blocks in the facets of sparkling diamonds. We see quilt blocks in patchwork fields of wheat and corn. And this week’s new quilt was inspired by…a tile floor!
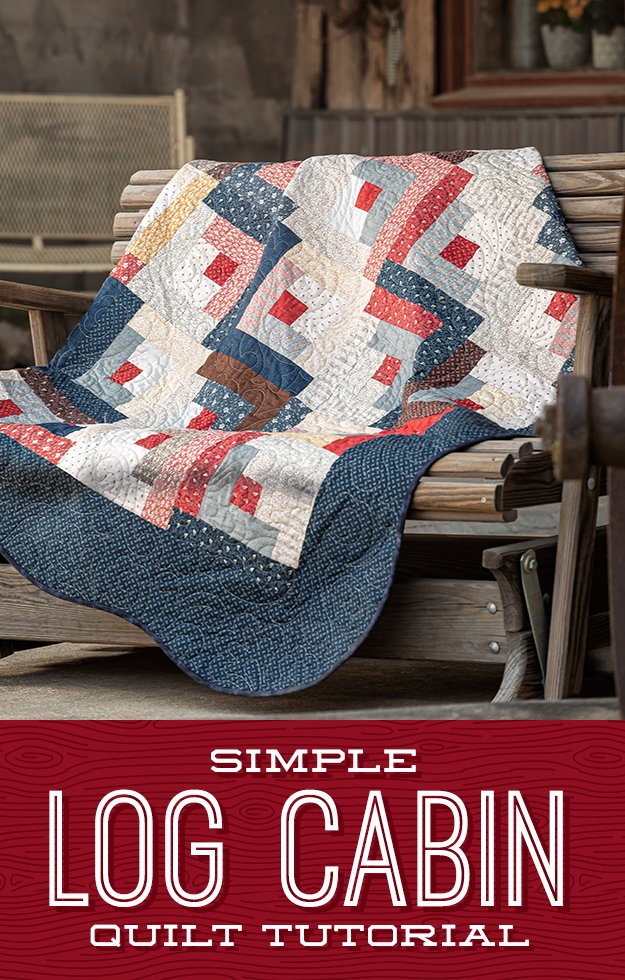
Life on the American frontier was hard. There were prairies to tame, trees to fell, and fences to build. There was butter to churn, laundry to scrub, and water to fetch.
Despite such labor-filled days, those resourceful pioneer women found ways to whip up easy patterns like the Log Cabin block. These simple, pretty quilts were used not only as bed coverings, but as windows, room dividers, and doors, too!
This week Jenny is working on a Simple Log Cabin with a traditional red center square to represent the heart of the home—the hearth. Click HERE to learn how to make this classic 19th-century quilt!
On Mother’s Day, we shared a bouquet of fabric flowers that bloom year round! We were so excited by your response to this lovely project, that we teamed up with the creator, Missouri Star’s very own, Cassie R., to share a step-by-step tutorial on how to make these easy fabric flowers!
Follow along below to learn how to make your very own fabric flowers. These can be made with any fabric (and are a perfect scrap buster!), however, Cassie used batik fabric strips so that the back side of the fabric is not as noticeable when twisting the flowers.
Supplies needed: 2.5”x22” fabric strips (you can use a scrap from a package of 2.5″ strips or a fat quarter cut to 2.5”) We recommend batiks for their reversibility. Hand needle and thread to stitch together the stem If desired: Straws or mini dowel rods and super glue to use as stems Missouri Star Thimble Container
How to create easy fabric flowers:
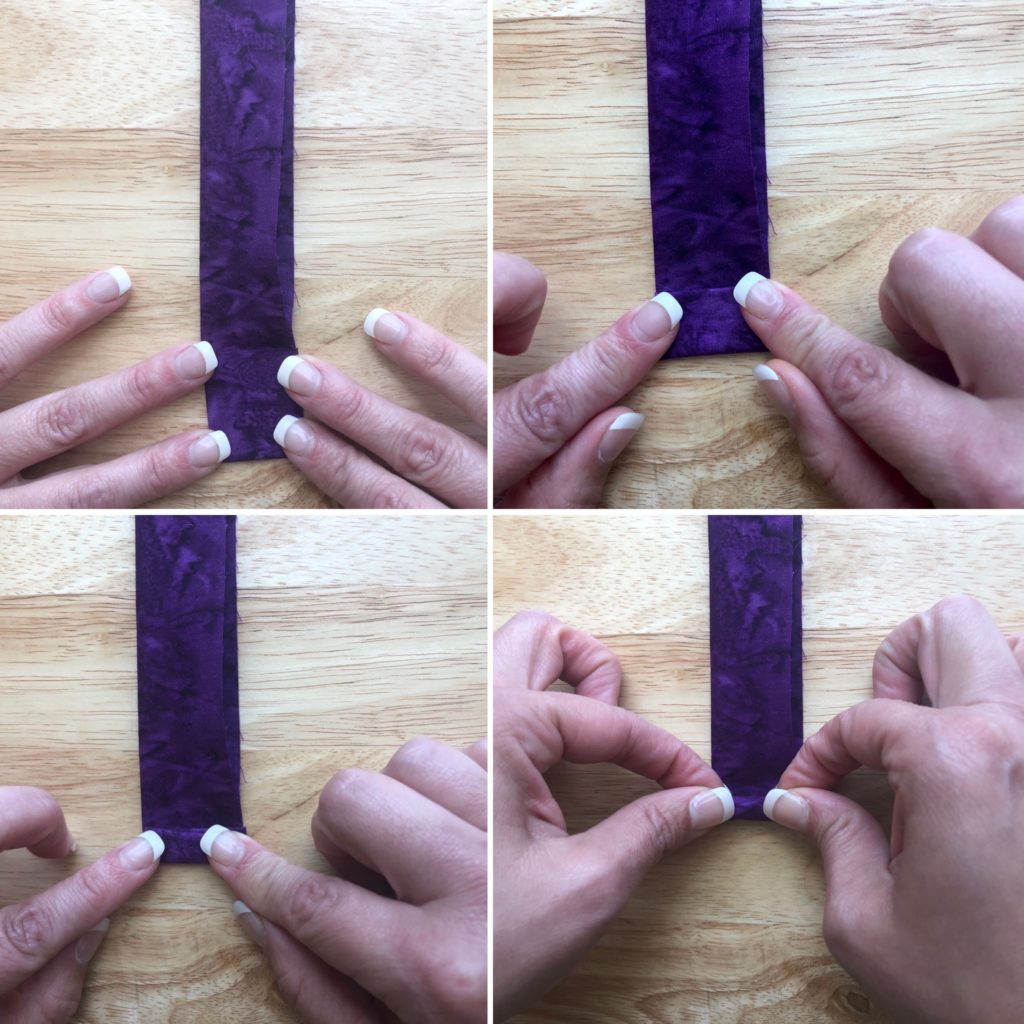
Step 1: Cut fabric strip to 2.5”x22″. Feel free to experiment with skinnier strips for smaller flowers and wider strips for bigger flowers.
Step 2: Fold fabric strip in half lengthwise, but do not press with an iron. A finger press works just fine.
Step 3: Begin at one end of the folded fabric strip and fold in about 1″ from the end and then fold again.
Step 4: Fold a third time so it’s super tight. This will form the middle of the flower.
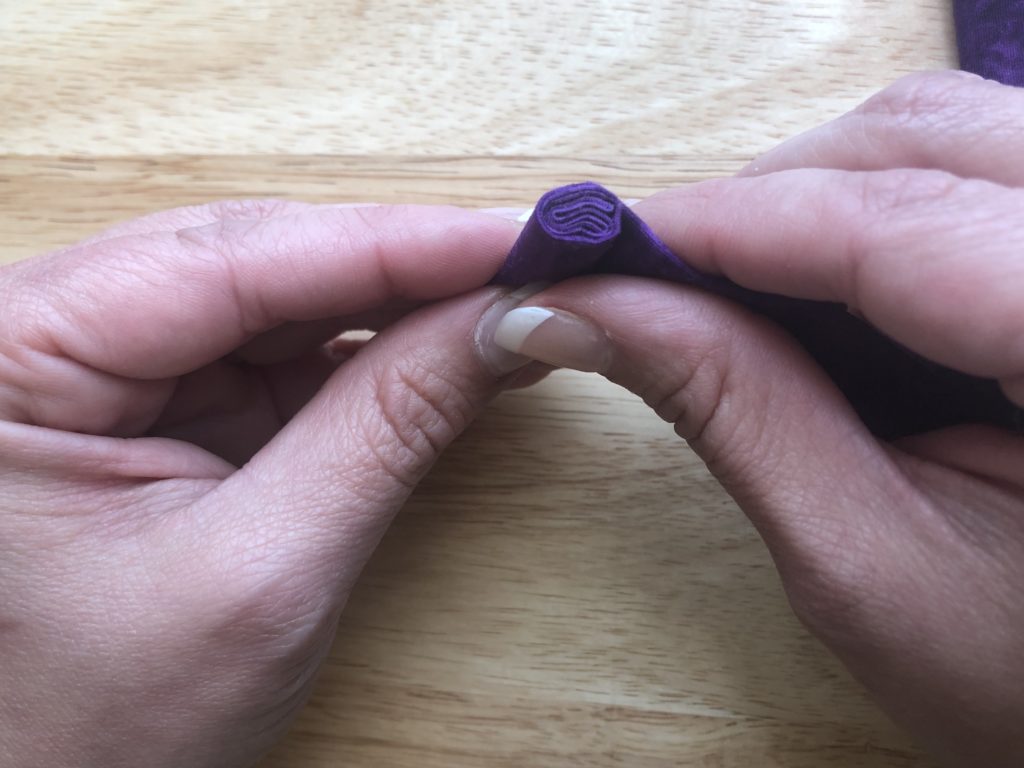
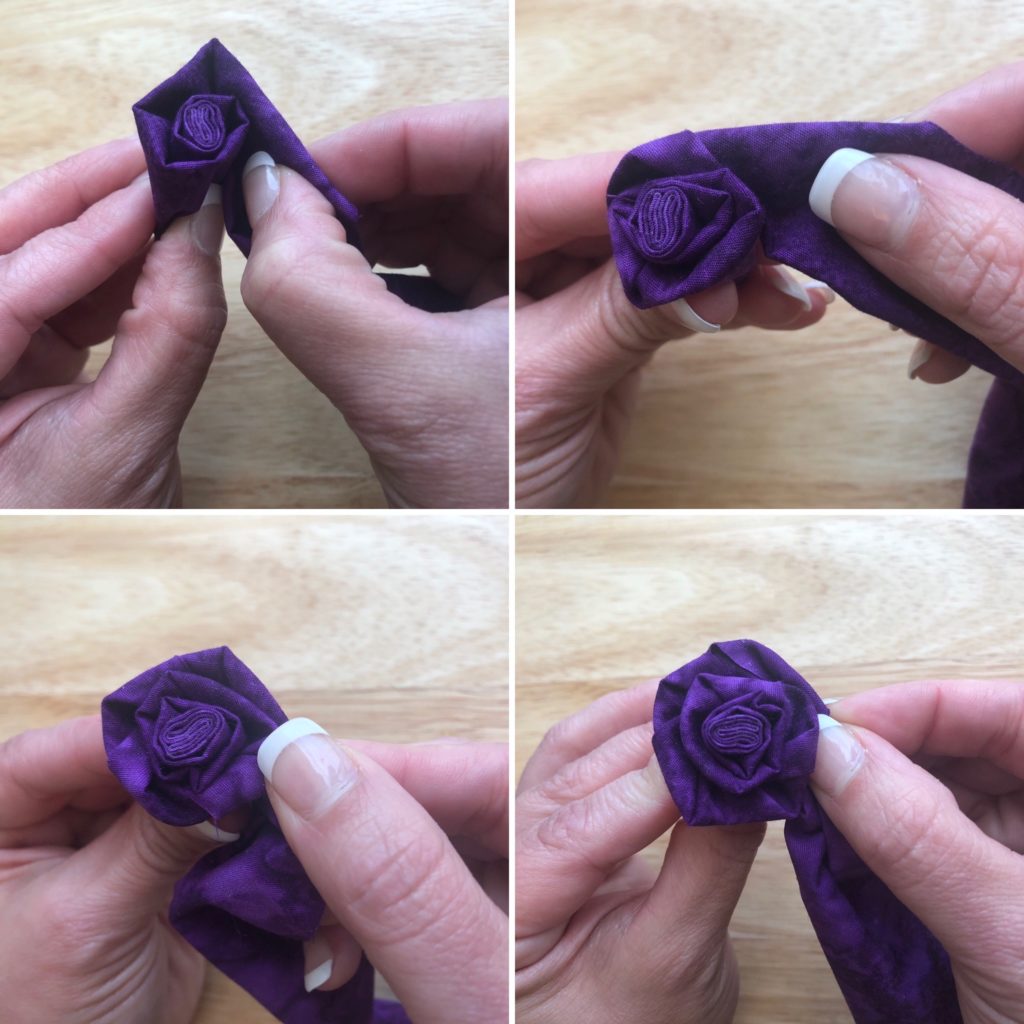
Step 5: With the vertical fold at the top of the flower, loosely roll it around the middle one time.
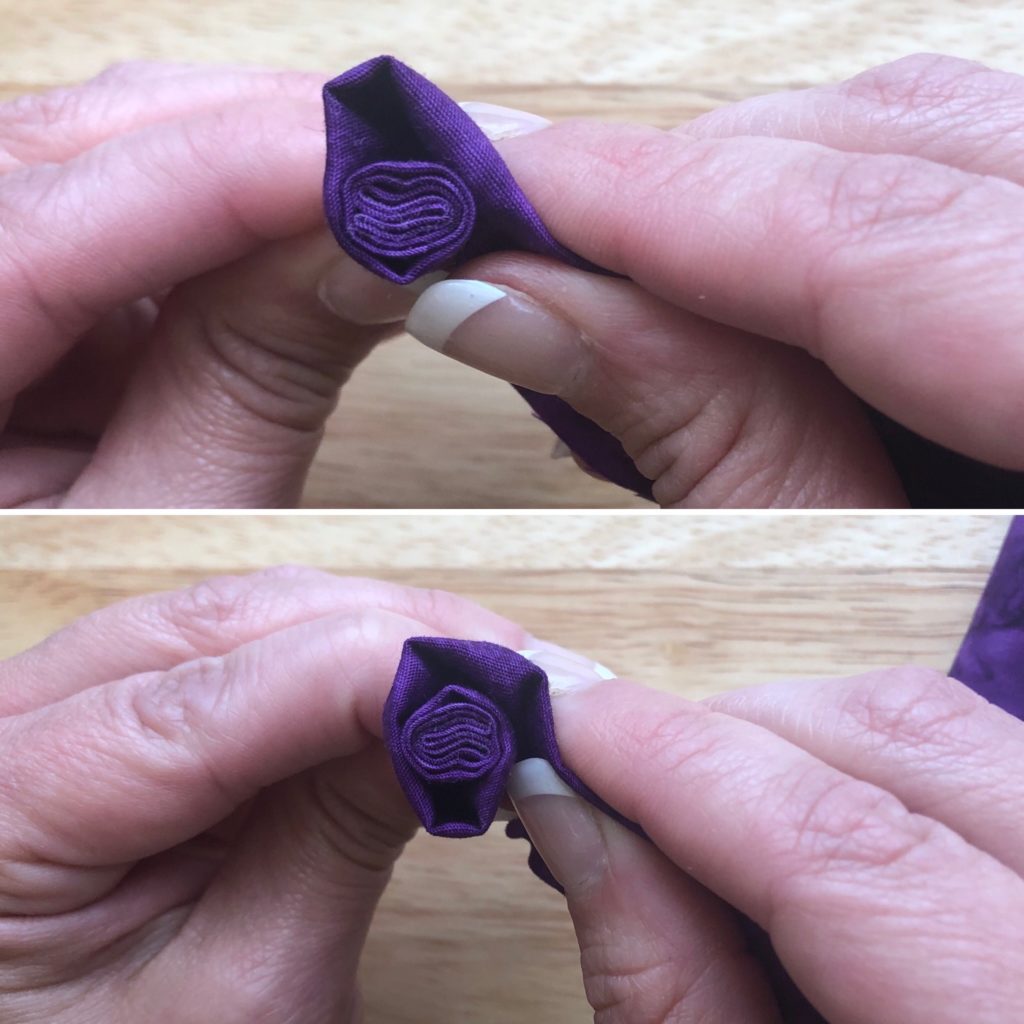
Step 6: As you wrap the fabric strip around the middle, fold the strip about halfway. This will form the petals of the fabric flower. Be sure to keep the fold at the top of the flower.
Step 7: Keep folding and twisting to form the flower
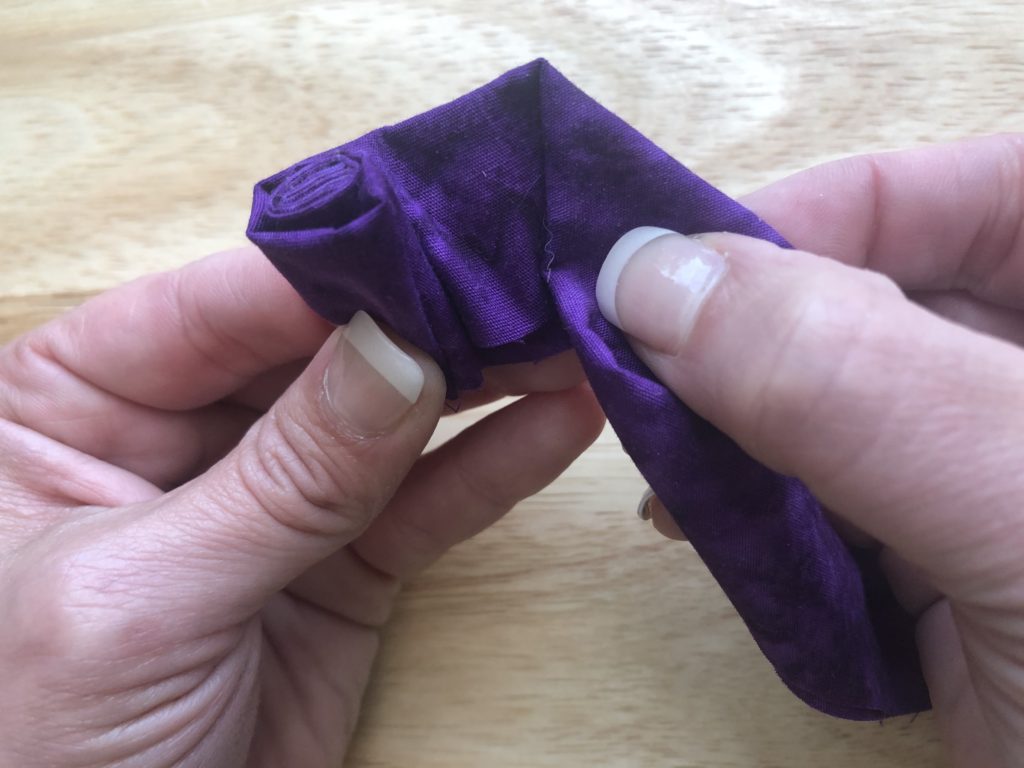
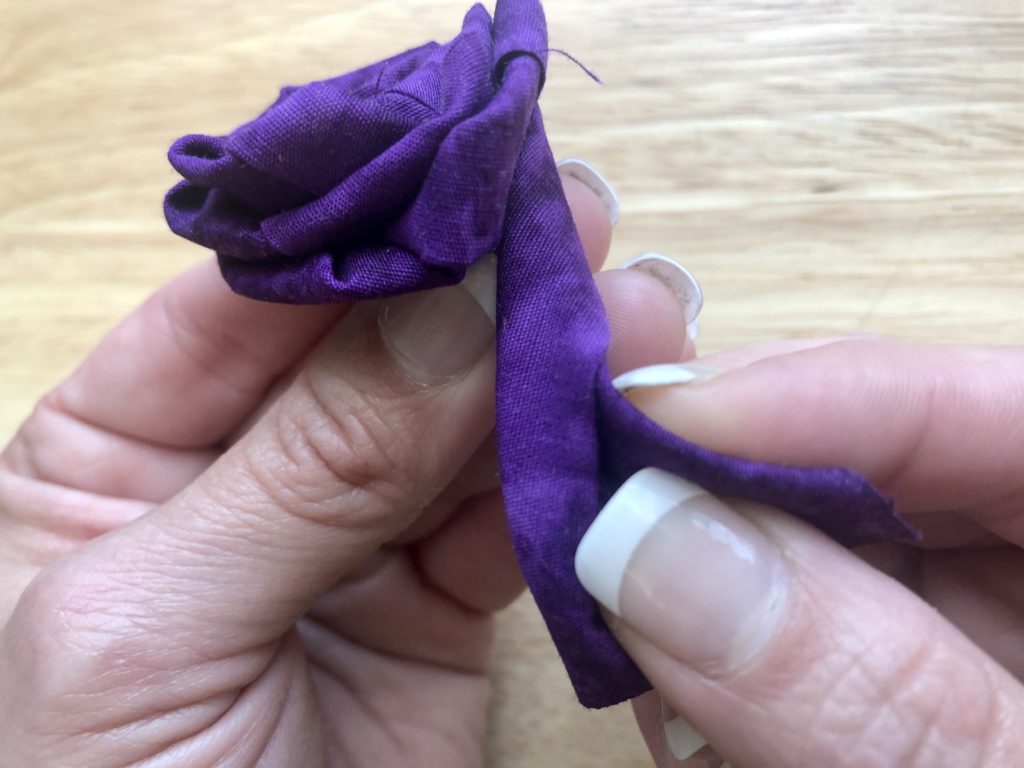
Step 8: Continue folding and twisting the fabric around the flower until you run out of fabric or reach the desired size. As you fold, you will notice that the stem of your flower will form.
Notice the stem forming below.
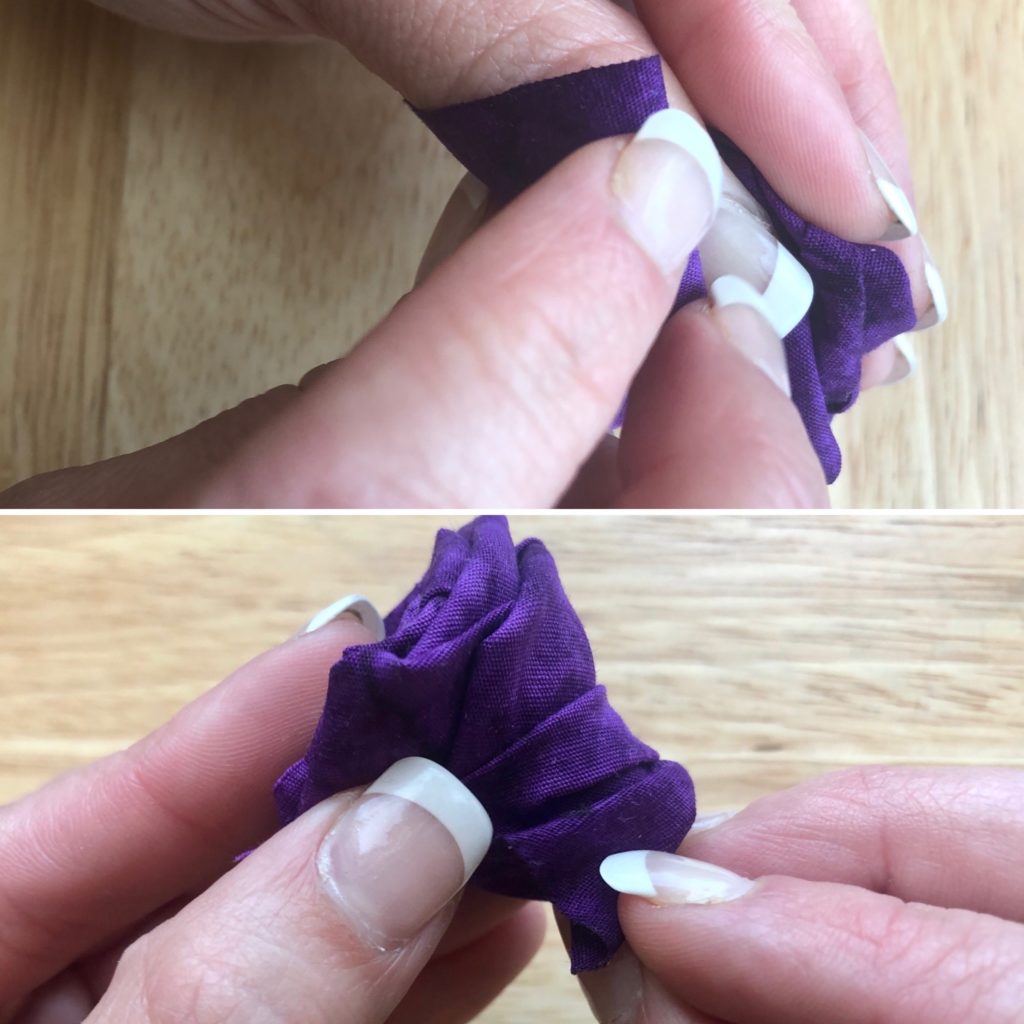
Step 8: Once your fabric flower blooms to your desired size, glue or stitch together the end to secure it.
Use this technique to create fabric flowers that bloom all year round! Be sure to share your creations with us online using #msqcshowandtell! Happy sewing!