Snowball Star Quilt

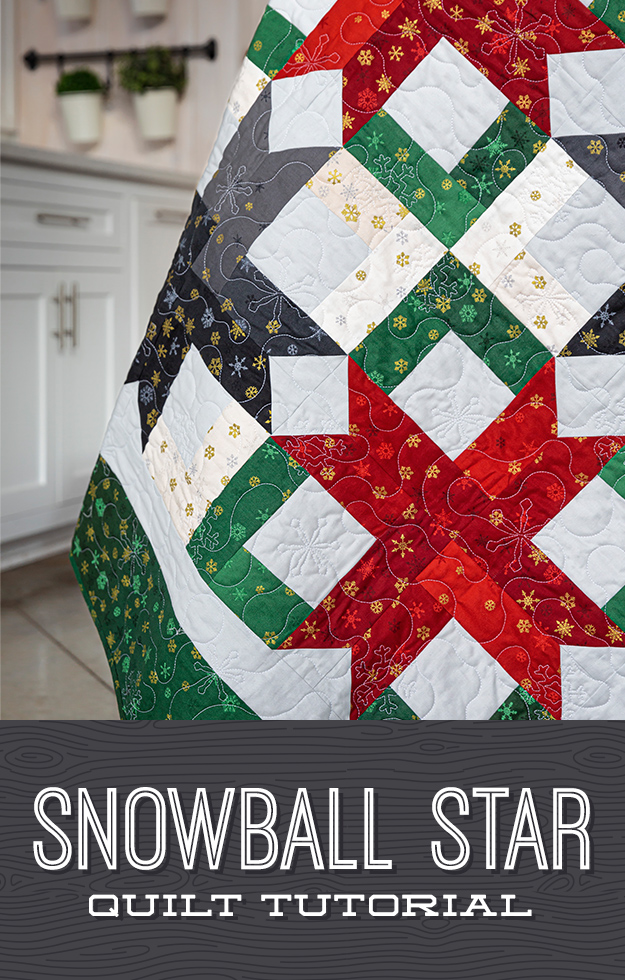
The Snowball Star Quilt from Missouri Star Quilt Co. Watch the free quilt tutorial today.

When Suzy Snowflake comes tap, tap, tappin’ at your windowpane, how do you react? 

Do you welcome winter with open arms or do you wrap up in your thickest quilt and “hibernate” ‘til spring?

The Snowball Star Quilt from Missouri Star Quilt Co. Watch the free quilt tutorial today.

Do you curse each icy flake, or do you set up the Christmas tree and drink peppermint cocoa for breakfast, lunch, and dinner?

Love it or hate it, winter is on its way, and Jenny has just the quilt to get you in the mood:

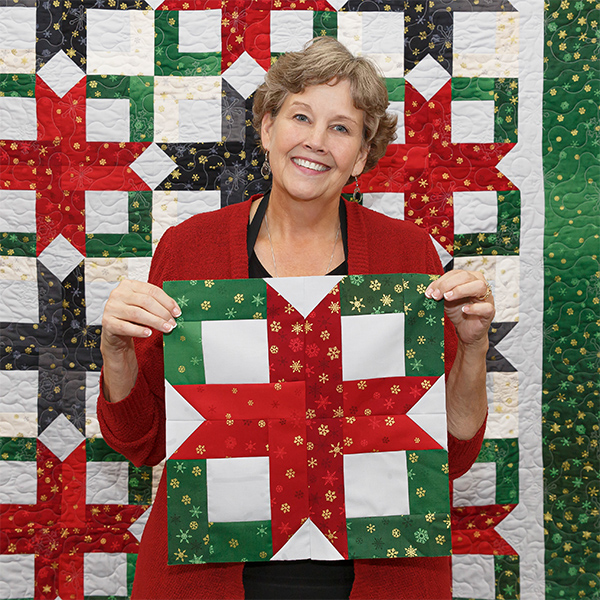
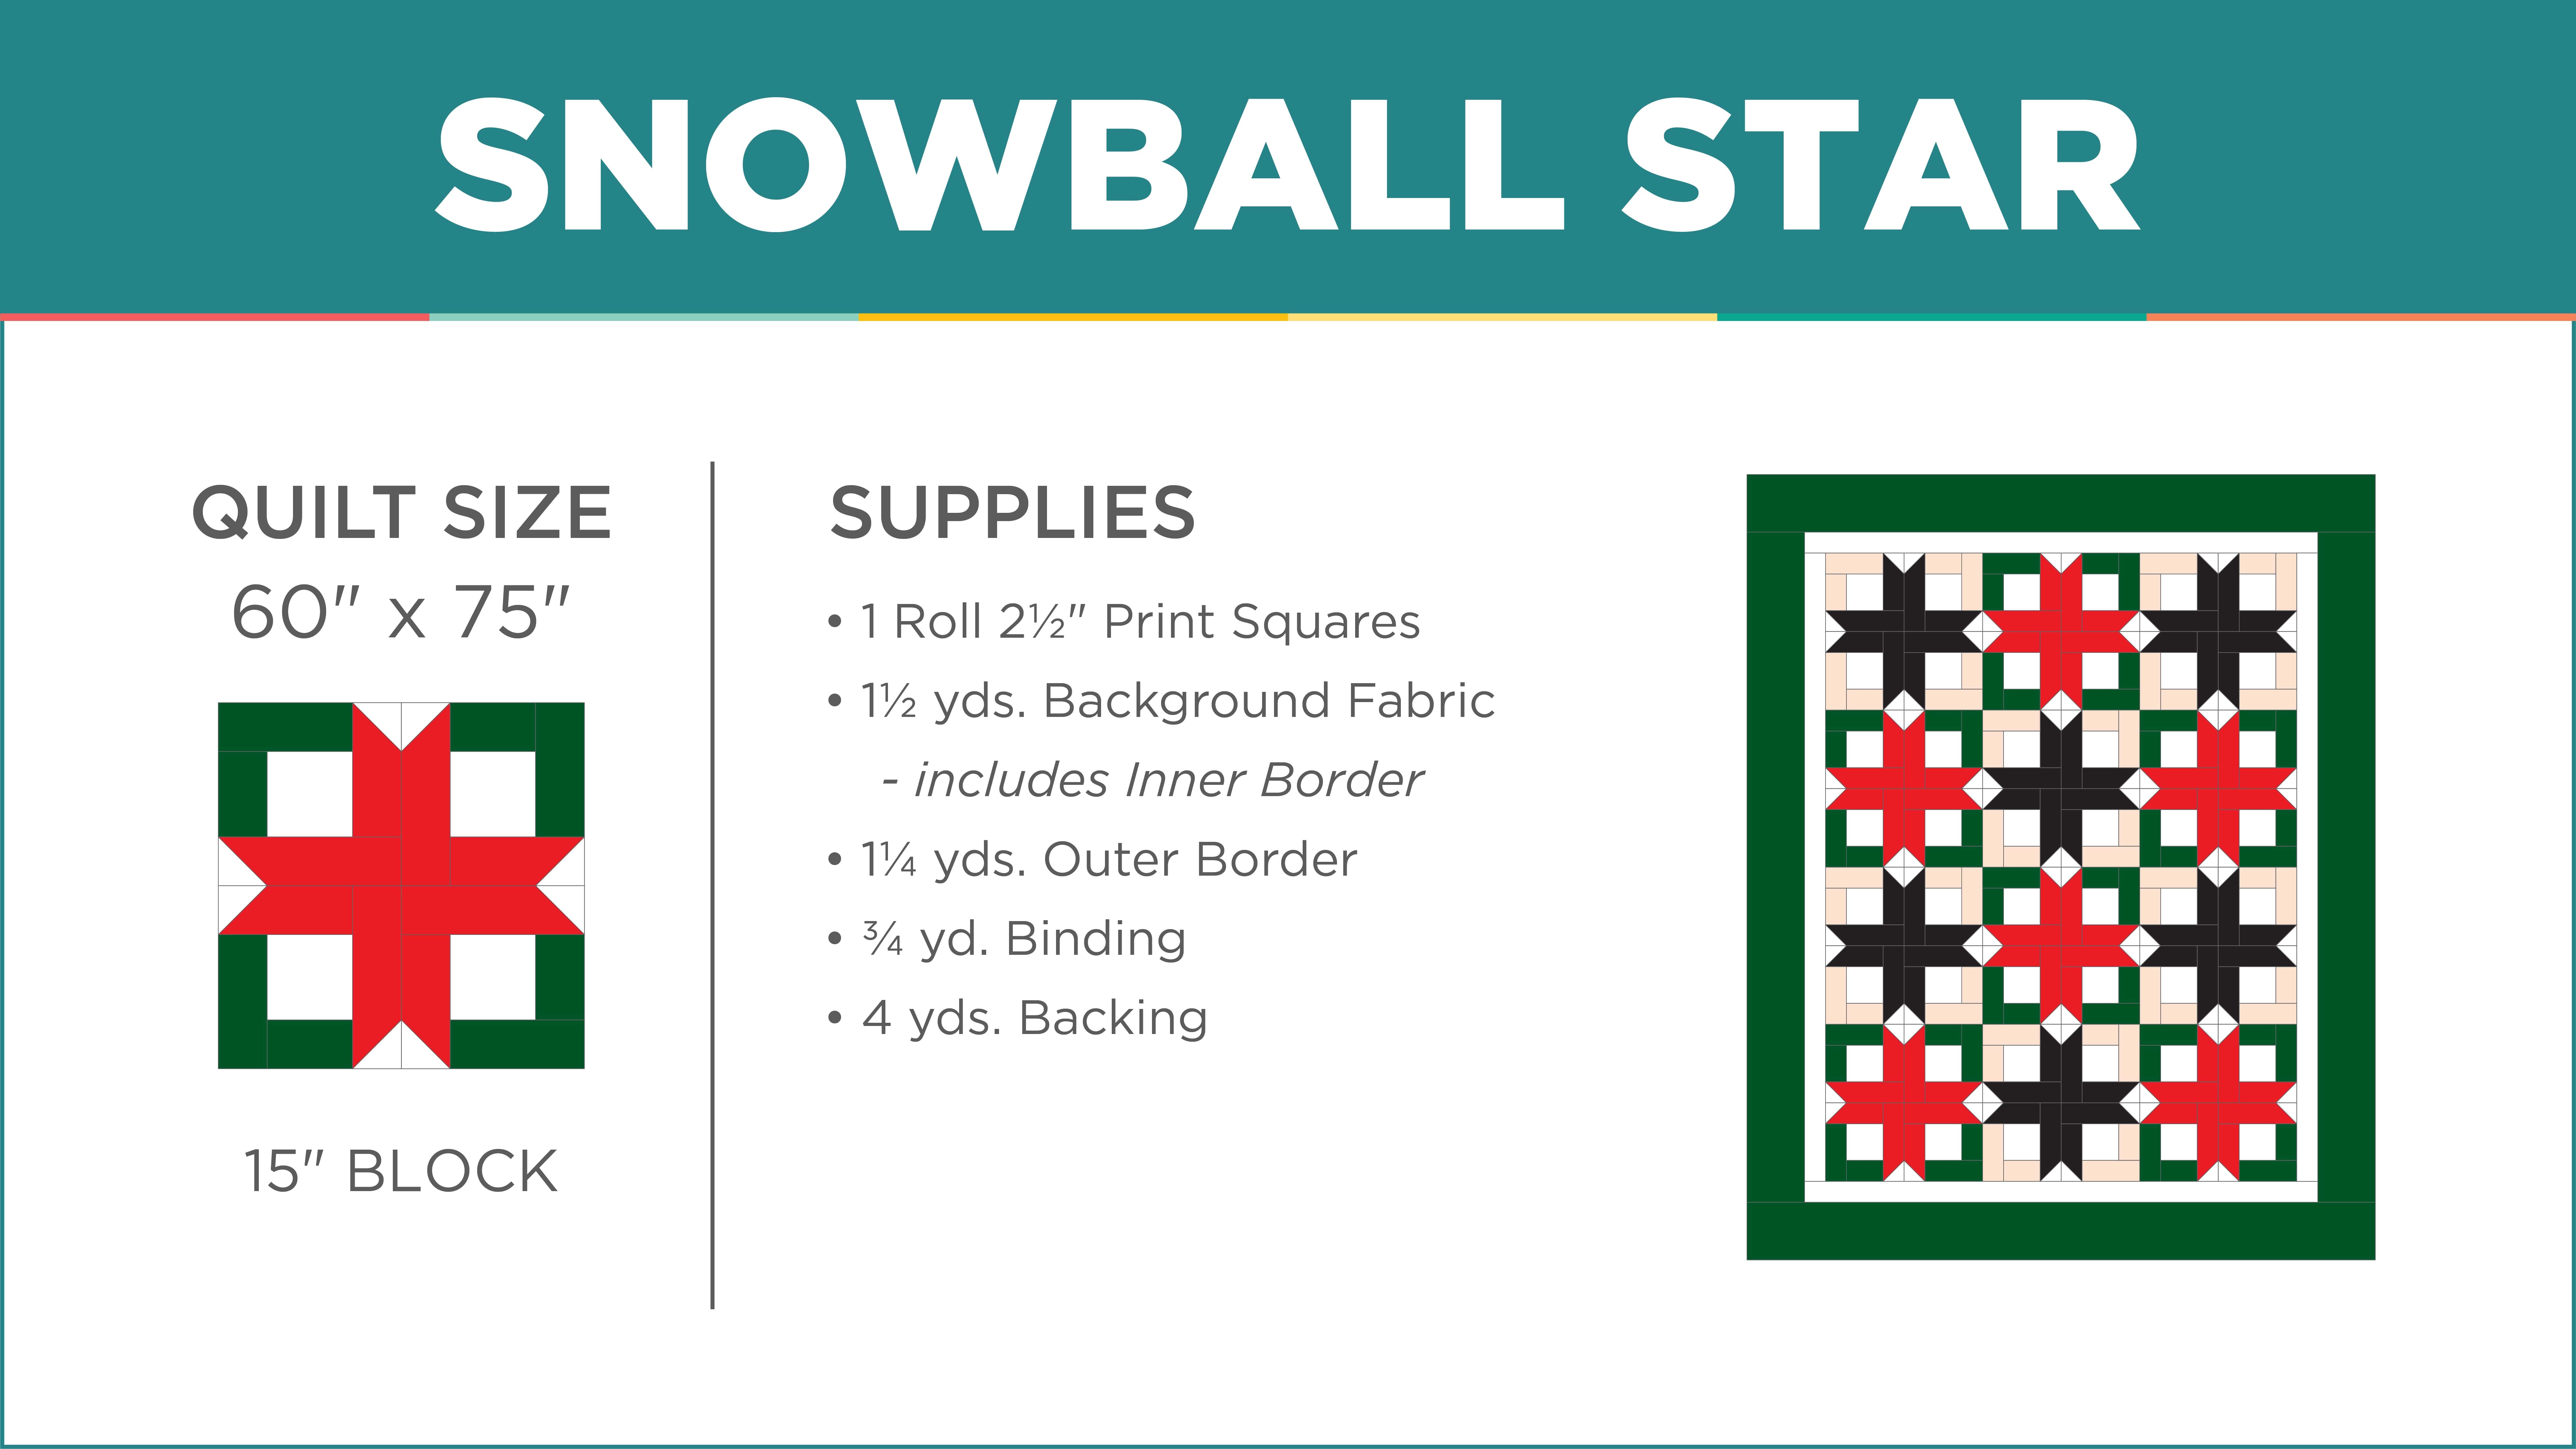
The Snowball Star is a quick and easy jelly roll pattern. We’re using Ombre Snowflake Metallic strips, and every block is made special with – you guessed it – snowballed corners! Click HERE to watch the tutorial!

The Snowball Star Quilt from Missouri Star Quilt Co. Watch the free quilt tutorial today.
Watch the Latest Tutorial from Missouri Star Quilt Co!

Amy Smart’s Patchwork Forest Using 10″ Squares and Fat Quarters

CLICK HERE to watch the Facebook Live video that teaches this project!

A few years ago, our friend Amy Smart (Diary of a Quilter) came out with a free Patchwork Forest Wall Hanging Tutorial that people are still talking about and making in every which way they can imagine! We love it, especially the free improv method she uses for creating the tree shapes! Every tree is slightly different and that’s what makes it so fun to make and such a cute finished project! So, we’ve collaborated with Amy and are excited to be able to share these new cutting instructions so that you can make the same great Patchwork Forest blocks using precuts! We’re focusing specifically on 10″ squares and fat quarters and hope this makes you even more excited to try out this fun, improv pattern!

First, let’s start with the 10″ squares.

Supplies Needed:

  • 1 Pack Holiday Themed 10″ squares (42 squares)
  • 1/4 yard Brown/Gray fabric for tree stumps
  • Backing Fabric
  • Binding Fabric

If you think about the ultimate shape of your blocks, they are not square, but are taller than they are wide. so, if you start with 10″ squares, you will cut off a 2.5″ strip to save for border, binding, or another project. Once you’ve done that, you will cut another 2.5″ off the bottom and then divide those into 2 parts, which makes your fabric look like this.

Patchwork Forest with 10" Squares

These cutting instructions feature The Cat in the Hat Christmas Ten Squares by Dr. Seuss for Robert Kaufman. Isn’t it adorable?

At this point you will want to divide your fabrics into complementary pairs.

When you start to cut your trees, you will stack your 2 fabrics together first, then cut out your tree shape.

Patchwork Forest with 10" Squares

When you create your tree shapes, make sure to leave enough room for seams on the sides and at the top. Once you’ve cut your desired tree shape, swap the center fabrics so it looks something like this (Each pair should be cut slightly differently to achieve the improv effect).

Patchwork Forest with 10" Squares

To make the tree stump (1.25″ x 2.5″), you will want to sew it to the (2) 2.5″ x 3.75″ rectangles as shown. Here are some great fabric options for your tree stumps:

In Amy’s original tutorial, she shows that you should sew your tree to the short side of the background fabric first, then to the long side. Make sure to place your point past the edge to allow for the 1/4″ seam allowance. There will be some trimming required, but I like to wait until I’ve sewn all the blocks to make sure I’m trimming them all to the same size!

Finished Block Size: Approximately 6.75″ x 9″

If you use your entire pack of 10″ squares, you can make a wall hanging or small quilt that is 7 blocks across and 6 blocks down (42 total). That will make your finished project approximately 43″ X 60.5″ (or bigger if you want to use your leftover 2.5″ strips to make a piano key border! The result is so fun!

You can see that this project makes a really adorable, whimsical project, but I want to assure you that it can also be very elegant and beautiful with different fabrics!

Now, let’s talk about the cutting instructions when you’re making this project out of Fat Quarters!

I whipped up a table runner using a few fat quarters that has a completely different feel to it! I used this Holiday Flourish 10 Holiday Metallic Fat Quarter Bundle for Robert Kaufman.

Supplies Needed

  • 3-6 Fat Quarters (depending on the variety you would like in your design)
  • Brown Scrap Fabric measuring 2.25″ x7.5″ (divide into 6 strips that are 1.25″ x 2.25″)
  • Backing Fabric
  • Binding Fabric (1 Fat Quarter cut into 2.5″ strips is plenty)

Cut each fat quarter into (4) 8″ x 10.25″ rectangles (If you’re only going to make one table runner, then you can just use half of each fat quarter and cut TWO of the 8″ x 10.25″ rectangles. If you cut it in half lengthwise to get the two, then you could use the remaining fabric for binding or even a pieced backing)

Finished Block Size: Approximately 7.25″ x 9.25″

The table runner is made up of 12 blocks. The Finished Table Runner size is approximately 17″ by 39.5″

Patchwork Forest Christmas Trees Table Topper

Using 6 fat quarters, I was able to make 24 blocks (I wanted the variety of 6 different fabrics), so in addition to the finished table runner shown, I have 12 more blocks ready to make a second table runner for a gift! Or, of course, you could certainly make a larger wall hanging with your 24 blocks. With some of the remaining fat quarters, I cut them into long strips to make a scrappy backing. This is a fun, carefree, improve project, so have fun with it and make it your own! #holidaypatchworkforest
2016 Christmas in July Retreat Recap

MSQC Retreat Recap on the Blog!

IMG_0402 7

Merry Christmas (in July) from Santa and Mrs. Claus at Missouri Star Quilt Company! July is the perfect time of the year for quilters to start preparing for holiday gift giving. It makes us feel like we’re ahead of the game for a while, and then by the time Christmas rolls around we’ll be scrambling to finish up a few less quilts on Christmas Eve. 😉

IMG_0375 2

Show and tell time at retreats is one of our favorites. It’s always fun to see what others have been working on, what fabrics they’ve chosen and how one pattern can have look so different when made in various fabric lines. Isn’t this blue, yellow and white Dresden Flower Quilt darling??

IMG_0347

Michele Schneider made the same Dresden Flower pattern using Christmas fabrics and it turned out so cute as well!

Photo Jul 08, 2 42 42 PM (1)

Patrcia Jackson made her Dresden Flower Quilt in blue and white snowflake fabric for a fun quilt that will be great to cuddle up in all winter!

Jackie Smith from TX

Jackie Smith worked on this Jelly Roll Race Quilt that’s going to be a Christmas gift for her grandson. He’s going to love it! She used two Jelly Rolls and doubled the size of the quilt. Find out how you can do that same HERE.

IMG_0344

We absolutely loved this shirt! It’s too cute and so true!

IMG_0410

A huge thanks to everyone who came and participated in our Christmas in July Retreats this year, it was a blast having you all here and we hope to see you again soon!

Christmas_in_July_Retreat_July_6-9

ChristmasInJulyRetreat_07-28-16_RE

For more information on events and retreats at Missouri Star Quilt Company click HERE!

New Friday Tutorial: The Sewing Machine Pad

MSQC New Tutorial on the Blog!

sewing machine pad pinnable

Merry Christmas from Jenny’s Studio! Today Jenny has created something that is a gift JUST FOR YOU! It’s a Machine Sewing Pad with pockets that you can make any size! Plus, you’ll learn how to use one of Jenny’s favorite products, Steam-a-Seam, which will seriously improve your relationship with the binding process!

Jenny Sewing Machine Pad

Click on the button to watch the tutorial and start removing some of the stresses from your life (your scissors will never go missing again!). Merry Christmas and Happy New Year!!

shop for supplies tutorial button


New Friday Tutorial: The One Seam Flying Geese Quilt & Advent Wall Hanging

MSQC New Tutorial on the Blog!

flying geese pinnable

Have you ever drooled over a quilt pattern and then been super discouraged by how much is involved in creating it? Well, I love flying geese, but sometimes I just want something a little simpler, so I am so excited about this method of making a flying geese. You won’t believe how easy it is!

Screenshot 2015-12-10 11.03.36

Here’s a basic preview of how to make this amazing block! You’re definitely going to want to watch this one to catch all the details!

flyinggeesegif

Jenny came up with a darling bonus project using this same method! Look at this great holiday wall hanging!

Jenny Flying Geese web

When you sew your flying geese together, it creates little pockets on either side, so Jenny created this Christmas-y layout with 24 pockets that makes a little Christmas Advent Calendar! You could applique some numbers on there and really personalize it to make something really sweet!

We even created some super cute printables to use for the advent for some fun things you can do each day with your family! You can download it here:

christmas-bucketlist-banner-14

Or you could just use it as a festive wall hanging and fill the pockets with Christmas cards or wrapped candies! You can do whatever you want!

advent close up

flying geese advent pinnable

CLICK THE BUTTON TO WATCH THE VIDEO AND SHOP FOR SUPPLIES!

shop for supplies tutorial button