We had the privilege week ago of hosting the girls of the 4-H group here in Hamilton. They came to the shop to learn basic sewing skills, and by the time they left they were almost pro’s. Each girl got to pick out her favorite fabric from any bolt in the shop and then pick out the needed accessories (for this project it was a piece of coordinating jumbo ric rac). After the shopping was done the girls all sat down at their own sewing machine and used the skills they had been taught to put together their
own fun pillow cases.
Mom told the girls that her first experience with sewing happened in 4H for her as well. She said “this is where I learned to sew, and have loved it ever since.” She reminded them that sewing is a learned skill, and it takes practice to be better. Not to get frustrated because it isn’t perfect, just keep trying. In the end, they had fun and so did we!
Where did you have your first sewing experience? What got you into this hobby, anyway? I’d love to know.
You all have a great weekend. I am hoping to get a little cleaning done, some thrifting, and maybe a few paint projects going….oh, and also some sewing. I am STILL working on my disappearing nine patch. (don’t judge) Wish me luck….really. I need it!
Easy “Broken Leg” Applique
I consider myself a “piecing quilter “, not an applique quilter. But when you are desperate for a project and can’t get out of bed…You acquire new skills. I must say this is not the first time I have broken a leg and the last time I did , my good friend Amy, who is an amazing appliquer,told me that now that I couldn’t get away from her, she was going to teach me. So now I will teach you! There are amazing tools and helps out there, but not having them ,shouldn’t stop you from doing what you need to survive! and to survive I need to SEW!
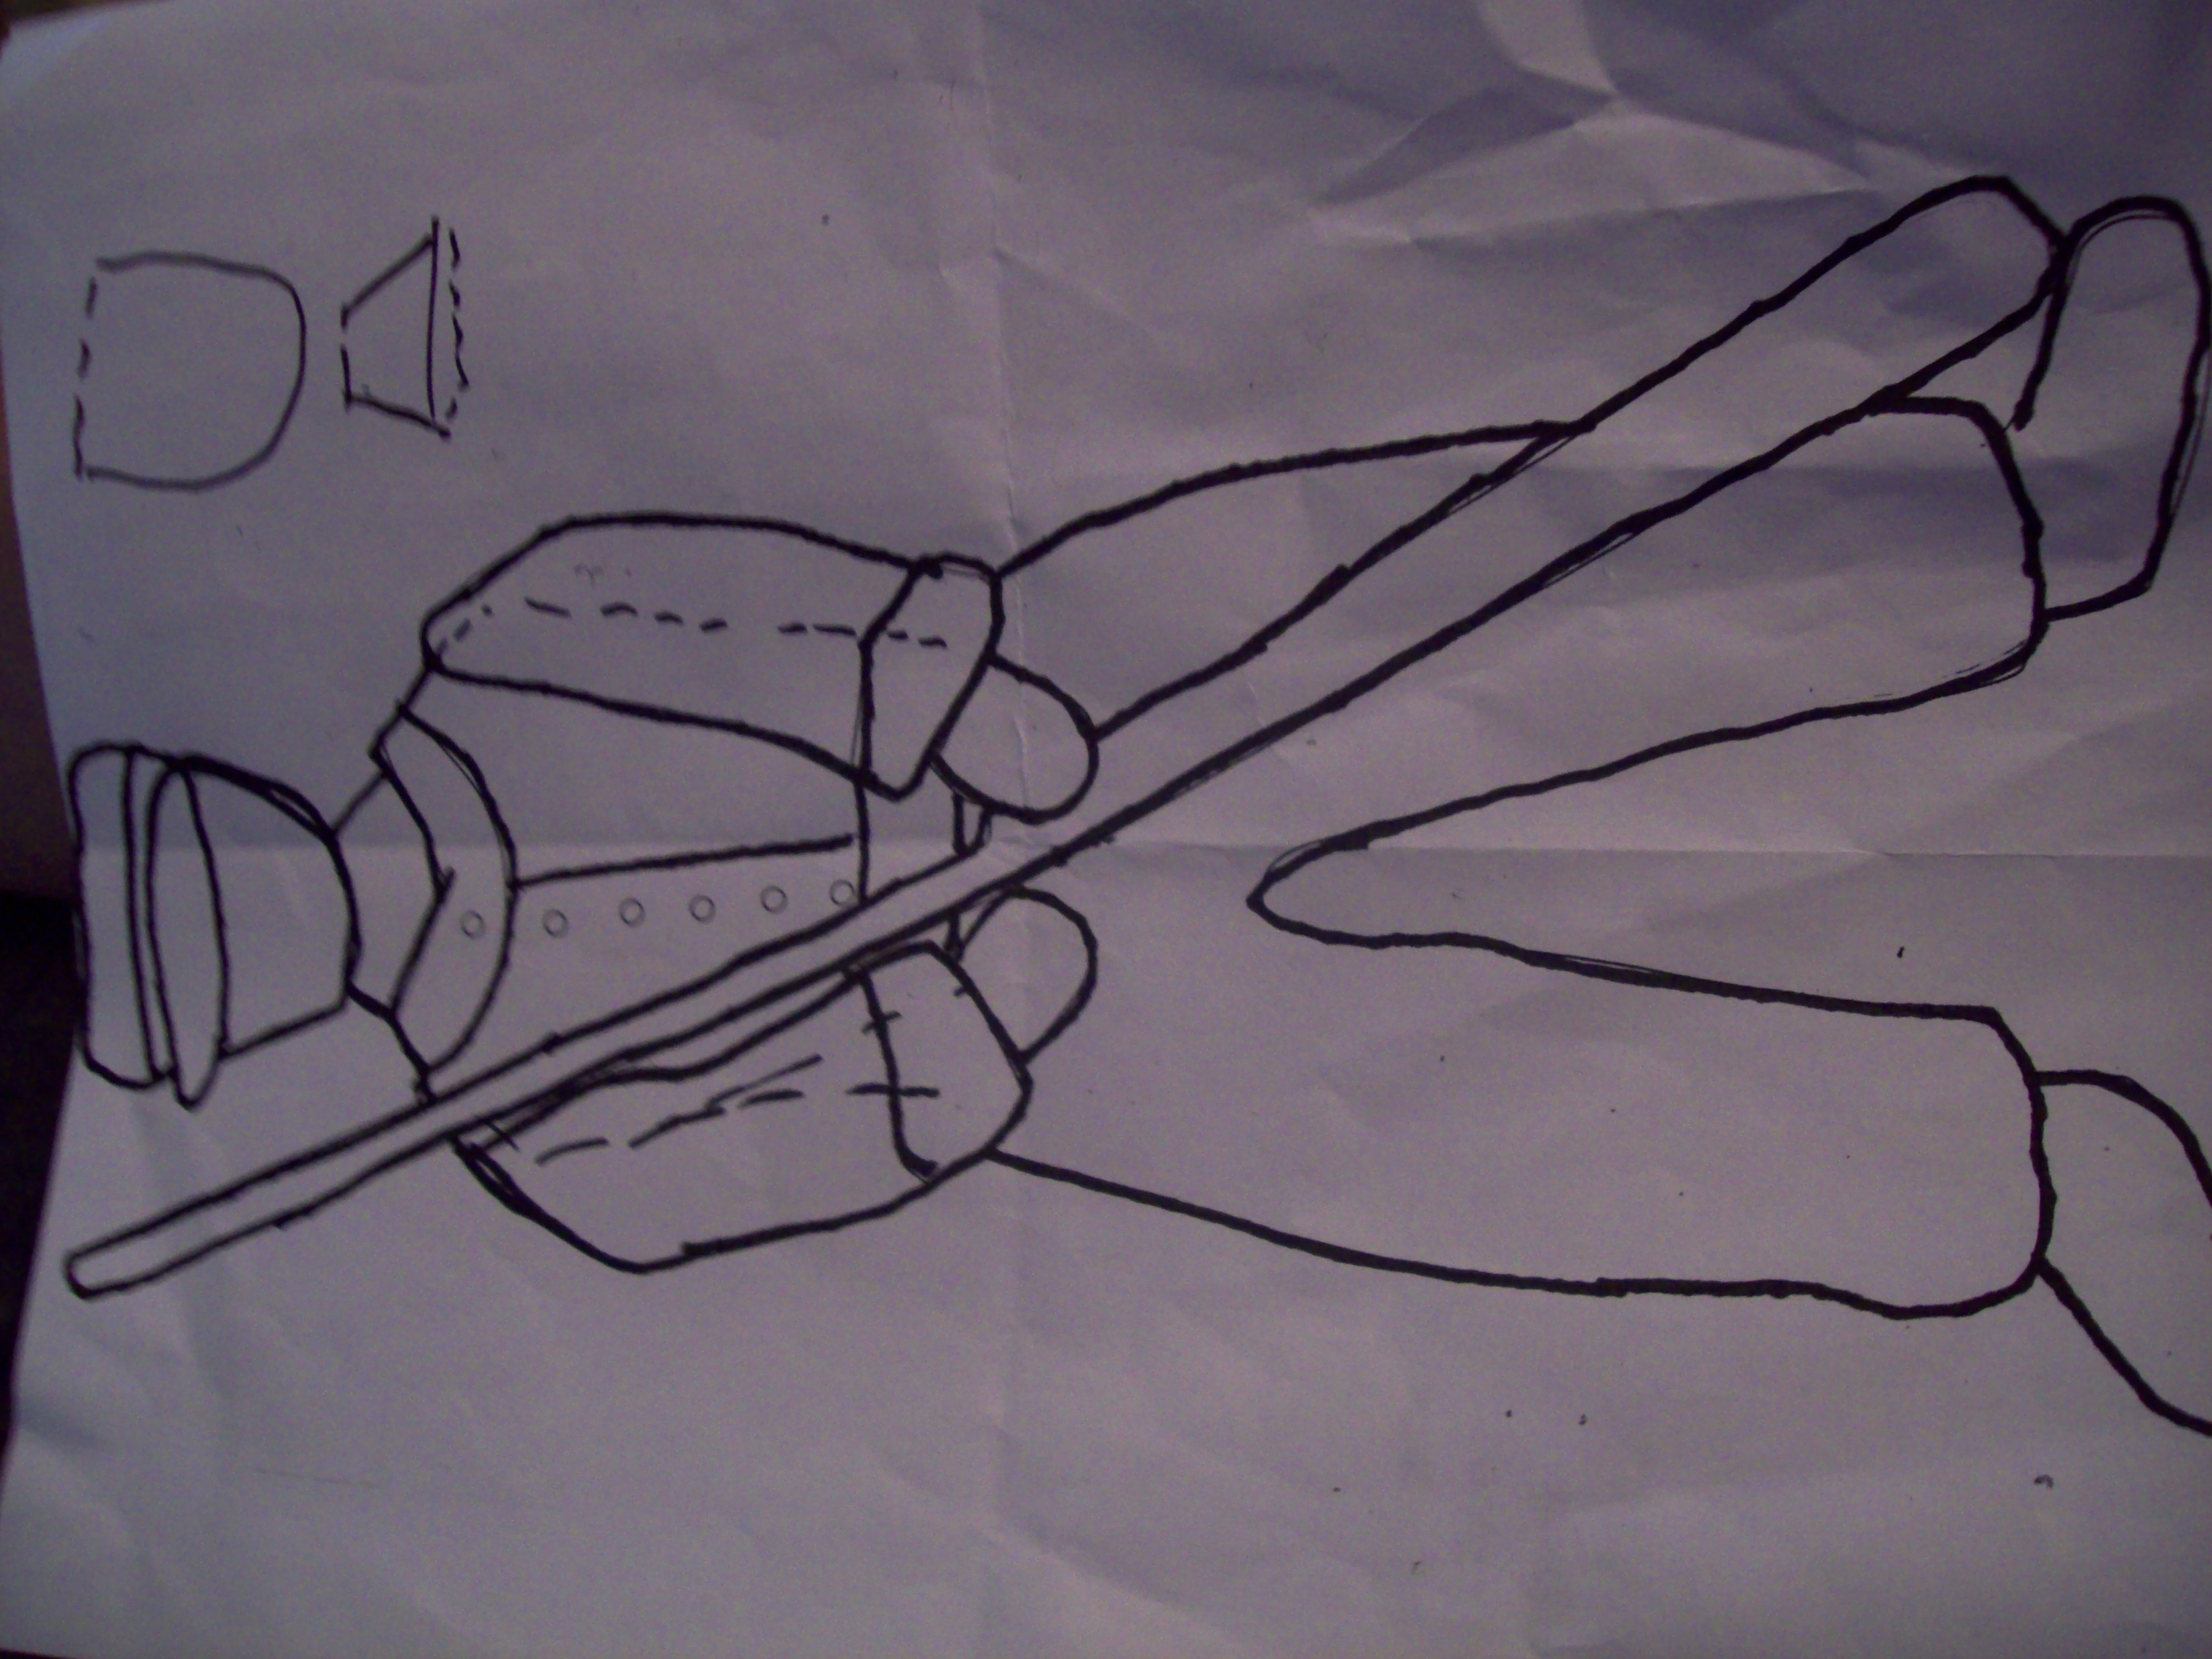
Start with an easy picture..A coloring book works nicely. Make the lines darker so that you can see through it to trace. This is because we don’t have light boxes in our beds!
Coloring book page
Also lightly trace it on to your background square as this will help with the placement.
Then trace each individual part on to scrap paper.
Trace all pieces
Then you have your children, grandchildren, or husband gather up scraps of fabric and put them in a bag by your bed.
Then you want to choose the fabric you want and using your paper pattern you trace around it.
Scrap Bag!
I do have an applique board that my husband made for me that makes the tracing so much easier. To make the applique board, You take a piece of fine grit sandpaper and glue it to a piece of wood. This becomes your drawing table and holds the fabric in place making it easy to trace.
Easy to make applique board
You trace your entire piece and cut out about 1/4 inch on the outside of the trace line.
Trace around piece
Now comes the fun part…since I don’t keep freezer paper in my bed, I don’t use it and I also don’t have an iron so we finger press.
Finger press
Take your cut piece of fabric and fold it on the traced line and press down with your thumb nails. Do this all around the fabric. Having this edge finger pressed down will help with the sewing.
Lay your fabric pattern down on the background fabric and loosely pin in place.
Loosely Pin
Choose thread that matches your applique fabric and bring up your thread out through the fold.
Needle turn and sew
Use your needle to fold under the 1/4 edge. Bring you needle up thru the fold of the fabric and STRAIGHT down to anchor the stitch and continue sewing. So you fold, bring needle thru the fold, straight down and anchor and come back up thru the fold . You stitches should be about 1/8 of an inch apart.
Stitch
I generally start placing pieces from the bottom and work up, or inside and work out. And after awhile you will have a completed applique.
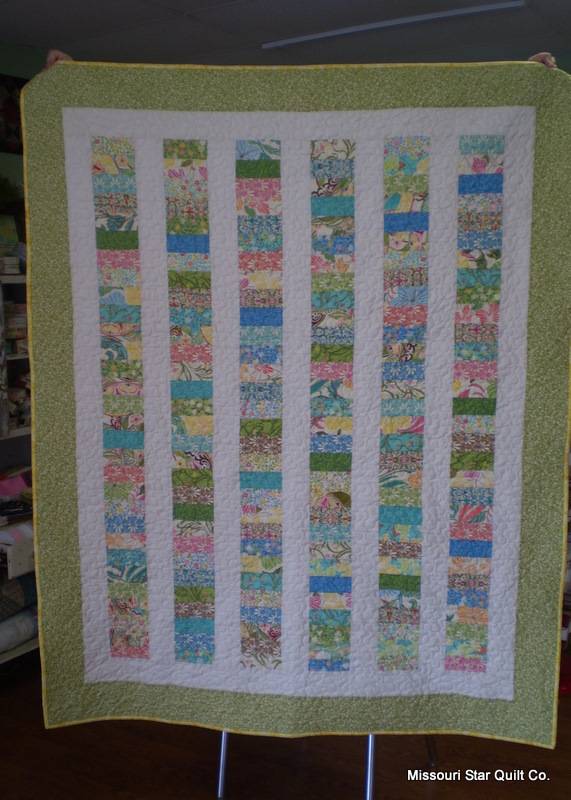
This line of fabric is absolutely beautiful! I knew when I first saw it that I HAD to make something out of it! I also wanted to make a coins quilt, they are just so cool! 🙂
So I decided to put the two ideas together and this little beauty was born! I AM IN LOVE!!! Here she is…my first Coins quilt. I followed AmandaJeans tutorial on the Moda BakeShop pretty closely…except, I used three charm packs because I wanted mine to be a little bigger. Its roughly twin size. So, grab your charm packs and get started. This one really is a breeze!
My, oh my, what a wonderful day! Plenty of sunshine, heading my way…Oh sorry:)
This is my inspiration:It’s a darling quilt from the cover of the Quilts and More magazine…I was looking at it and realized that it was made with half square triangles. Wow! I thought, I could do this with a charm pack.
So, I took two Zippity Doo Dah charm packs and made half square triangles using Kona Muslin (80 5in. squares) then laid them out…It was much easier than it looks! My kind of quilt! I am so pleased with the results…Here’s mine all finished up: I love how the striped squares turned into zig zags. This has got to be the cutest Americana Fabric! I can’t wait for picnic season to get here! For the magazine and pattern click HERE.
Whew, we have been so busy lately! This one is just gorgeous! It is made out of batiks, with a few other brights mixed in. It is so bright and cheerful! SUCH a fun quilt!
This next one is really cool to look at. It is done in a pattern called attic windows. and it amazes me. It is so three dimensional and geometric. I love it! Our local quilters just keep amazing us…quilt after quilt! WOW! You ladies are awesome!


 I followed
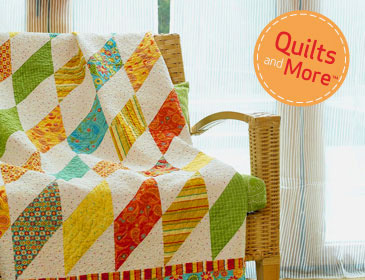
 It’s a darling quilt from the cover of the Quilts and More magazine…I was looking at it and realized that it was made with half square triangles. Wow! I thought, I could do this with a charm pack.
 I love how the striped squares turned into zig zags. This has got to be the cutest Americana Fabric! I can’t wait for picnic season to get here! For the magazine and pattern click
 Whew, we have been so busy lately! This one is just gorgeous! It is made out of batiks, with a few other brights mixed in. It is so bright and cheerful! SUCH a fun quilt!
 Our local quilters just keep amazing us…quilt after quilt! WOW! You ladies are awesome!