Quilting superstar Amy Barickman from Indygo Junction is here to team up with Jenny for a new tutorial, the Denim Strip Quilt! This is a great quilt for beginners because it looks so much more difficult than it is, so you can show off your skills without pulling your hair out! It doesn’t even require binding (though you could absolutely construct it like a traditional quilt with binding)!
Amy Barickman’s Crossroads Denim fabrics are a dream to work with! They are so soft and come in so many gorgeous colors that you’ll definitely be making a list of all the things you can make with it!
This quilt was inspired by this pillow that Amy had made and we just had to turn it into a quilt!!
Click on the button below to watch the tutorial and get all the supplies you need to make this beautiful quilt! Happy Quilting!
Some quilt tutorials are pure inspiration, some are adaptations of old classic patterns so they’re precut-friendly… and some tutorials are more personal! The Tiny Wonky Stars Quilt came about because Jenny’s granddaughter was headed off to college and obviously needed a quilt for her new digs!
All you need to make this quilt is some 2.5″ strips and some yardage! Let your imagination go wild, the possibilities are endless. Imagine this quilt in crazy bright colors, or make the stars yellow with a navy background! You could even arrange the blocks to create your favorite constellation!
Click to watch the tutorial and get all the supplies you need for this quilt!
Sometimes I want to piece something together and I just want to be able to go and do it without following a pattern. There’s something so wonderful about improvising a quilt and then having it turn out great! This Stacks Quilt is just the perfect way to do that!
All you need is some 2.5″ strips and some yardage for the border and you’re set! Just think of all the different fabric combinations that would make this quilt so unique and exciting. 🙂
Have you ever seen a block this simple?? This is the ideal quilt for book-lovers everywhere too! Imagine adding your favorite titles to a few of the blocks for that extra little touch. Click on the button to watch the tutorial and find all the supplies you need to create your own version of the Stacks Quilt!
I just love the look of quilts that have the most beautiful flower quilt patterns… they just always look so difficult to achieve! That’s why we’ve adapted this gorgeous Prairie Flower Quilt to be made with our best friends, precuts! This one in particular is made with 10″ squares and the result is just stunning!
Here is your basic supply list as well as the finished size of the quilt if you want to make it exactly the way that Jenny Doan made it!
Click on the button to watch the tutorial and find all the supplies you need to create your own version of the Prairie Flower Quilt!
Hi Y’all. I’m Cristina Tepsick from Pretty Little Quilts and I’m really excited to be here today! I’m a mother of three, an active duty member of the US Air Force, and a quilter. I started quilting a few years ago to occupy my time when I had to be separated from my family, and although those months were miserably lonely, quilting gave me a tangible way that I could express my love for them. It makes me teary just thinking about it, but I don’t want to depress everyone, so let’s get started with the tutorial!
Today I’m going to be showing you what I did with Jenny’s Broken Bars tutorial. When I was looking at her quilt it reminded me of rows of books. I absolutely love reading, so I knew this was the project for me. It’s such a simple project that yields some amazing results.
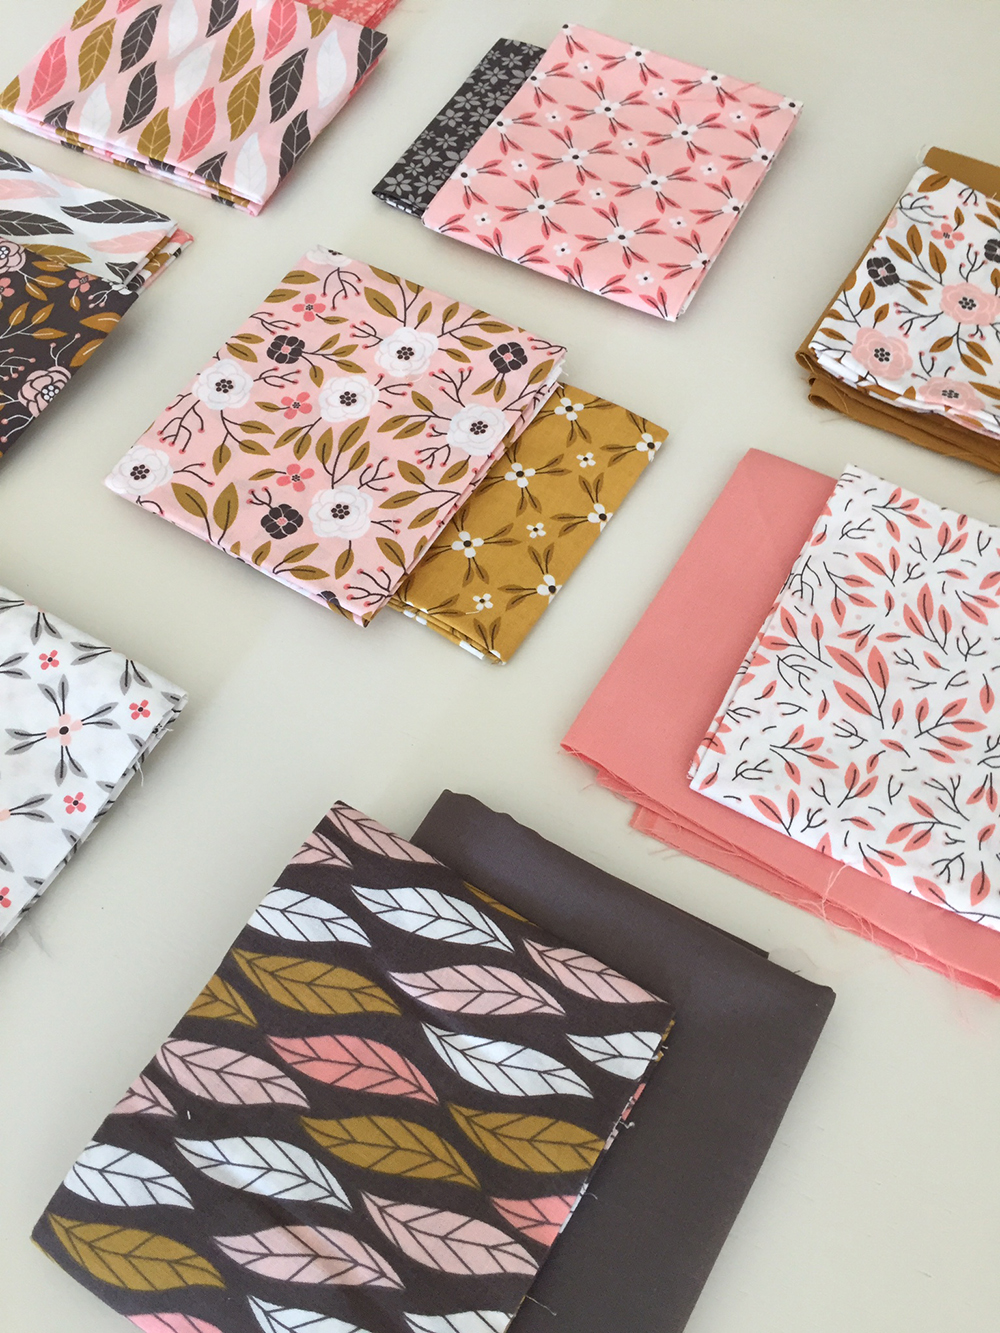
I used a fat quarter bundle of Magnolia fabric by Camelot Designs, and coordinated it with some Bella Solids. Although this fabric is modern, the warm color palette and florals really give it a romantic feel, and in the quilt it reminds me of a Jane Austen library.
To make the quilt, I first took my fat quarters and paired them up in sets of two.
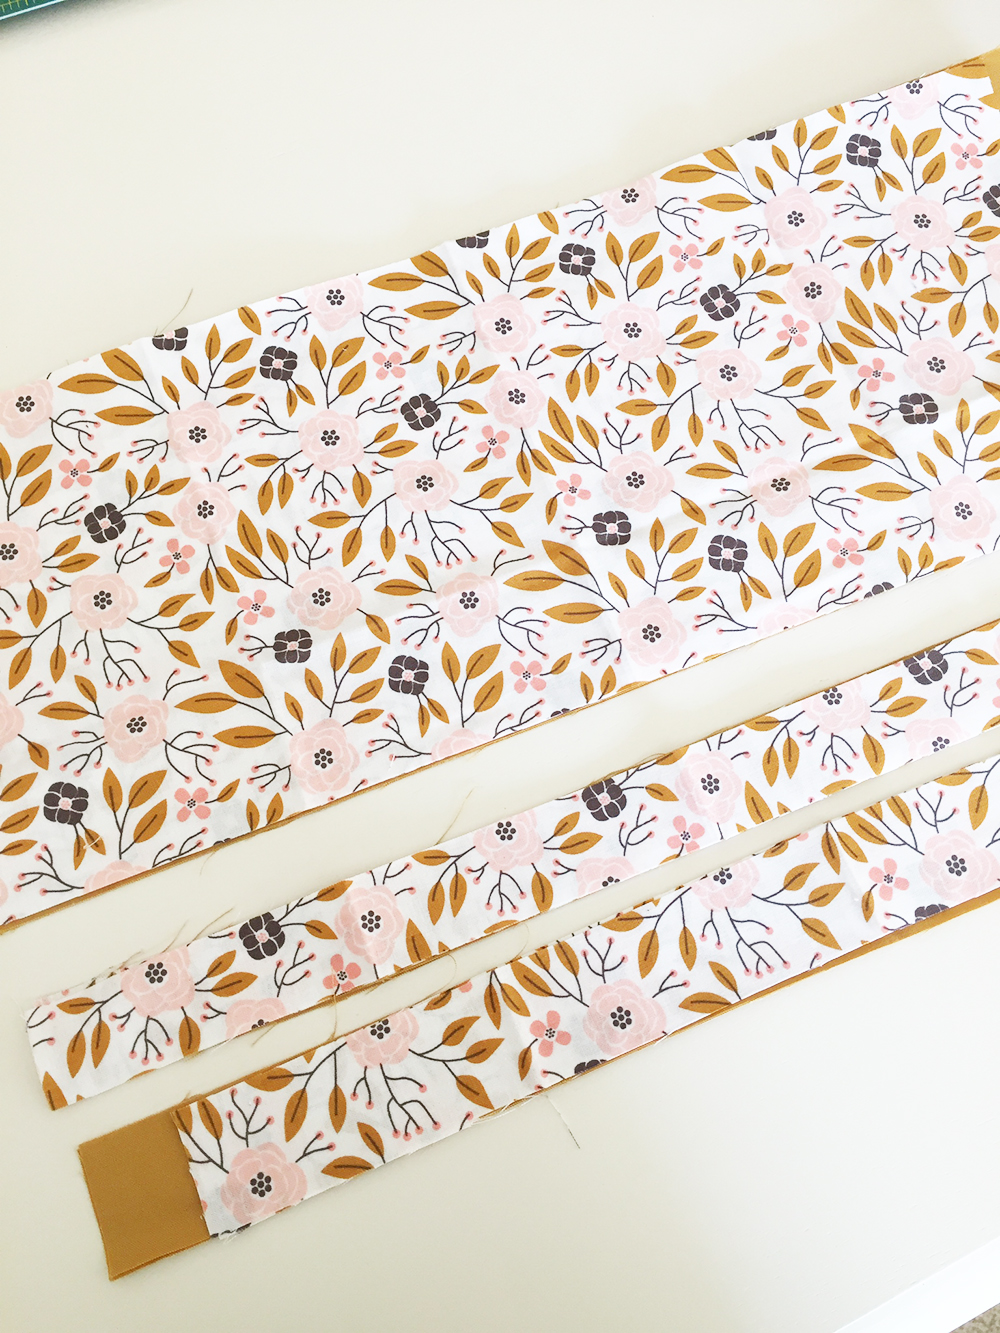
Then I cut the pairs of fabric into strips between 7-11 inches. In Jenny’s tutorial you’ll see how she made hers into 10in strips and I used her method, with the exception of changing up the sizes. You really want to vary your strip sizes of your patterned fabric to give it that authentic bookshelf feel.
To give it a little more detail, I cut smaller strips of fabric (1in-2in) from each of the fat quarters and used the coordinating fabric (from the sets) to give it a little more interest. Let me show you how I did it in this one:
First took a set of 10in strips. Then I cut some 1 1/2in strips off the bottom.
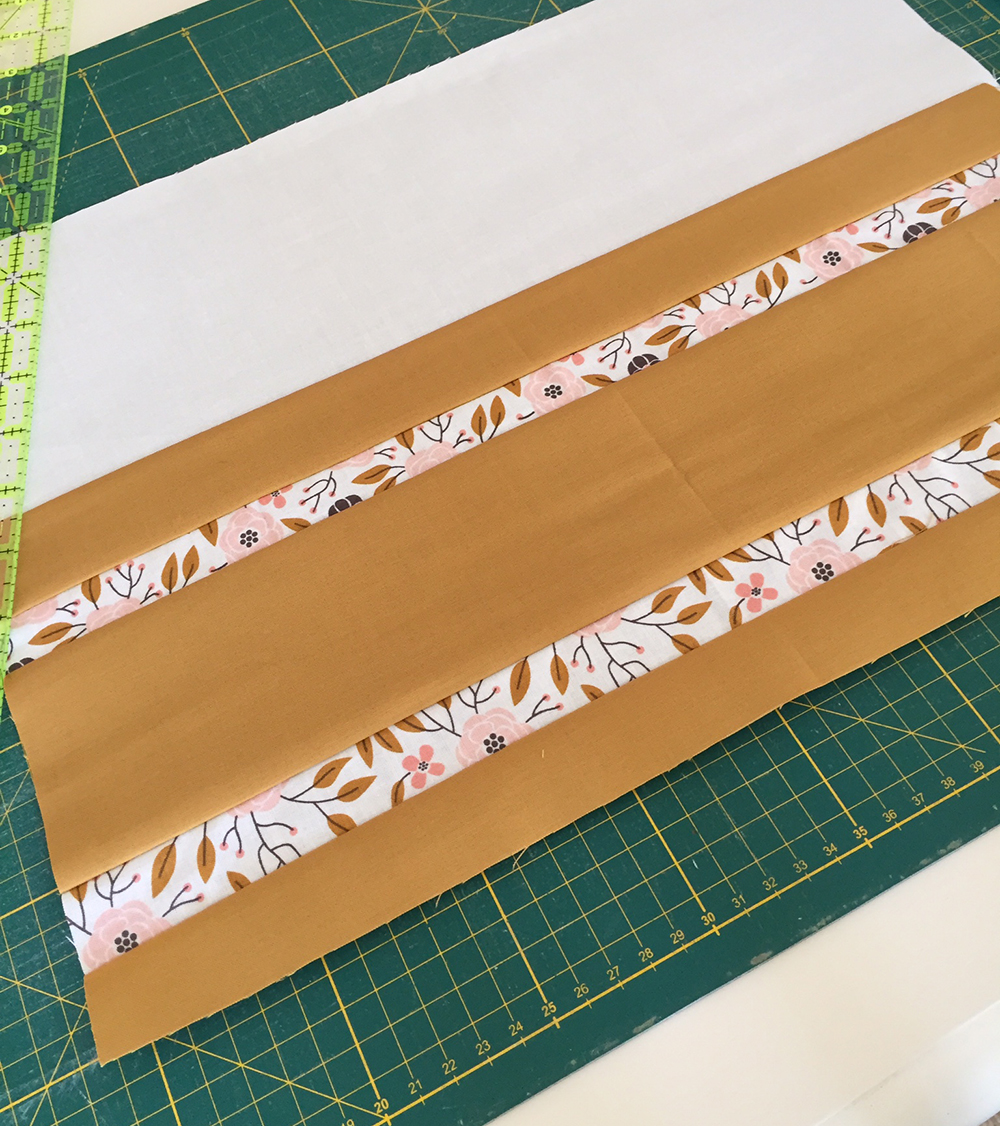
I had a remaining 7in strip piece that I cut into three parts and sewed the 1 1/2 strips of the alternating fabric in between. Then I cut a strip of white fabric and sewed it to the top. My final rows were 12in, but I cut the white strips so the row would be a little taller so I could trim them down later. (Note: Since each of the colored fabric are different sizes, each of your white strips will also be different sizes to meet the 12in row size.)
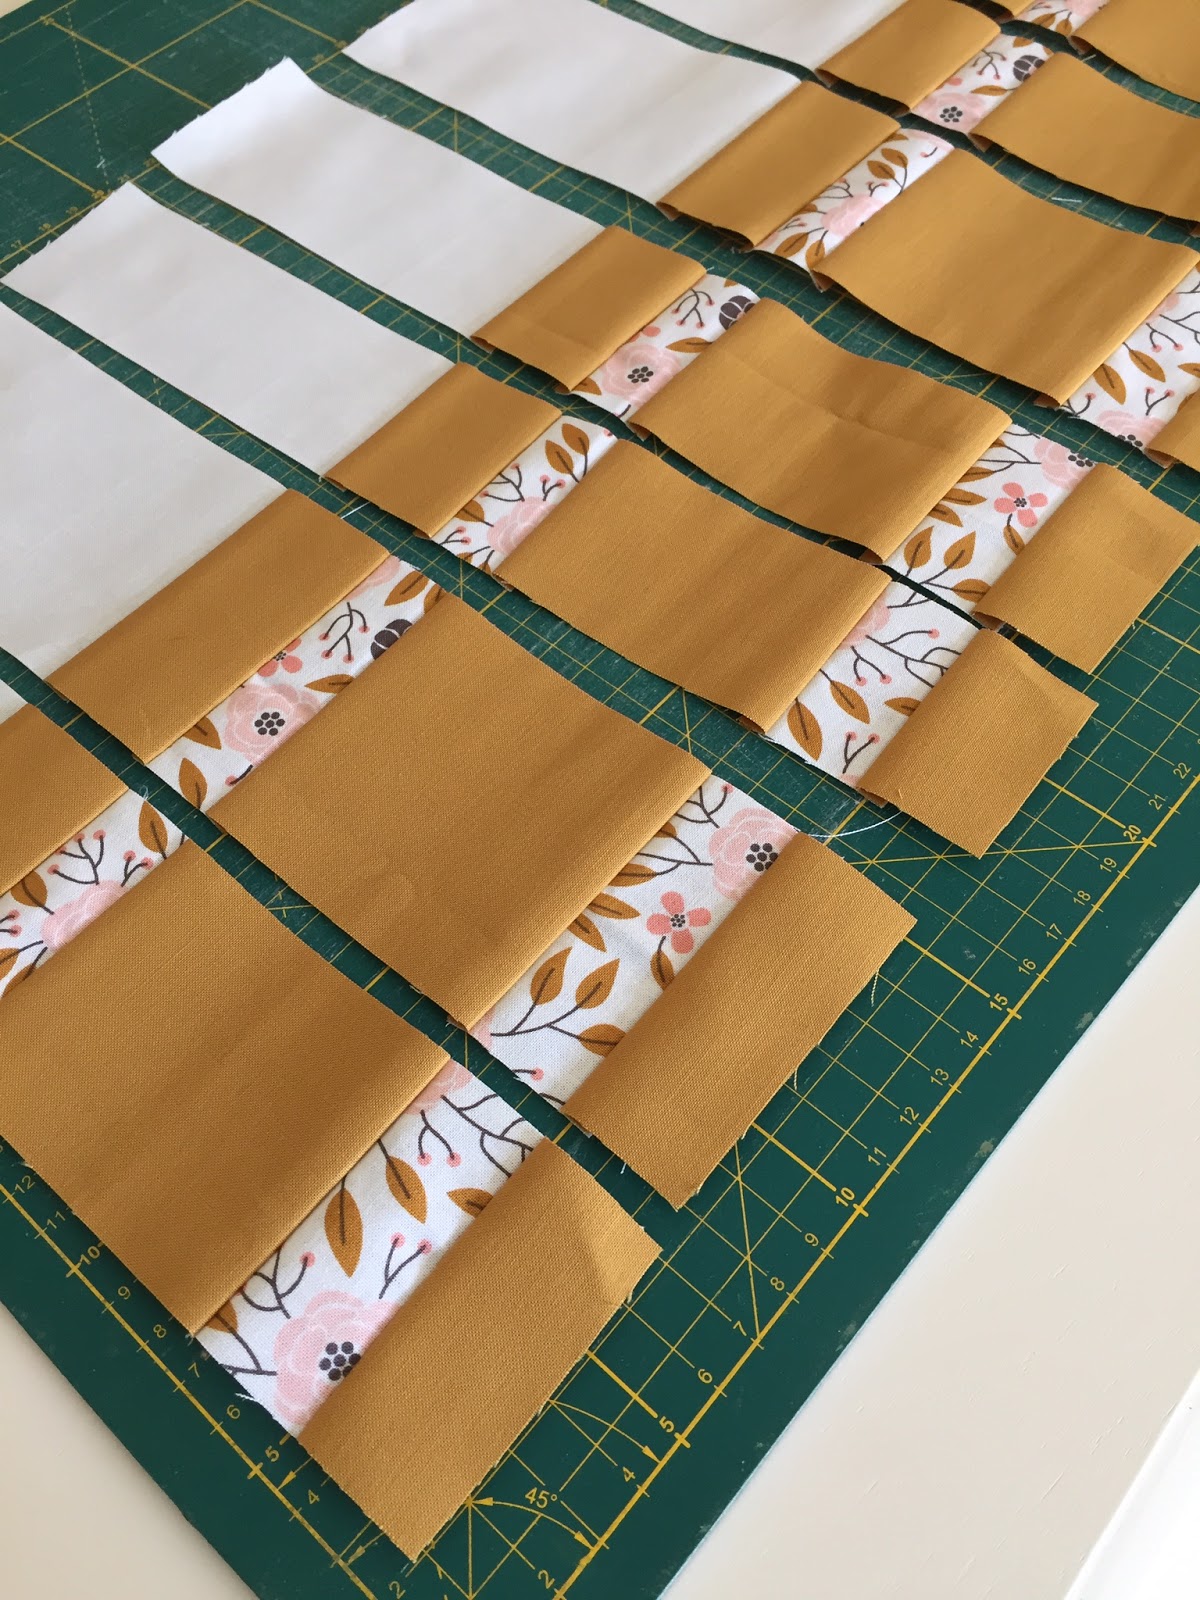
Once you have that all together, just use your ruler to cut your “bars”. I varied the width of each of mine from 2in-3 1/2in, but the great thing about this project, is there are no specific rules, so you cut them however you like.
I made each of my strip sets different, and the funnest part was sewing them together into blocks. A good tip in Jenny’s tutorial that I would like to emphasize is deciding how many bars (or books) you want in each block, because the more bars you add the wonkier it gets. Each of my blocks were 10 bars (or about 20 inches) and I had used two per row.
Then the hard part was done. It’s a no borders quilt, but you could absolutely add borders or strips of fabric between each row to make it look more like a bookshelf.
This was a really fun and easy project and I hope it gives you some inspiration for making your own quilt!! To see more of my work you can follow my blog, Pretty Little Quilts, or follow me on Instagram @prettylittlequilts.
THANK YOU, Cristina!! We loved having you and love what you’ve done with the Broken Bars pattern!!! If you’ve made it this far in the post, we’ve decided to do a little giveaway to go with this fun project! We’re giving away 1 Magnolia Fat Quarter Bundle to one quilter! Here’s what you have to do to win: