Quilts tend to bring out the nostalgia in folks. And it’s no wonder; there’s nothing quite as cozy as a well-loved quilt that is worn to a perfect softness, smells like heaven, and holds a lifetime of memories.
This week’s tutorial, The Wallflower Quilt, is a tribute to a very special quilt that belonged to Jenny’s daughter-in-law, Misty. Be sure to have a box of tissues close at hand! After all, quilts are love!
Here’s what you need to make this quilt. Click on the diagram to download a printable PDF.
Geese are well known for flying in neat little v-shaped formations. It’s orderly, it’s predictable, aaand…it’s a tad stuffy, don’t you think? Why not throw caution to the wind and give those geese a little freedom to roam? Turn up some sweet tunes and pass out a few fancy drinks just for kicks; really let those birdies shake a tail feather! This week’s Tangled Geese Quilt is a fun take on the traditional Flying Geese.
Add a little spice to your Flying Geese repertoire by trying out Jenny’s Tangled Geese Quilt!
Click on the button to watch the tutorial and see everything you need to make your own Tangled Geese Quilt!
Have you ever found yourself in the situation where you have beautiful fabrics and the cutest quilt pattern picked out, but then you can’t bear to cut your fabric up into such small pieces? The Friendship Star Sashing Quilt gives you the best of both worlds. You can keep your large 10″ squares without cutting into them, but still add a super cute flair to the sashing to give it a little something extra.
Here is all the info you need to create this quilt. You can click on the image to download a printable version of this as well!
Easter is right around the corner and that means it’s time for egg dying, a big family dinner and don’t forget the Easter egg hunt! The sun is shining, the flowers are blooming and it’s a happy time of year. We’ve compiled a few D.I.Y. projects for you to make in preparation for Easter! Jump in and give them a try, and this Easter will be one for the books! 🙂
Scrap Buster Easter Carrots!
Decorate your house with these cute Fabric Carrots! Wouldn’t they make an adorable center piece for Easter dinner??
Carrot Zipper Pouch!
Add a cute Carrot Zipper pouch to your child’s Easter Basket! The Easter Bunny encourages cute storage solutions! 😉
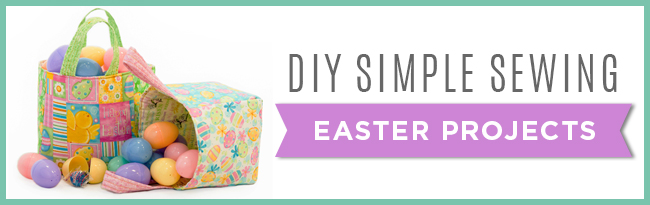
Easter Basket!
Make a special homemade Easter basket from the heart for the kiddos. This can be used year after year and it will be such a great Easter memory for them.
Super Hero Cape!
Spice up your Easter egg hunt with some super hero capes! Just image how fun it will be to have super heroes running around the yard hunting for eggs! 🙂
Hello, my name is Nicole Daksiewicz and I sew and blog over at Modern Handcraft, where I share my current projects and free sewing tutorials. I was so excited when they contacted me about joining the Tutorial Re-boot series here at Missouri Star Quilt Company. I have been a huge fan of the website and of Jenny’s since I first started quilting, and since joining the Sizzix Design team where they offer a huge assortment of MSQC dies that are so helpful!
One of the reasons I started quilting is that I was searching for nursery decor when I was pregnant with my first son and just couldn’t find anything that I loved. Fast forward to today’s project – my take on the Chopped Block Quilt which is a quilt I am making for my son’s Star Wars themed room. Kids bedding is a tricky one, usually the bed sets you find at the store are cheap quality and are not exactly the colors your child wants in his room. Luckily MSQC has a great assortment of novelty fabrics, including the Star Wars fabric I used in this project along with a pop of color that my son loves and matches the artwork we bought for his room.
The quilt I chose, the Chopped Block, is a beautifully simple quilt that was so so much fun to make. It can be very modern in appearance depending on the fabrics used and is a perfect project for a quilter that is just starting out! In the YouTube tutorial, Jenny uses pre-cut jelly rolls and charm packs.
The fabric we wanted to use unfortunately did not come in pre-cuts, but that doesn’t mean we couldn’t use them, we just had to do a little math using the fabric allowance chart and do a little extra cutting.
Once you have all of your fabrics prepped, it’s time to make each block. We will start with a patterned center for the first block. You will make the same number of patterned center blocks as solid center blocks since you will be cutting and shuffling in the next step. Take your 4.5″ patterned square and join a 4.5″ x 2.5″ solid strip of fabric to each side, press seams.
Add your 8.5″ x 2.5″ solid strips to the remaining sides, press seams.
Now add your 8.5″ x 2.5″ patterned strips to two sides, press seams.
Add the final patterned 12.5″ x 2.5″ strips to the remaining sides, press seams.
For the chop and shuffle step you will first need to cut your blocks into 4 sections, in half and in half again. The trick I have for making cutting the blocks is to line up your outside middle square line to the 2″ line on a ruler and the outside line of the middle fabric to the 4″ line on the ruler. This will make for fast cuts and ensure that everything is nice and straight.
You will join two pieces of solid center block with patterned center block to create the chopped block design, isn’t that fun?!
Once you get into the groove of sewing all of your parts together this is a fantastic project for chain piecing. It comes together really fast!
Before you know it you will have a whole stack of Chopped Blocks finished! The instructions now have border information for you to use. I altered my twin size a bit and left the half blocks off of the top and bottom and just went with a 6″ border around the entire quilt. My son’s bunk bed is a little smaller than a normal twin sized bed so making it a little smaller so it will fit inside the bed nicely.
I hope you enjoy this project as much as I did! The video instructions are fantastic and I honestly believe beginners to expert quilters would enjoy making this quilt. Here are some more photos of my finished quilt along with the inspiration for my color choices.
Thank you so much for allowing me to share my version of the Chopped Block Quilt with you here at MSQC!
You can find more of my work at the following places: