Sewing with Rayon: Tips and Tricks

Amy Barickman, founder of Indygo Junction has joined us for a Facebook Live Video. Watch the replay below as Amy and Misty chat about tips and tricks for sewing with rayons!

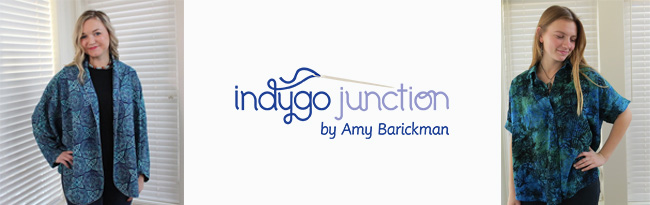
Who is Amy Barickman?

Amy is an entrepreneur in the sewing and crafting world with more than 25 years experience, but her passion for this industry began much earlier than that. Amy grew up immersed in the sewing and crafting business, as her mother owned a creative arts shop in West Des Moines, Iowa. After graduating from the University of Kansas with a degree in art and design, Amy knew she wanted to make craft and art her life’s work and that’s when she decided to start Indygo Junction, a fabric arts publishing company, that showcases the talent of leading sewing and craft designers. Over the years Amy has teamed up with innovative artists to publish over 1,500 pattern titles and write over 80 books. Amy has also released several beautiful fabric collections over the years and shares her passion for vintage fabrics and sewing at AmyBarickman.com. Amy lives just an hour away from Missouri Star and has joined us for several videos over the last few years as a guest on Man Sewing with Rob Appell as well as a tutorial with Jenny featuring denim.

With Amy’s experience in writing and creating apparel patterns, she has many helpful tips to share with us all. That’s why we asked her to join us on today’s Live Video and share her expertise on working with rayon fabrics with us.

What is Rayon Fabric?

Rayon fabric is made from cellulose making it a semisynthetic fiber. This gives it the properties of both natural and synthetic fibers. It is smooth and slippery like nylon, but feels more natural when worn, making it great for clothing in the summer and in warmer climates.

Download Amy’s Tips and Tricks for working with rayons HERE and take a look at some of the gorgeous clothing you can create with rayons below!

Indygo Junction Shift Dress

Isn’t this Indygo Essentials – Shift Dress made using Les Fleurs – Berch Floral Enamel Rayon Yardage darling?

Warm & Cozy Wrap Pattern

We adore Amy’s Warm & Cozy Wrap Pattern in the Longitude Batiks – Navy Medallion Rayon Yardage.

Button Back Shirt Pattern

If you love a comfy shirt with a fun design element, this Button Back Shirt Pattern made in Batik Rayon – Ferns Blue/Green Yardage is for you!

Turn About Tank

We’re feeling summer ready after seeing this Turn About Tank Pattern in the Longitude Batiks – Magenta Medallion Rayon Yardage.

Katelyn's Dress and Tunic

How cute is this tunic made from the Katelyn’s Dress, Tunic and Top Pattern using Longitude Batiks – Teal Floral Rayon Yardage.

We hope with the tips and tricks for sewing with rayon from Amy you’ll feel comfortable giving some of these patterns a try! Be sure to share your creations with us on social media using #msqcshowandtell.

Shop all rayon fabric at Missouri Star HERE.

Shop all of Amy’s apparel patterns HERE.

My First Quilt: Nichole Spravzoff

Celebrate National Quilting Month

The next installment of our “My First Quilt” series for National Quilting Month comes from one of our wonderful Missouri Star Quilt Co. team members. Nichole is our fearless senior copywriter, who spends her workdays crafting quilty stories and quips for all of us to enjoy! Read on to learn all about Nichole’s first quilt and why she made it.

My First Quilt: Nichole Spravzoff

Back in 1999, I was a moody teenager, more interested in tattooed boys than my school work. Most Friday nights I hung out at all-ages clubs full of spiky-headed youth, but occasionally I would spend my time pursuing milder hobbies. It was a few months before graduation that my cousin, Joy, suggested we make quilts together. I wasn’t against it, but I had no idea where to start. My generous aunt helped us procure all the necessary tools and showed us how the sewing machine worked. It seemed kind of cheeky to take a quilt, something associated with our grandmothers’ generation, and make it our own.

We planned out our patterns on graph paper. Mine was an ambitious design featuring my favorite mopeds appliqued around the edge with the Vespa logo in the center. I had no idea what I’d taken on. I didn’t even own a scooter, but I loved the idea of hopping on a cute, mint green Vespa and jetting around town. It seemed like a simple enough design in pink and black squares, but reality hit me when I began ironing on all those little scooter pieces and satin-stitching around the edges. It definitely tested my patience! The result wasn’t perfect by any means, but it is a tribute to the ingenuity of ignorance and, of course, scooters.

My First Quilt: Nichole Spravzoff

Now I look back on my first quilt, 19 years later, and I realize how much I’ve learned about myself. I don’t long to own a scooter anymore, and I never did ride on one. As I finished college, I abandoned quilting for a time, but my interest in quilting resurfaced again in a big way about ten years ago when I stepped into the Stitchin’ Post in Sisters, Oregon. The walls were lined with gorgeous quilts and I couldn’t stop myself from purchasing a bundle of fabric and planning to begin another project right then and there.

Once again, it was a pattern that I might not take on today, and in fabrics that I wouldn’t necessarily choose again, but I stuck with it, and 11 months later, I had hand-quilted my second, real quilt. The blocks were a variation on the Schoolhouse pattern, but made to my own specifications in 1800s reproduction fabrics. It was a doozy!

My First Quilt: Nichole Spravzoff

These days, I prefer to work in an eclectic modern palette with brighter colors and playful fabrics. I love Japanese prints and using the entire spectrum of solids. Sometimes I even sneak in a vintage print for fun. And I’m sure my tastes will shift again as I grow older. That’s the beauty of quilting. It grows with you. It changes as you do. It can be as easy or as complex as you wish it to be. However you choose to quilt, make it your own and, most of all, enjoy the process!

If you want to jump into quilting, Nichole recommends Couch to Quilt! This all-inclusive box of quilting supplies includes everything (minus the sewing machine) you need to make a crib-size quilt. Click HERE to shop now! 


Half and Half Quilt

MSQC New Tutorial on the Blog!

Half and Half Quilt

When Jenny is designing a new quilt, she always asks herself, “What happens if…?”

Half and Half Quilt

What happens if she rotates every other block? What happens if she snowballs two corners? What happens if she uses solids instead of prints?

Half and Half Quilt

Today’s new quilt came to life when Jenny found out what happens if HALF square triangles are cut in HALF. Click HERE to learn how to make the Half and Half quilt!

Watch the Latest Tutorial from Missouri Star Quilt Co!

DIY Flat Doll: Chuck the Chicken-Duck

Celebrate National Quilting Month

It wouldn’t be National Quilting Month without a visit from our favorite quilting mascot, Chuck the Duck! He is always here to offer words…ahem, quacks of encouragement, and a helpful hint or two. This week, we are sewing up a fun, flat-ish version of Chuck just in time for spring.

DIY Flat Doll

To get started, download the FREE Chuck the Duck printable HERE! Follow along with Misty as she shows us how to create one of these soft, fabric friends. Watch the replay of our Missouri Star Live Video below: 

Supplies:

Directions:

  1. Download the Chuck the Duck printable HERE. Not a fan of Chuck? No worries! You can create any shape you would like. We think this would look super cute as a dog, cat or even a bunny if you are wanting a spring creation. 🙂
  2. Cut out the duck outline, nose, eye, and wing. Just follow along the black lines on the template.
  3. Fold your fabric right sides together before tracing the Chuck outline on the wrong side of the fabric. Keeping both layers together, carefully cut around Chuck using the Shark Applicutter or a pair of fabric scissors.
  4. Repeat the process for both the nose, wings, folding fabric right sides together. If you would rather cut one piece at a time, just be sure to reverse the template for one of the cuts for each of the elements, including the body.
  5. Attach the wings, noses and eyes to a piece of fusible.
  6. Peel off the backing of the fusible and attach to the Chuck the Duck body.
  7. Start sewing! To give this doll the charming, rustic look, we top stitched around the right sides, so that the stitches show. (If this isn’t your style, feel free to sew the right sides together and leave an opening to pull right sides out before filling.)  Be sure to leave an opening so it can be stuffed.
  8. Fill up Chuck with a bit of Poly-Fil. Be careful not to overstuff, since it is a flat doll.
  9. Finish top stitching, and you have your very own Chuck the Duck flat doll!

Have fun sewing, friends! Be sure to share your creations with us on Facebook and Instagram throughout National Quilting Month using #makesomethingtoday and #msqcshowandtell!

Four Leaf Clover Block

Celebrate National Quilting Month

Four Leaf Clover Block

St. Patrick’s Day is just around the corner, and before we start enjoying corned beef and cabbage, let’s make a Four Leaf Clover quilt block that is sure to bring us luck throughout the year!

Watch Misty and Jenny Fish explain how to create a lucky four leaf clover block in our March 6 Live Video below.

Download the instructions HERE!

This festive block is inspired by the Garden Party Quilt. Watch the tutorial below:

Be sure to share all of your creations with us on social media using #msqcshowandtell and #makesomethingtoday!