Paper or Plastic? How about neither. It takes as much petroleum to make 14 plastic bags as it does to drive a car one mile. These grocery bags are made from rescued T-Shirts. They are similar in size and shape to your average plastic grocery bag and can be used anywhere! They are quite durable, keep them in your purse or your car, it just takes a little at a time to get in the habit of recycling. It’s all about making a difference one small step at a time.
So, what do you do with your favorite T-shirts after they are too small, or worn out? Why, make reusable grocery bags of course! Here’s how I do it:
First choose a t-shirt…
 I find that small to mediums work best. If you want to use larger T-shirts you would either have a very big bag (not a bad thing!) or you would need to cut and sew the side seams. (Confused?) You’ll see in a minute.
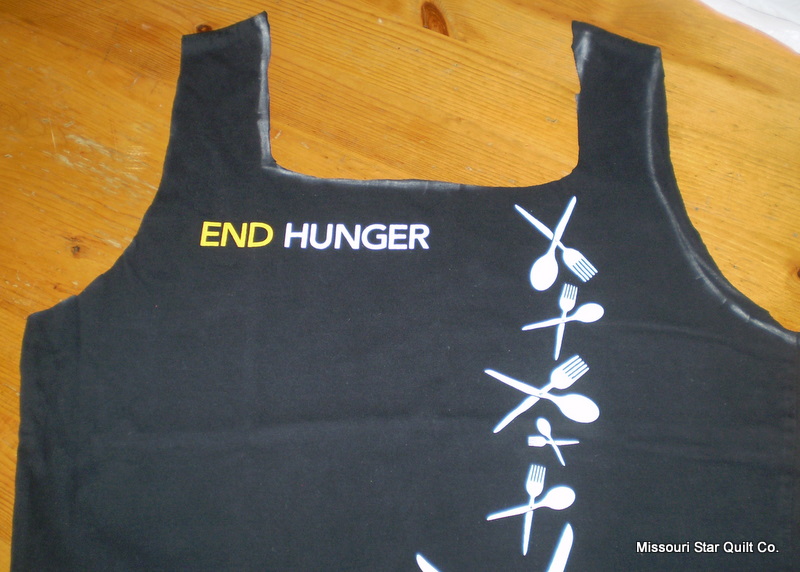
Lay your T-shirt out on a hard flat surface (I am using my kitchen table),  then lay your template…(any grocery bag will do. Pick one that has a size and shape you like.) on top pf your T-shirt.
Match the top of the bags handles with the shoulder seams.
Trace the opening around the neckline, and around the sleeves. (don’t worry, the chalk comes right off!) :)You are basically cutting out the neck and cutting off the sleeves to make your handles.
I usually fold my shirts in half, matching up all the seams and then do my cutting…this way both sides match. We leave the original side seams intact. (One less seam to sew!) 🙂  When that is done, cut off the bottom of the shirt. Again I use my walmart bag as a guide but, remember, your bag can be as big or small as you like. When you have decided on a good length, cut it, then turn the shirt inside out, Sew or serge the bottom seam shut.
 (If using a regular sewing machine do a straight stitch and a zig zag to make it nice and sturdy) If desired, you can also sew or serge around the handles.
Then take the bottom seam of the bag and fold it against the side seam like this.. ..you will have a little triangle, measure about 1 1/2 inches from the point and place a pin. (do this for both sides) sew a straight seam from pin to pin. You can leave this on or cut it off, its up to you. When you flip your bag right side out, you should have a nice squared bottom to your bag. And, its done! Nice job!
 Here is your finished product!
  You can roll them up and keep them in your purse or under the seat of your car. You can tie them with hemp cord and give them as gifts! They’re great! Have a happy day!


 Want to win free fabric or patterns? Of course you do! Join us in the


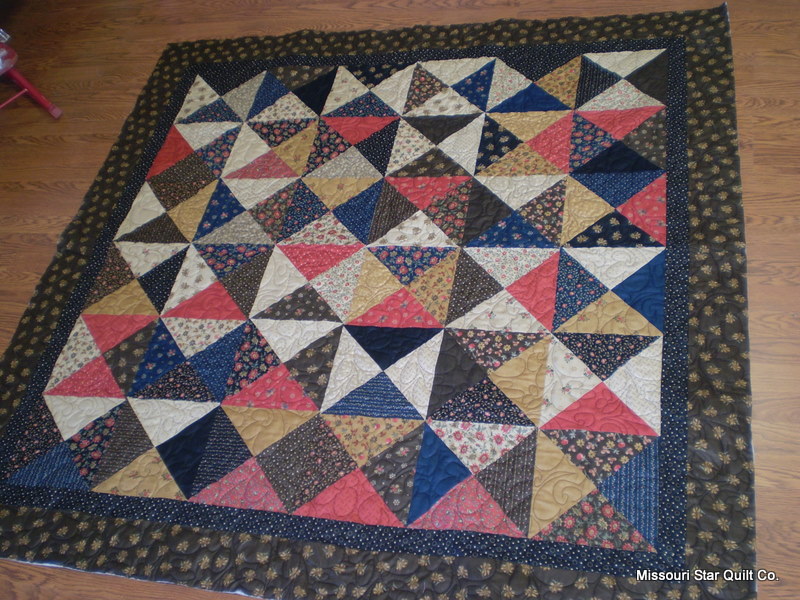

 I wanted to give her something that would be meaningful, but, I also needed to get it done quickly so I went with a simple hourglass block made from a