Celebrate Love with 6 Easy Valentine’s Day Projects

Love is more than turning a blind eye when an unexpected shipment of fabric arrives. Love is a gift. Valentine’s Day is closely approaching and this year, share your love of quilting and crafts with someone special in your life. Gifts made from the heart are the best kind of present; nothing is more treasured than a handmade Valentine that shows the time and commitment of the crafting process.

If you’re looking for inspiration for your Valentine this year, look no further! We’ve collected six of our favorite quick and easy Valentine’s Day projects that you can make today. Whether you’re creating a beautiful new quilt to snuggle under or a scrap busting token of affection, remember to add each stitch with love!

Zigzag Place Mats & Napkins

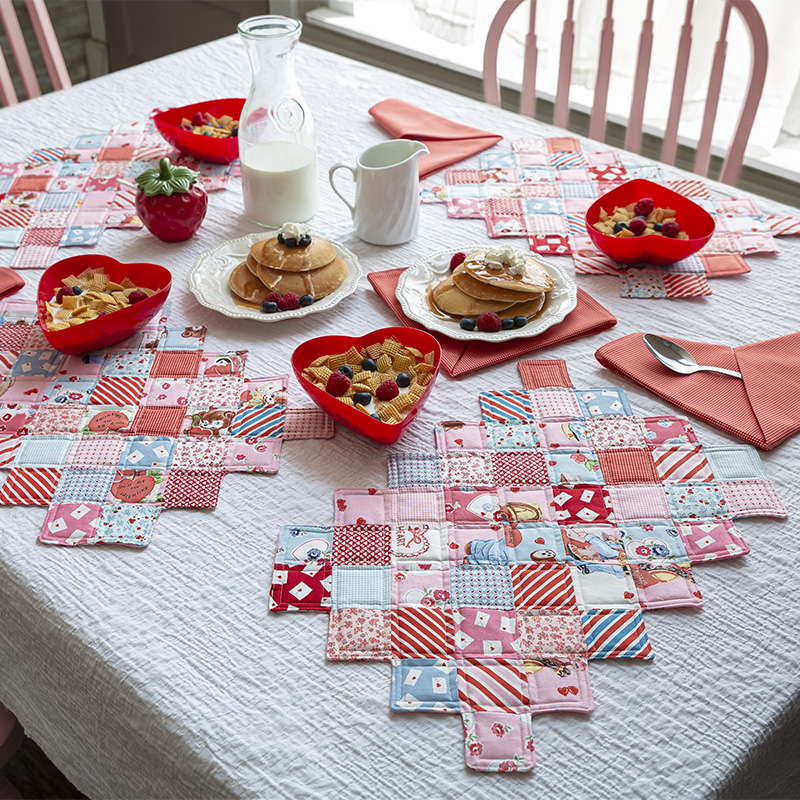
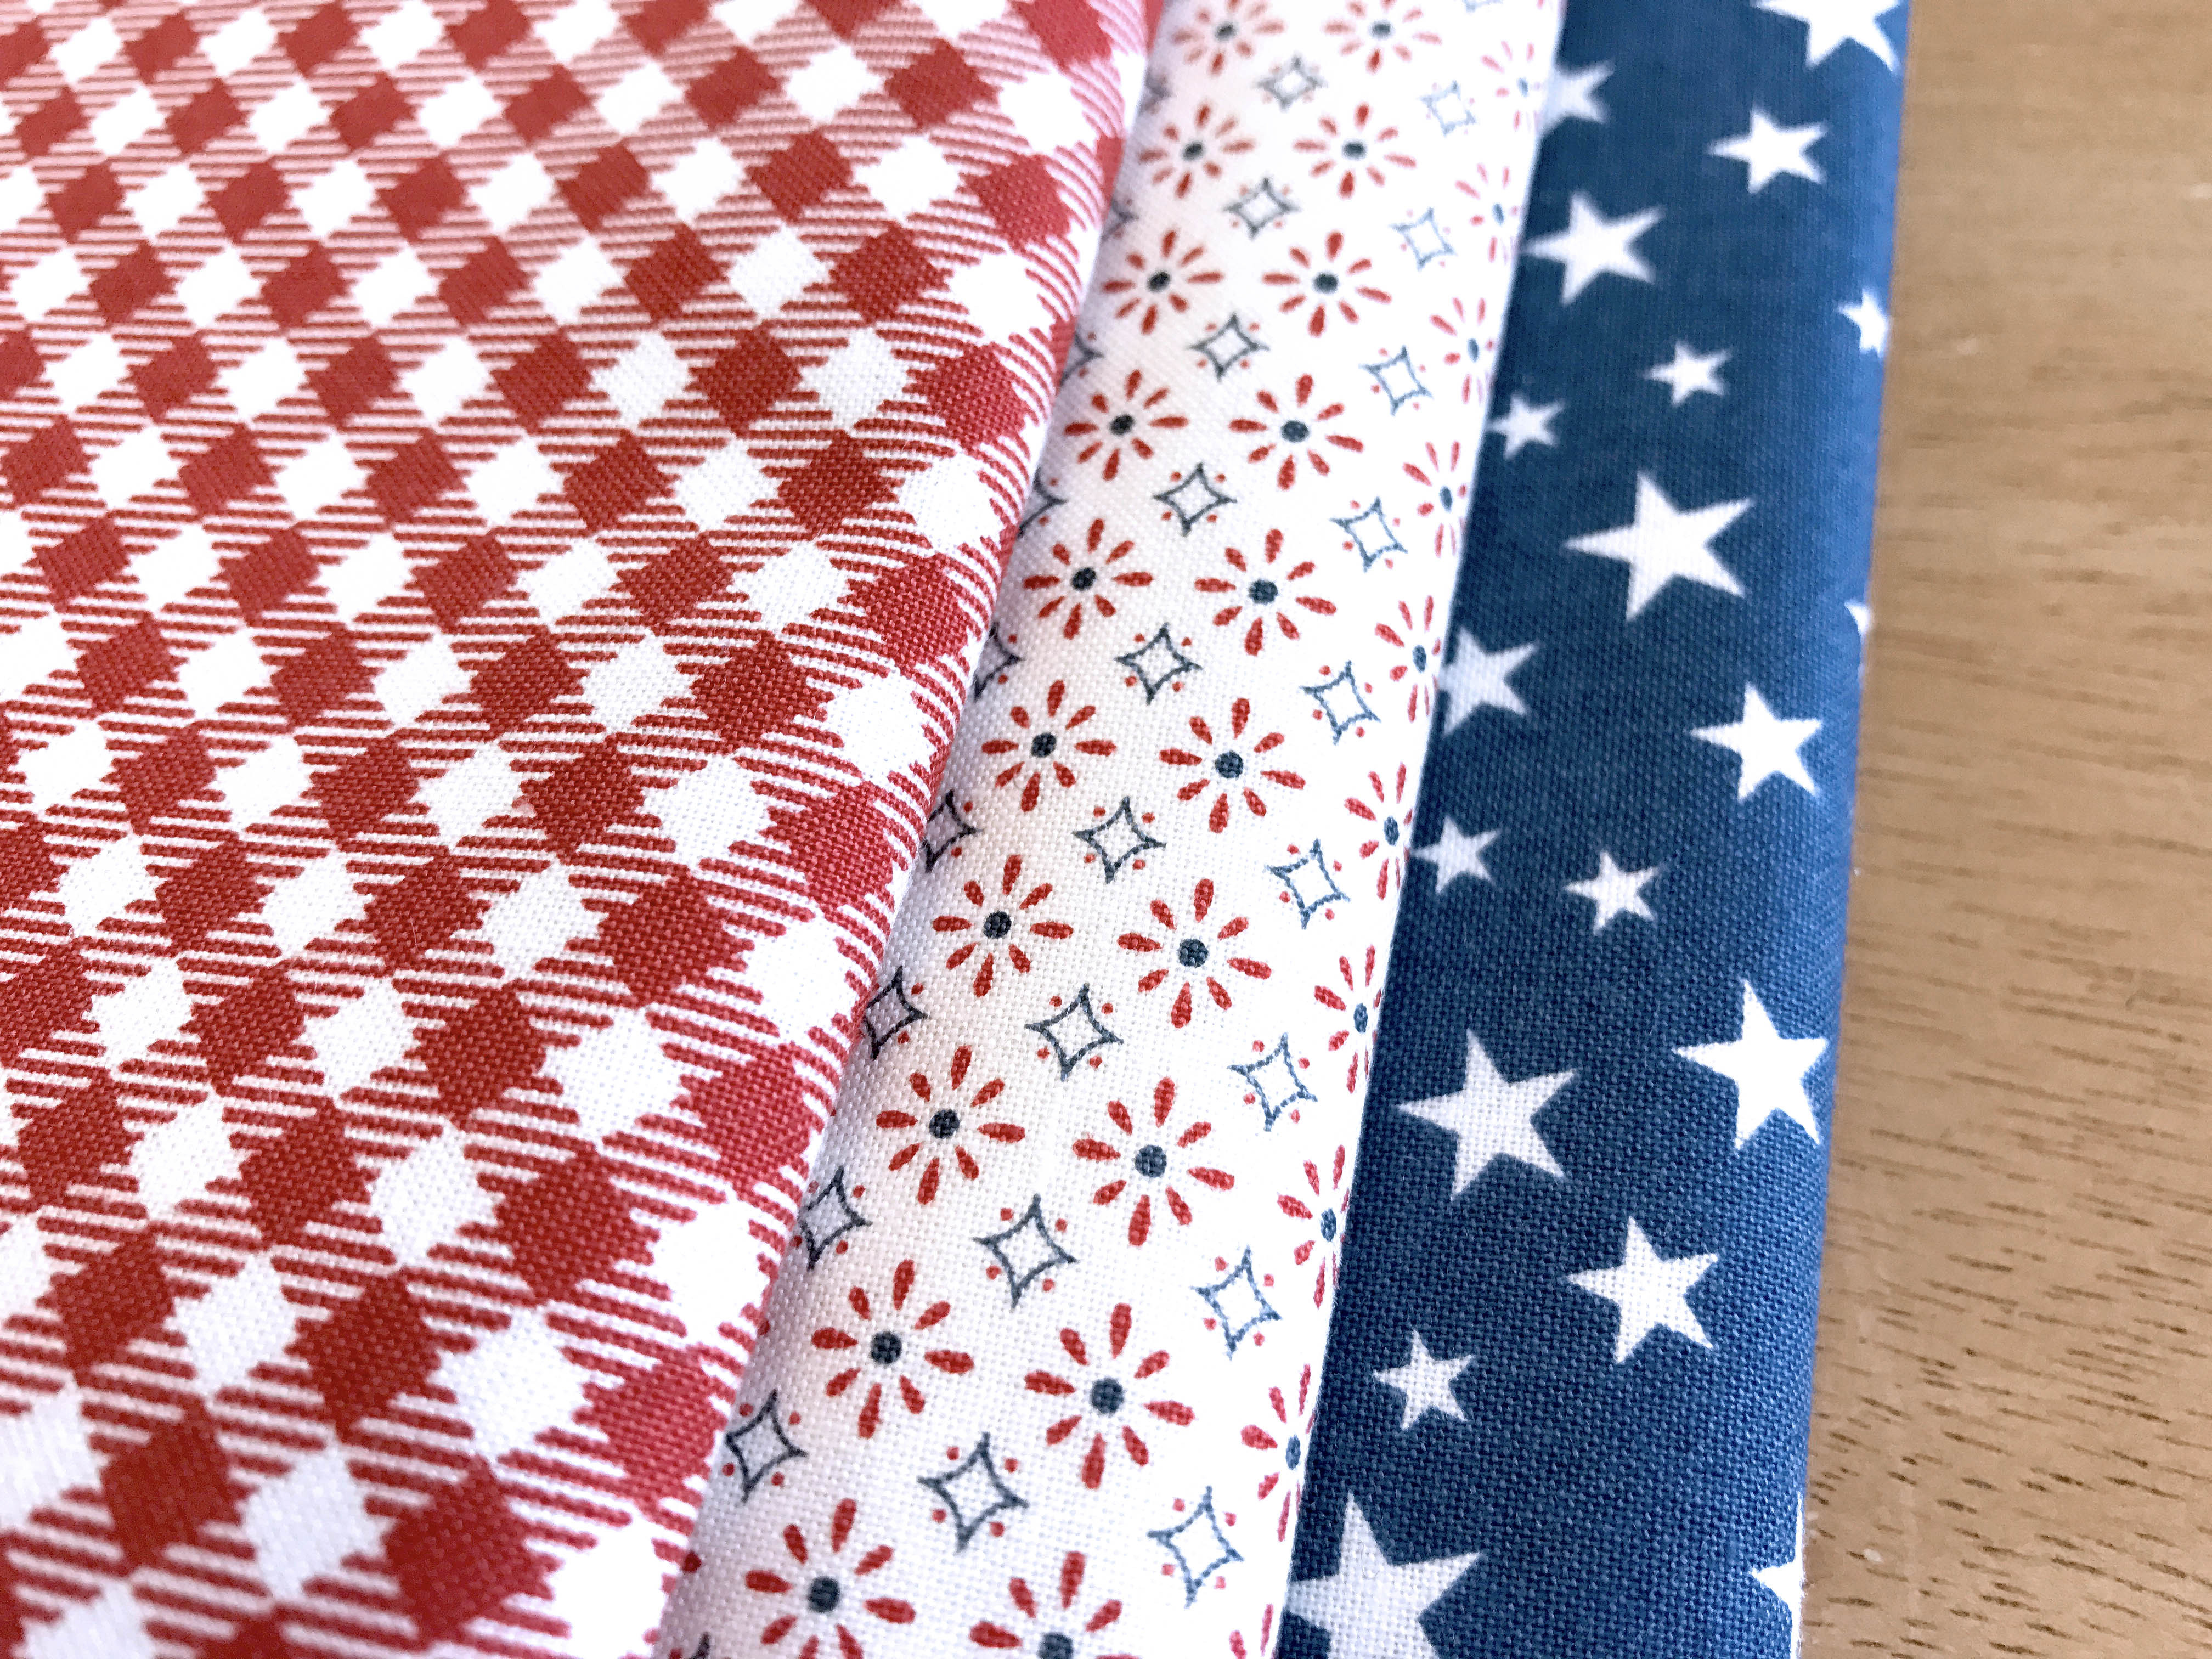
What’s the perfect complement to a Valentine’s Day homemade candle lit dinner? An adorable table setting! The Zigzag Place Mats and Napkins project is a quick and easy addition to your Valentine’s Day celebration that creates a beautiful atmosphere to get lost in your sweethearts company in. By using your favorite 5″ squares of precut quilting fabric, you can add a truly individualized touch to this fantastic table setting.

If you’re looking for inspiration or just wanting to go all out (it’s cute when it’s over the top isn’t it?), consider picking up a heart themed charm pack to really tie your place mats together. Heart to Heart Batiks Stamps by Kathy Engle for Island Batik are a sweet chic collection of groovy hearts, check, dots, and much more in a red, black, and white color scheme. These classic colors and symbols of love are perfect when illuminated by candle light!

Watch the LIVE Replay >

Get the Pattern >

Inside Out Heart Quilt

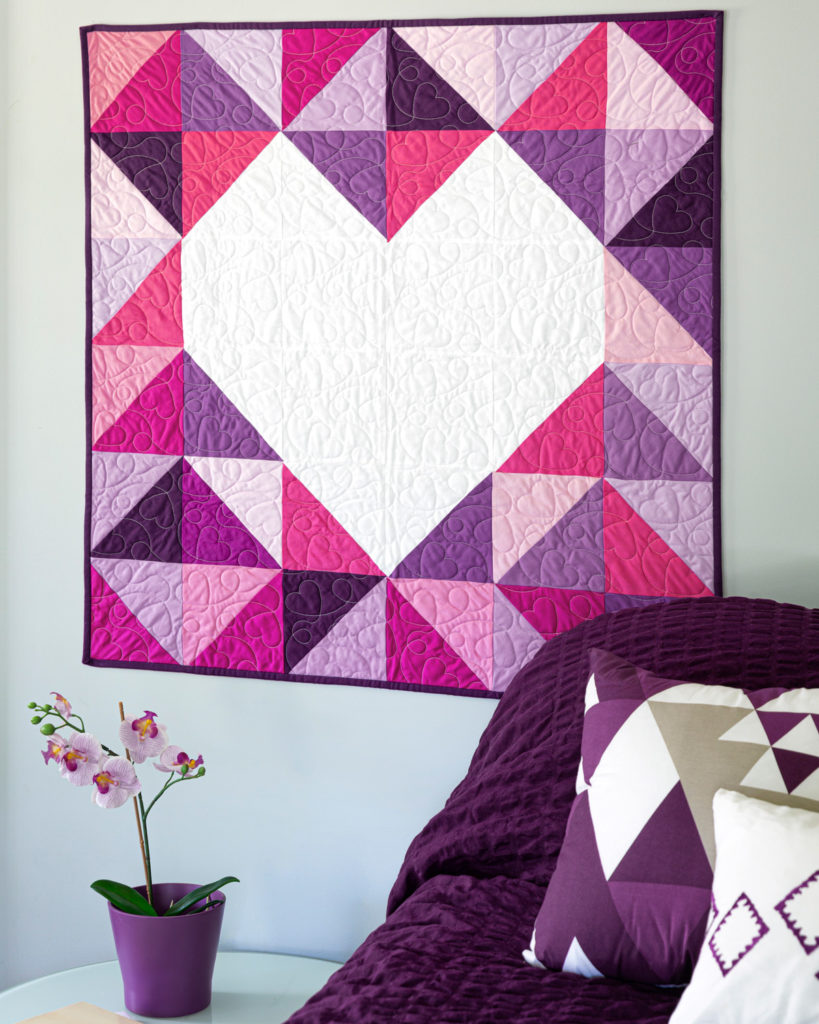
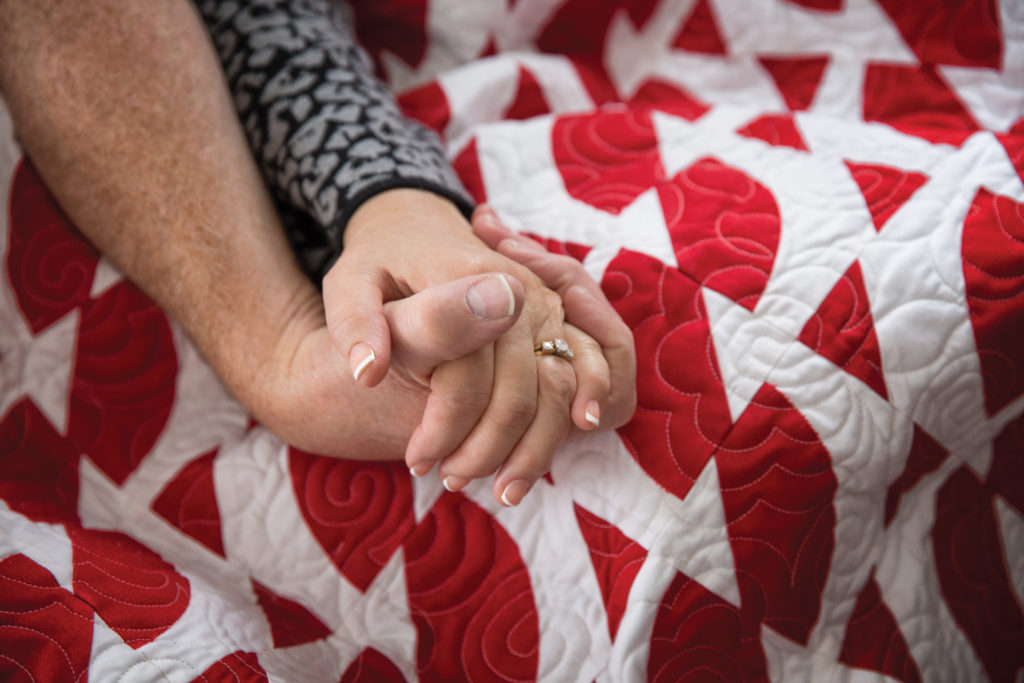
February can be a cold month, especially here in Hamilton, Missouri. Although the days are short and the nights are frigid, we can always count on our quilts to keep us warm. Keep it simple this Valentine’s Day and create a new quilt to cuddle under with your loved one! The Inside Out Heart quilt is a stunning geometric design that will not only be perfect for a Valentine’s Day at home, but also for a spring picnic when the weather is warm.

Jenny suggests using a colorful solid layer cake for this pattern as to not draw attention to the fabric and away from the design. The pastel spectrum will be your friend for this pattern, creating a muted and soft design that you just can’t help but smile at. Confetti Cottons Pastel 10″ Stackers for Riley Blake are perfect for this project; they are exactly the vibrancy you’ll be looking for and offer a wide variety of color choices! Don’t forget to expedite your quilt making with a Clearly Perfect Slotted Trimmer A to get this 36″ x 36″ lap quilt done in time to celebrate.

Watch the Free Quilting Tutorial >

Get the Supplies >

Loads of Love Tea Towel

Valentine’s Day is supposed to be fun, it doesn’t have to be all candlelit dinners and roses! Spruce up your home this season with a Loads of Love Tea Towel featuring an oh-so-cute applique truck that is loaded with love! This project can be completed in a day and the applique pattern is completely free and ready to print!

You’ll need a tea towel for this project, but don’t be afraid to just use one that’s been in your kitchen for years. With just a little scrap fabric and some Heat N Bond, you can upcycle it into a treasured seasonal decoration that you’ll use for years to come!

Download the Free Printable >

Watch the LIVE Replay >

Love is in the Air Wall Hanging

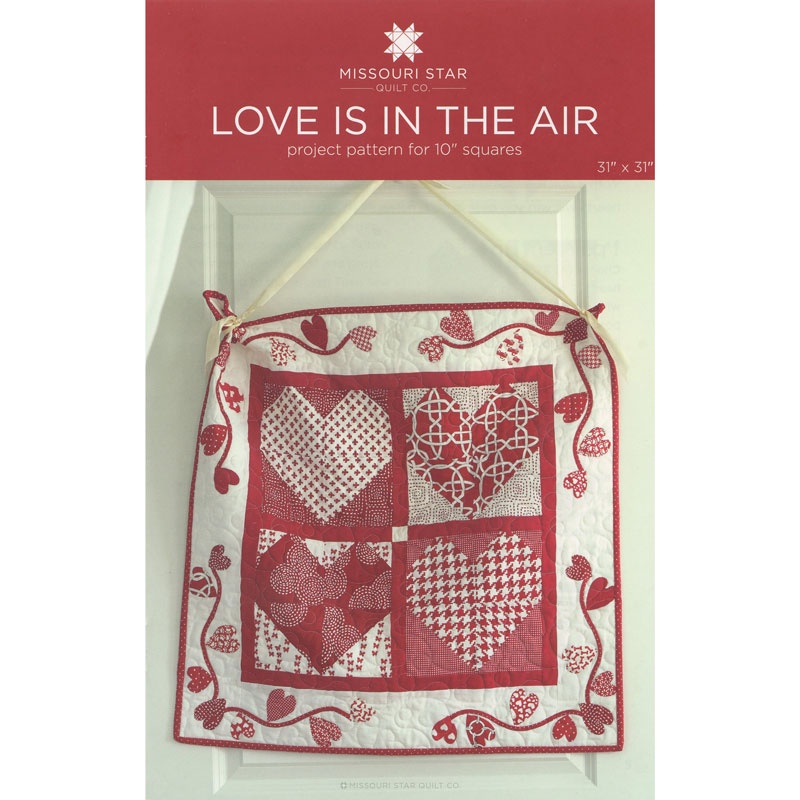
If you’re looking for more traditional décor, a Love is in the Air Wall Hanging is the way to go! This project is simple to create, like the Loads of Love Tea Towel, because it comes together quickly by using applique. Classic Valentine’s Day elements such as hearts and sprawling vines come together to create this piece of art that will be the perfect addition to your home or sewing room.

You’ll need a Layer Cake for this project, but you can certainly have some fun with the fabric! From the Heart 10″ Stackers from Sandy Gervais for Riley Blake feature red and cream 10″ squares of flowers, hearts, stripes, and other Valentine’s Day prints that are perfect for the mood of this project. These fun designs will better complement this project as they mirror the design!

Watch the Free Quilting Tutorial >

Shop Layer Cakes >

Mug Rug

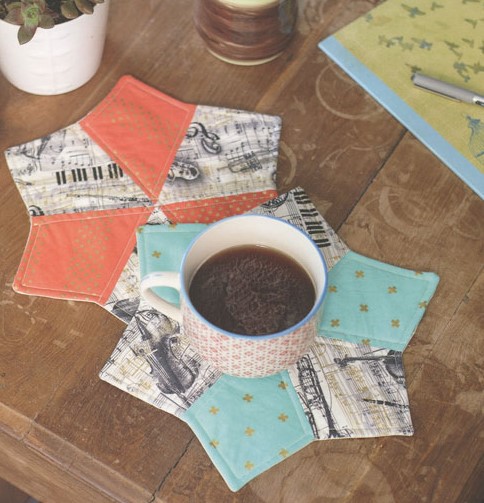
When in doubt, the Mug Rug is a great go-to project for any level of quilter! There’s almost nothing better than a hot cup of coffee, tea, or cocoa and now you can make each cup extra special by serving it on a custom made Mug Rug that’s stitched with love. Not only will this quick and easy project protect your table from the heat and condensation of your cup, it makes waking up each morning extra special!

Bust out your Wacky Web template and a love-inspired Charm Pack and you’ll be halfway done with this fast moving project! If you’re gifting this project to your Valentine (we won’t judge if you want to make one for yourself) then Sending Love 5″ Stackers by My Mind’s Eye for Riley Blake will help bolster the emotional appeal of the season. As this can easily be an everyday use item however, you can always get a little creative and use a favorite color palette or design!

Watch the Free Mug Rug Tutorial >

Browse Charm Packs >

Artsi2 Valentine’s Quilt Board

Turn your fabric stash into art with an Artsi2 Valentine’s Quilt Board! These no-fuss boards require no sewing at all and can be ready in a flash to help decorate your home for the holiday. Using the back of a small seam ripper, just tuck your pieces of fabric into the precut grooves of the adhesive backed quilt board and there you have it; a unique decorative piece of art with little effort!

Quilt boards are great for inspiring others to start crafting, so instead of making this one for your secret admirer (or not so secret!), make it a date where you both can share the fun of creating something together.

Watch the LIVE Replay >

Shop Artsi2 Quilt Boards >

Triple Play! Totally Tulips Tutorial

Join Jenny, Natalie and Misty once a month for a Triple Play!

When life feels off-kilter, I find solace in two places: the sewing room and the garden.

Jenny’s Design

The Tulip Time Table Runner from Missouri Star Quilt Co. Watch the free quilt tutorial today.

Whether I’m up to my elbows in fabric or dirt, creating a bit of order and beauty does wonders for the soul! And combining the two? Well, that’s a slice of heaven!

The Tulip Time Table Runner from Missouri Star Quilt Co. Watch the free quilt tutorial today.

Misty’s Design

The Tulip Garden Wall Hanging from Missouri Star Quilt Co. Watch the free quilt tutorial today.

In this week’s Triple Play tutorial, learn how to make 3 new tulip projects with Jenny, Natalie, and Misty.

The Tulip Garden Wall Hanging from Missouri Star Quilt Co. Watch the free quilt tutorial today.

Natalie’s Design

The Tulip Fields Quilt from Missouri Star Quilt Co. Watch the free quilt tutorial today.

These pretty quilts will have your home looking as fresh as a spring garden in no time! Click HERE to watch the free Triple Play tutorial now.

The Tulip Fields Quilt from Missouri Star Quilt Co. Watch the free quilt tutorial today.
Watch the Latest Tutorial from Missouri Star Quilt Co!

Amy Smart’s Patchwork Forest Using 10″ Squares and Fat Quarters

CLICK HERE to watch the Facebook Live video that teaches this project!

A few years ago, our friend Amy Smart (Diary of a Quilter) came out with a free Patchwork Forest Wall Hanging Tutorial that people are still talking about and making in every which way they can imagine! We love it, especially the free improv method she uses for creating the tree shapes! Every tree is slightly different and that’s what makes it so fun to make and such a cute finished project! So, we’ve collaborated with Amy and are excited to be able to share these new cutting instructions so that you can make the same great Patchwork Forest blocks using precuts! We’re focusing specifically on 10″ squares and fat quarters and hope this makes you even more excited to try out this fun, improv pattern!

First, let’s start with the 10″ squares.

Supplies Needed:

  • 1 Pack Holiday Themed 10″ squares (42 squares)
  • 1/4 yard Brown/Gray fabric for tree stumps
  • Backing Fabric
  • Binding Fabric

If you think about the ultimate shape of your blocks, they are not square, but are taller than they are wide. so, if you start with 10″ squares, you will cut off a 2.5″ strip to save for border, binding, or another project. Once you’ve done that, you will cut another 2.5″ off the bottom and then divide those into 2 parts, which makes your fabric look like this.

Patchwork Forest with 10" Squares

These cutting instructions feature The Cat in the Hat Christmas Ten Squares by Dr. Seuss for Robert Kaufman. Isn’t it adorable?

At this point you will want to divide your fabrics into complementary pairs.

When you start to cut your trees, you will stack your 2 fabrics together first, then cut out your tree shape.

Patchwork Forest with 10" Squares

When you create your tree shapes, make sure to leave enough room for seams on the sides and at the top. Once you’ve cut your desired tree shape, swap the center fabrics so it looks something like this (Each pair should be cut slightly differently to achieve the improv effect).

Patchwork Forest with 10" Squares

To make the tree stump (1.25″ x 2.5″), you will want to sew it to the (2) 2.5″ x 3.75″ rectangles as shown. Here are some great fabric options for your tree stumps:

In Amy’s original tutorial, she shows that you should sew your tree to the short side of the background fabric first, then to the long side. Make sure to place your point past the edge to allow for the 1/4″ seam allowance. There will be some trimming required, but I like to wait until I’ve sewn all the blocks to make sure I’m trimming them all to the same size!

Finished Block Size: Approximately 6.75″ x 9″

If you use your entire pack of 10″ squares, you can make a wall hanging or small quilt that is 7 blocks across and 6 blocks down (42 total). That will make your finished project approximately 43″ X 60.5″ (or bigger if you want to use your leftover 2.5″ strips to make a piano key border! The result is so fun!

You can see that this project makes a really adorable, whimsical project, but I want to assure you that it can also be very elegant and beautiful with different fabrics!

Now, let’s talk about the cutting instructions when you’re making this project out of Fat Quarters!

I whipped up a table runner using a few fat quarters that has a completely different feel to it! I used this Holiday Flourish 10 Holiday Metallic Fat Quarter Bundle for Robert Kaufman.

Supplies Needed

  • 3-6 Fat Quarters (depending on the variety you would like in your design)
  • Brown Scrap Fabric measuring 2.25″ x7.5″ (divide into 6 strips that are 1.25″ x 2.25″)
  • Backing Fabric
  • Binding Fabric (1 Fat Quarter cut into 2.5″ strips is plenty)

Cut each fat quarter into (4) 8″ x 10.25″ rectangles (If you’re only going to make one table runner, then you can just use half of each fat quarter and cut TWO of the 8″ x 10.25″ rectangles. If you cut it in half lengthwise to get the two, then you could use the remaining fabric for binding or even a pieced backing)

Finished Block Size: Approximately 7.25″ x 9.25″

The table runner is made up of 12 blocks. The Finished Table Runner size is approximately 17″ by 39.5″

Patchwork Forest Christmas Trees Table Topper

Using 6 fat quarters, I was able to make 24 blocks (I wanted the variety of 6 different fabrics), so in addition to the finished table runner shown, I have 12 more blocks ready to make a second table runner for a gift! Or, of course, you could certainly make a larger wall hanging with your 24 blocks. With some of the remaining fat quarters, I cut them into long strips to make a scrappy backing. This is a fun, carefree, improve project, so have fun with it and make it your own! #holidaypatchworkforest

DIY Fabric Flag Holiday Decoration with Easy Gathering Technique – Step by Step Tutorial

During a recent Facebook Live video, we taught a simple technique for gathering fabric. It’s great if you don’t have a lot of time (or patience). You also have the option to find a gathering foot for your machine, but this way is my favorite! We featured a cute project we came up with just in time for Independence Day, so here are the step by step instructions to make it!

Let’s start with the fun part! Pick your fabric! We used fabrics from Freedom by Sweetwater for Moda (Picnic Apple Red Yardage and Bandana Vanilla Yardage) and Lost and Found America by Jen Allyson for Riley Blake Designs (Americana Mini Stars Blue Yardage)

You will need 1/4 yard of Blue, 3/4 yard of white, and 3/4 yard of red.

Additional Supplies:

  • 1 Fat Quarter (I used a neutral color that blends with my fabric choices)
  • Thread (& Sewing Machine)
  • Pins/Wonder Clips
  • Heavy Weight Thread (12wt would work great) or String or Dental Floss or Fishing Line (whatever you prefer)
  • Ruler/Cutting Mat/Rotary Cutter
  • Hot Iron

First, you will start by cutting your fabrics into 3.5″ strips! You need 7 red, 6 white, and 2 blue.

Set aside your red and white strips, and grab the blue strips. Stack the 2 strips and cut them them into thirds, so you get 6 strips that are approximately 3.5″ x 14.3″ (this does not have to be exact).

Take 3 of the red strips and 2 of the white. Trim off 14 inches from each strip. These will be the first 5 strips at the top of the project to show the stars and first 5 stripes. Put them right sides together and sew a 1/4″ seam to attach the 2 fabrics. Press the seams open (as pictured below).

Fold in about 1/4″ on each end and press (as shown).

At this point, you would fold the fabric in half lengthwise and press so the right side is facing out. At that point you will have 5 strips that look like this.

Repeat the previous step with the remaining red and white strips, so that they are all folded lengthwise with the raw edges folded in.

Once all of your strips are prepped like in the photo above, it’s time to add a top stitch to the ends! This will just give you a clean, finished look, so that your raw edges don’t show! Just like you would do a top stitch, get close to the edge and I like to backstitch for some extra security.

This is where the magic begins! It’s time to begin the gathering process! Set your machine to a loose zig zag (these are my settings).

For this next part, you need some kind of string. I used crochet cotton because I had it on hand, but a heavier thread would be great for this, like this Sulky 12 weight thread! You can also use dental floss, fishing line… anything strong that won’t get caught in your zig zag!

Line up the raw edges of your folded strips so that your zig zag won’t come off the edge, and line up the string with the small center marker on your foot. That will help you keep the string nice and centered, so it doesn’t get caught in your zig zag. You do not need to back stitch! Here’s how it should look.

Tip: Think about which side of your strip is the back and which is the front. If you put the zig zag on the back, it will make it harder for the string to accidentally show on your project!

Then, you just pull on one side of the string and gather your fabric together! It’ll twist and turn at first, but don’t let that worry you! That’s what pins and wonder clips are for! 🙂

Once all of your strips are prepped, you can work on the background fabric. I used a neutral colored fat quarter. Square it up to approximately 16×20. Use your iron to double fold each edge (except the top edge) toward the back. That means, fold 1/4″ inch in and press, then fold over and press a 2nd time. Top stitch over the left, right, and bottom edges (left and right sides first, then the bottom) and this will conceal your raw edges. On the top edge, you’re going to fold your edge toward the front side, press, and stitch down the edge. This will be important at the end, once you’ve stitched down all of your gathered strips.

To space your strips evenly, draw straight lines every 1.25″ starting from the bottom of your base fabric.. This is the line you will use to pin your gathered strips to the base fabric.

Tip: Use wonderclips to anchor the strips on each end, then pull your gather string to get even spacing in your gathering. Pin ever 2-4″. Notice that my gathering string is on the underside of the strip to make sure it’s nice and hidden.

To sew your gathered strips down, you will want to set your machine to a smaller/tighter zig zag than the one we used before. I set my stitch length at a 2 and my zig zag width at a 2.5.

Once you get all your strips sewn on, you will want to take the top loop of your background fabric and loop it forward over the raw edge of your top gathered fabric strip. Pin it in place and stitch over it to finish the top edge and create a loop for hanging your finished project!

New Friday Tutorial: The One Seam Flying Geese Quilt & Advent Wall Hanging

MSQC New Tutorial on the Blog!

flying geese pinnable

Have you ever drooled over a quilt pattern and then been super discouraged by how much is involved in creating it? Well, I love flying geese, but sometimes I just want something a little simpler, so I am so excited about this method of making a flying geese. You won’t believe how easy it is!

Screenshot 2015-12-10 11.03.36

Here’s a basic preview of how to make this amazing block! You’re definitely going to want to watch this one to catch all the details!

flyinggeesegif

Jenny came up with a darling bonus project using this same method! Look at this great holiday wall hanging!

Jenny Flying Geese web

When you sew your flying geese together, it creates little pockets on either side, so Jenny created this Christmas-y layout with 24 pockets that makes a little Christmas Advent Calendar! You could applique some numbers on there and really personalize it to make something really sweet!

We even created some super cute printables to use for the advent for some fun things you can do each day with your family! You can download it here:

christmas-bucketlist-banner-14

Or you could just use it as a festive wall hanging and fill the pockets with Christmas cards or wrapped candies! You can do whatever you want!

advent close up

flying geese advent pinnable

CLICK THE BUTTON TO WATCH THE VIDEO AND SHOP FOR SUPPLIES!

shop for supplies tutorial button