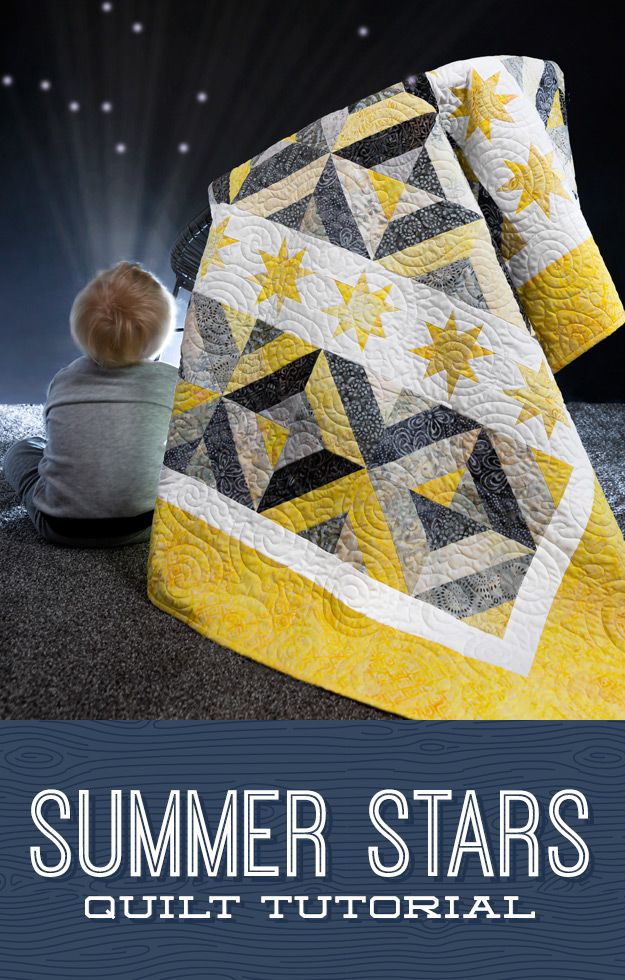
Jenny loves to give quilts as wedding presents, but not super-fancy-never-to-be-used quilts. She gives picnic quilts! Jenny wants her quilts to be taken on adventures near and far. She wants them to be loved and used!
Summer Stars was created for a special grandson and his beautiful bride. It’s a cute picnic quilt made up of two of our favorite patterns: Summer in the Park and Wonky Stars.
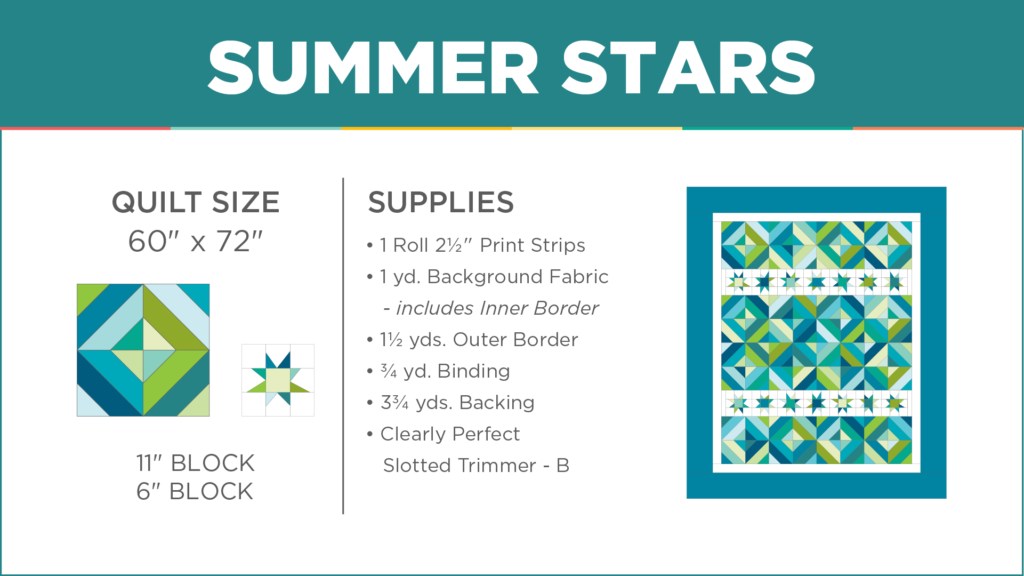
A fast and simple way to create an exquisite quilt using 2.5″ strips. It is best to use contrasting prints/ colors. This quilt top will have you amazed by your own creation because you would think that if it’s easy it should look easy too, but not this quilt! So bust out those 2.5″ Strip packs and get to sewing!
Hi! My name is Lee Ann. I’m a wife and mother of four. When I was expecting my third child, I saw some rag quilts on Etsy and thought they were adorable—but expensive. I mean, $65 for a little baby blanket?
So I bought my first sewing machine and a set of fat quarters by Kaffe Fassett. I learned how to make my first rag quilt by watching a tutorial by Vanessa Vargas Wilson on YouTube. I was pretty happy with the result but my husband teased me a bit. ”Why spend $65 on a blanket when you can make it yourself for $300?”
But, I fell in love with sewing! Putting colors together. Feeling the fabric run through my fingers. And the finished project was an item that was both USEFUL and beautiful. I made several rag quilts before getting bored and wanting to learn more. That’s when I found the free video tutorials online by MSQC.
One of the first “real” quilts I made was from a pattern called Summer in the Park using a jelly roll, a line by Tula Pink, the Birds and the Bees.
Watching the videos made it easy for me to follow along—or watch a half dozen times if necessary, and sometimes it was! The finished quilt was so worth it.
But, like many quilters, I don’t ever make the same thing twice! You’ve got to change it up a bit.
Recently I came back to this pattern and changed only two things.
In the tutorial, Natalie uses a brightly colored jelly roll and combines it with a jelly roll of white strips. When sewing them together, she sews two strip sets, 1) white, print, white, and 2) print, white, print.
So to change it up, I chose a jelly roll of Carolyn Friedlander’s Carkai. Instead of white, I used a darker CHAMBRAY fabric. I also changed how I sewed my strips together. ALL of my 3 strip sets were sewed as: print, chambray, print.
The 3-strip-sets are then sewed to each other, right sides facing, into a “tube.”
Now comes the really fun part—cutting the tubes into squares. You lay your tube down and cut triangles—when you open it up, they will be perfect squares!
The best ruler for this is the Triangle Square Up Ruler, 9 1/2” by Quilt in a Day. I don’t happen to have that ruler (mine only goes up to 6 1/2”), so I had to make do with my big square up ruler for squares. I put the point of my ruler right up to the seam but did not cross it. Then, I made sure both of the 8” marks touched the bottom seam before making a cut.
Continue cutting the tube, swiveling the ruler around the opposite way to maximize the number of cuts you can make. I was able to get five finished 8” squares from each “tube.”
When sewing the squares together, I made sure to nest the seams to make perfect points.
I sent this quilt off to MSQC for machine quilting. My local lady is great but she will not back anything with fleece. MSQC does — Cuddle/minky too! This is my first quilt backed with fleece and it’s pretty much the best thing EVER.
After it came back, I had to choose binding fabric. I always “audition” a few colors first.
After letting this quilt and the different options sit on my table for a few days, I ended up going with the same chambray I used in the quilt blocks.
My favorite binding tutorial is The Ultimate Quilt Binding Tutorial by MSQC. No binding tool required! I used to have one but I don’t use it anymore. This method is the easiest! But, I must confess, I had to watch this video EVERY SINGLE TIME a quilt needed finishing for at least the first ten quilts I made.
Here’s the finished result of my “reboot”.
And now that I’ve spent a few years piecing quilts…I’ve decided a $65 rag quilt is more than fair! A bargain, really! But, I wouldn’t trade learning a new hobby for ANYTHING. Quilting has become my quiet place and saving grace in my busy life.
Thank you, MSQC for asking me to write this blog post and for teaching me how to quilt in the first place!
You can follow my quilty adventures on Instagram at leeannjperry.
Have you ever heard of Throwback Thursday? Every Thursday all over the internet, people post old photos of themselves with their families or friends, etc, and use the hashtag #tbt to share a blast from the past! Well, today we’re introducing #msqctbt!
Here’s how it works. Every Thursday we’ll be featuring ONE of our previous tutorials from our YouTube channel. We’ll share a little bit about it and then we’ll ask you to share your photos of projects you’ve created using that quilt tutorial.
To share your photos, I want to introduce you to Missouri Star Quilt Co’s Quiltsby.me. Quilts By Me is a Show & Tell for your quilts and sewing projects and we’re so excited about it! It’s user friendly and a great way to share your projects with the web. You can ❤ your favorite projects, follow your friends, search by precut/style/project type… basically it’s amazing! Once you play around a little bit with it, we know you’ll just love it! This is a home for your projects where you can tell their stories and share with the quilting community!
First, you need to know how to log in. We’ve made it super easy for you! When you get to Quiltsby.me, this (image above) is what the front page will look like. Rather than creating a new account, if you already have an account at missouriquiltco.com (what you use to place an order), you can skip the whole ‘create an account’ process and just login with your missouriquiltco.com info!
Once you’re logged in, you can Create a Project, fill out all the info and in the Tags section, make sure to include #msqctbtas one of the tags!
We will select winners from all submissions with the #msqctbt tag and feature them next Thursday when we introduce the next Throwback Thursday Tutorial for the week! We also would love for you to share your photos on Instagram and Twitter with the same #msqctbt hashtag that feature any previous MSQC Tutorials! We may even repost/retweet our favorites, but the “winners” will be selected from the #msqctbt tag on Quiltsby.me.
So, let’s get started! For our inaugural Throwback Thursday, we’re going back to the Summer in the Park Tutorial! This is such a simple quilt to make with your 2.5″ strips and people just love it! Use some great prints with your favorite coordinating solids and it’ll be so gorgeous!
We even have a ‘Revamped’ version to help your creative juices flow!
If you’ve already tried this one, upload your photos to Quiltsby.me and you’ll be awarded a Throwback Thursday badge (If you haven’t done this one yet, you’ve got all week to get it uploaded)!
The winners we feature on the blog will also be awarded the Throwback Thursday Winner Trophy.