Jeans Embellishments

100_1706

How many of you have made cutoffs you wished were cuter?

Well here you go!

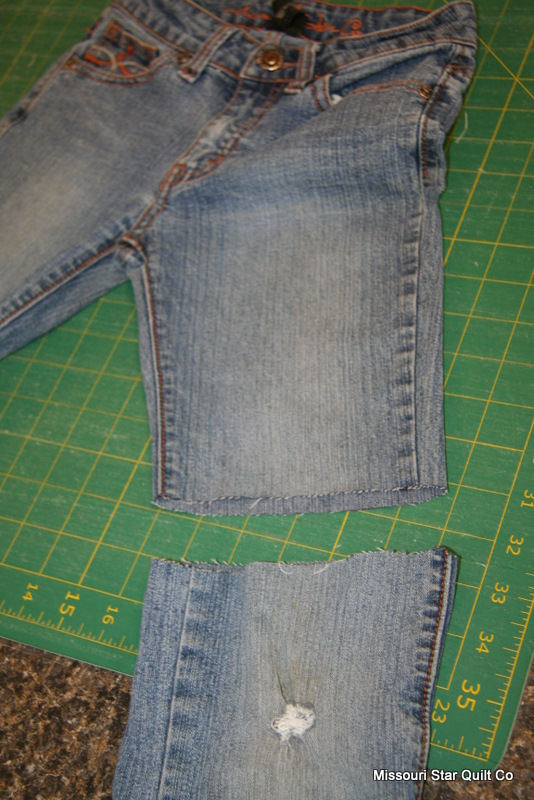
Measure your jeans to the desired length, add 4″ and cut off.  It’s ok if there is a whole in the knee, 3″ will be folded up as a cuff so just make sure it’s within the cuff area that will be soon covered in new fabric!

Measure the width of the pant leg double it and add a 1/2″ for seam allowances.  Using that measurement cut 2 pieces of fabric and 2 pieces of iron on inter-facing to that length x 6″ wide

Iron your fabric to your interfacing and sew the 6″ wide side together to make 2 tubes the size of the pant leg.  Leave them with the right sides to the inside and slide a tube inside one pant leg lining up your seam with the inner seam of the pants.

Fold the edge of the pants down 1/2″ line the fabric edge up with the raw edge of the pants and fold down another 1/2″ to enclose both raw edges.

Sew around the hem with a heavy coordinating thread.  Go up the leg about 5 inches and sew the inside of the fabric down with a thread that blends well with the pants.  It doesn’t need to be perfect just try to keep your fabric and interfacing flat!

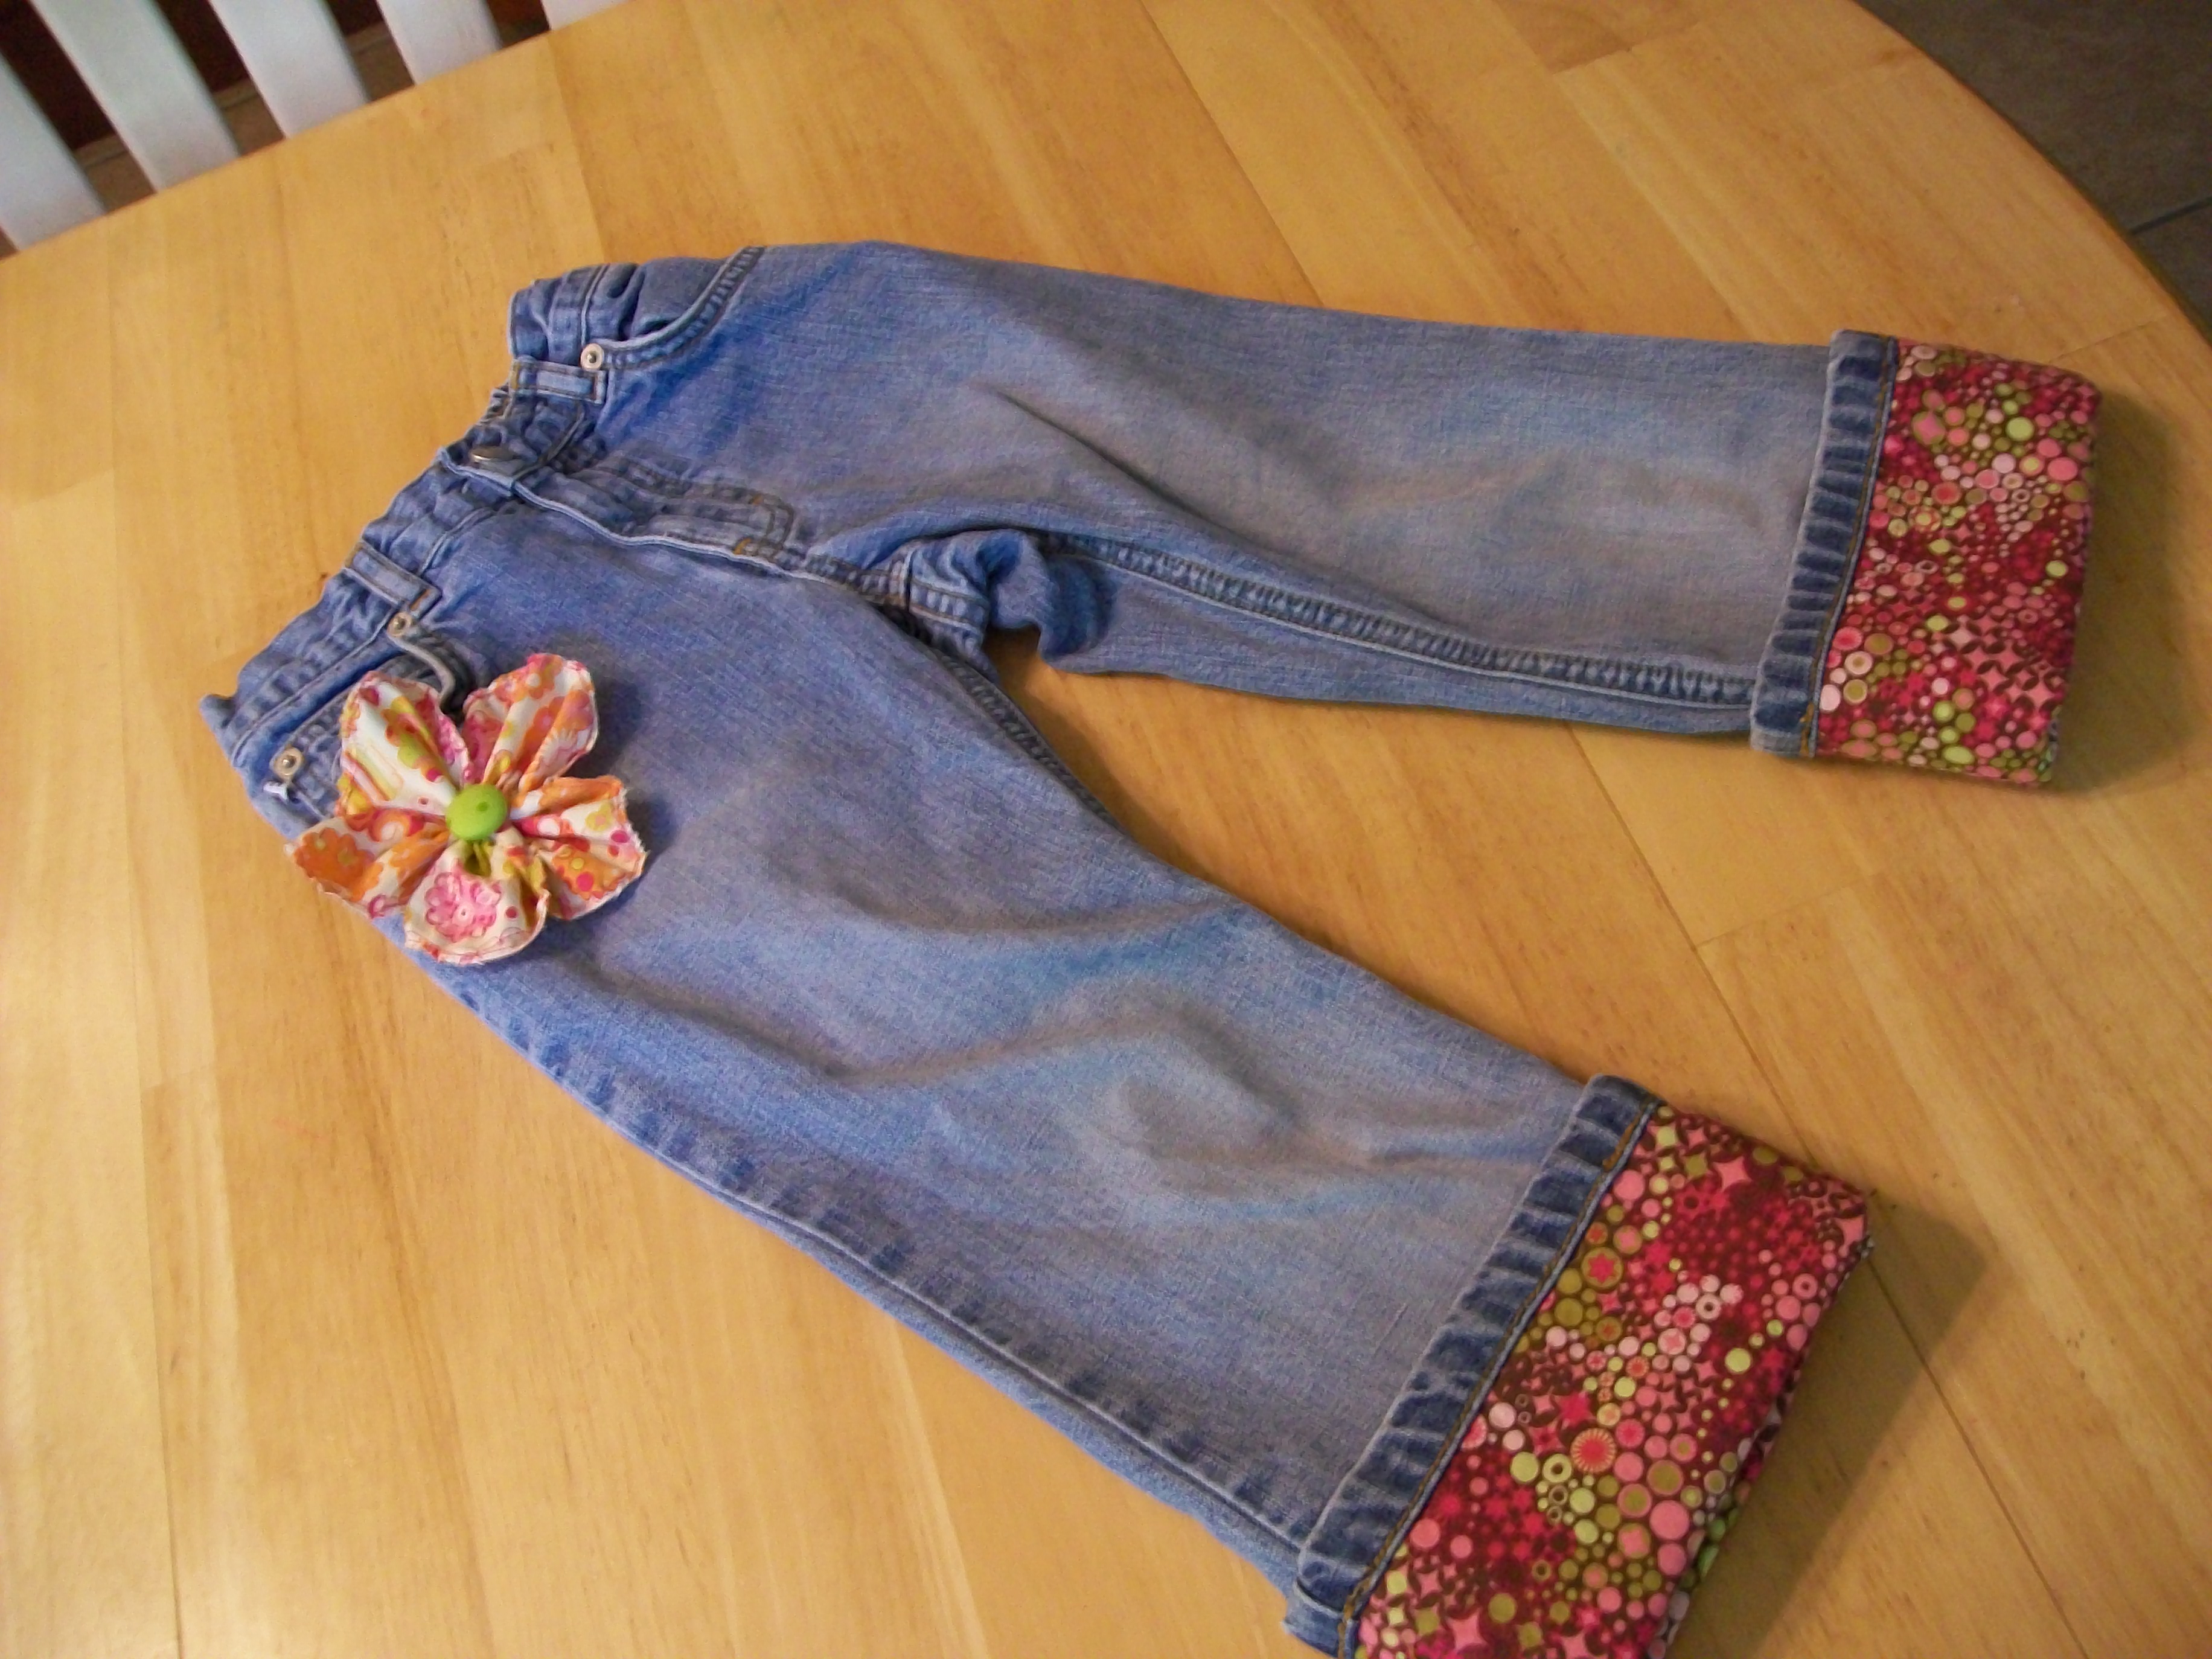
Fold up the cuff and admire your work!  You can tack the cuff up if desired by stitching in the ditch of one or both of the side seams.  You now have some adorable embellished and possibly re-purposed pants!

Cute Cutoffs!
Cute Cutoffs!

___________________________________

is a guest blogger from the Designing Happy blog who is known for her creative uses of fabric and unique sewing style.

Giving new life to old clothes….

to old ratty jeans!  I mean really we all want to extend the life of our kids clothes, right!?!!?  They wear them out so fast, especially when we are buying them half worn out already! 🙂 tehehehe.

img_84081
What we had to work with

Today what we did was take a pair of old jeans, and cut them off….

Pretty easy, of course…..But I have issures with things being straight.  So, we used the good old rotary cutter and mat for a more precise line!

img_84091
Straighten the cut

The next thing we did, was fold the end of the shorts up.  Yes, I said UP….here let me show you.

img_84111
Fold the jean up

See, it is gonna make a cute edge at the bottom with a minimal amount of work.  (My favorite!!)

Then you pick out the kind of trim you want to use.  My crazy girl picked this mini dingle-ball stuff we have in the shop, and I think it turned out darling.

img_8414
Work the trim in

Next of course, measure your trim…..cut it and get ready to sew it on!!

img_84151
Sew it all together!

Slip the jeans through the throat of your machine, and we just zig-zag stitched around the whole thing.  Rinse and repeat.  (uh, skip the rinse part) WHat I mean is, do the same thing to both legs.  🙂

img_8420
Alakazam!

Badd-A-bing.  You are done.  The only other step now, is to have your child try them on!

img_8422
Now we’re stylin’

Now you have one project complete, a happy child and many more ideas of repurposing old clothes running through your head!  🙂

I am SO loving these pink dingle-balls (we have then in white too) that I want to give some away!  Mention this blog with your order today and I will throw some (a yard)  in your package.  (and if you have already ordered just email me…chances are I can still throw some in!)

Hope you are all having a great day, and WHY not!?!?!?  It’s Friday!

I love Fridays!

Freebie Makeover

p7100006
Spare Backpack

My kids got these great lightweight backpacks for free from their summer school program. They are not very attractive though, and every other kid at school will be carrying the same backpack! So, I thought it would be fun to try some embellishments!For the first one, I tried adding a monogram. I just found a cute letter on the computer. Enlarged it to the full sheet size (8 1/2 X 11″) Then I printed it. Most printers have the option to print in reverse. It is smart to go ahead and print your letter in reverse so that you can trace it easily onto the back of your fabric. This way when you flip your letter over it will be facing the right direction!p5280028Then trace your letter onto some iron on backing…p5280030I also took a 12″ square of fabric and ironed it down. Then I added her letter H, and a cute little heart (at her request!) Once they were all ironed down, I just satin stitched around the edges and we were done!p5280034

p5280044
Finished Product 🙂

Free backpack + Stash Fabric+ very easy = One happy kiddo with a backpack like no one else!

Of course, having four of these little freebies, I couldn’t stop with just one! So, I thought about all the little floating blocks I have…you know the one block that didn’t fit into your quilt top. Well, I thought this would be so cute to dress up with some left over blocks…Just like before, take your block and iron it to the fusible web. Square it up so your edges are nice and clean.p7100008Peel off the back and line it up. Then Press it down!p7100009Can you see the writing through the white fabric? Well, I can too! and it bothered me so, I added some things! a second block, and a little flower. I did a simple zig zag stitch around the entire thing and I LOVE this one! It turned out even better than I imagined!p7100013Necessity is the mother of invention right? and don’t we all LOVE a  happy accident??!!  This will become our new library book bag. So, I don’t have to pay another $5.00 in fines when we go back! 🙂 oops! I was also thinking that this would be a fabulous way to dress up those $1.00 reusable grocery bags that you can get at most grocery stores. Someone once mentioned that they felt weird taking a Walmart grocery bag into a Target. Well, if your bag is all dressed up and you cover the store name with a quilt block, then you are good to go! Take that bag into any store you like with no discomfort whatsoever!  Either way, keep your eyes peeled for fun things that can be made over in a jiffy. They are closer and more abundant than you think! Enjoy!

More on Going Green…

I have always been a big supporter of going green and recycling. I remember when I was in the fifth grade our Science teacher took us to McDonald’s so we could protest their use of Styrofoam containers for their big macs! So, yes, that seed was planted early!

My kids are also big into recycling…they are also very creative and recently started making these bracelets from pop tabs. p4170134p4170135You can find a good tutorial HERE. I think they are so great. Very funky.

A few other things we do to recycle, reduce, reuse:

1)we try to separate our trash…taking aluminum, cardboard, newspaper, glass, and plastic containers to the local recycling center.

2)we donate our toys and clothes to charity when we no longer need them…we also shop thrift stores and garage sales! We only buy new if we have to!

3)we walk as often as possible…to the park, the library, the gym, and school.  We love to take walks

4)we USE our library…we have lots of readers in our house and we are always checking out new things to read!

5)we have lots of house plants around to improve our air quality, and we try to plant a garden every year. This year we are planting tomatoes, green beans and strawberries! We love to feed the birds too!

6)we use reusable grocery bags as often as possible, and on the chance that I forget them, or I don’t bring enough and we get plastic grocery bags, we use the plastic bags to line our small trash cans instead of buying trash bags.

If you stop and think about it…there are a lot of things we just do naturally every day that help to keep our world cleaner, and our lives healthier. And, if you’re not already doing these things…then just start today! Its not so hard if you take it one small step at a time! and I wouldn’t get too discouraged,  the earth is like our bodies…in that, it has the ability to repair and rebuild itself…and any little thing that we can do to help will make a huge difference! Good Luck!

A “Good Cause” Baby Quilt

Here is my baby quilt to donate to the Quilts for Kids Charityp4040071 I was really excited by the challenge to use my stash and scraps to make something cute.

This one is made all out of scraps except the green border. The floral is leftover from a dress I made myself (ten years ago), the white is from a sheet that I cut up for a mummy wrap game! I am especially proud of this one because I was able to make something amazing with stuff I already had! Who knew this was hiding in my closet all this time…disguised as old fabric that I almost tossed into the trash thinking that I would NEVER use! This was so much fun! I am already thinking up new quilts! We have a few (growing) bins of scraps here at the shop and we would love to have some help putting together baby size quilt tops. We are planning to have one night a month to work on this…we will let you know as soon as we decide which night and time!