Project Notes Notebook (Free Printable and Tutorial!)

If you’re like me, you scribble notes about your project on whatever is nearby. A receipt, on the back of junk mail, etc. That’s why I love this little notebook! It’s so easy to make, and full of graph paper, which is perfect for figuring out the specifics of your next quilt (and keeping them all in one place)!

In less than an hour you can make one of your own. And the best part is, you probably already have everything you need.

DSC_0264

What you’ll need for one notebook:

1 sheet of 8.5 x 11 cardstock in your favorite color
5 sheets of 8.5 x 11 printer paper or graph paper
About 3 feet of book binding string (or embroidery floss will work fine, too!)
Sewing needle
Rotary cutter, ruler, and mat
And this file, printed onto the sheet of cardstock

button

Step 1: Print the free .pdf onto your cardstock. Use your ruler to measure 5.5″ and cut the paper in half. Fold in half as shown in this picture. Now you have two covers. Hopefully you’ll love the first one enough to make another for a friend!

DSC_0226

Step 2: Open the cover and starting 1/2 inch from the top, make a mark every quarter inch along the spine ending 1/2 an inch before the bottom as well. Poke a hole with the sewing needle on each mark.

DSC_0227

Step 3: Then cut and fold the graph paper just like you did the cardstock.

DSC_0230

Step 4: Using the cover as a template, poke holes in the inside paper, a few sheets at a time.

DSC_0232

Step 5: Once your paper is all folded and punched, it’s time to start sewing. Start on the top hole, and draw your thread through the cardstock and all five sheets of inside paper. Sew back to the outside.

DSC_0253

Step 6: Double knot the string and clip the end.

Step 7: Go back down the second hole. Once you are inside the book again, come back up the third hole and loop under the thread between the first and second hole. Then go down the third hole again. Repeat down the entire spine.

DSC_0254

DSC_0257

DSC_0260

Step 8: Once you get to the end, come out the last hole, loop through the previous threads one more time and tie it of with a double knot. Trim the ends of the thread.

DSC_0241

This is what the inside and outside will look like:

DSC_0252    DSC_0250

Step 9: Using your rotary cutter and ruler, trim the edges of your book so they are uniform.

DSC_0244

You’re all done! Wouldn’t these make such a great gift with a charm pack or two? Enjoy!

DSC_0248


Easy one Charm Pack Quilt

Here at MSQC we are all about the easy, quick quilts.  You know, something to get you either through a slump, or an idea for a quick gift.  And this is a perfect example of just that.

IMG_9794
Cute little Baby quilt!

For this specific quilt we used one Panache  charm pack and some matching fabric for the borders. Sew the squares into strips and  attach them in rows.  (best part:  NO CUTTING!!)   Then we used the amazing scallops, waves and vines ruler (another favorite) and did a little wavy border.  I think this turned out to be a perfect gift for a baby shower and it won’t take you  a year to make!  (well, unless you put it away after an hour or so and lose the whole project….in that vast dark  hole we lovingly call ‘the sewing’ room)  You know what I mean.  🙂

Just thought I’d share an easy and quick little project.

Enjoy.

*ps.  Don’t forget to answer my question in the forums for your chance to win a charm pack!!  Free fabric every week! Yay!

Freebie Makeover

p7100006
Spare Backpack

My kids got these great lightweight backpacks for free from their summer school program. They are not very attractive though, and every other kid at school will be carrying the same backpack! So, I thought it would be fun to try some embellishments!For the first one, I tried adding a monogram. I just found a cute letter on the computer. Enlarged it to the full sheet size (8 1/2 X 11″) Then I printed it. Most printers have the option to print in reverse. It is smart to go ahead and print your letter in reverse so that you can trace it easily onto the back of your fabric. This way when you flip your letter over it will be facing the right direction!p5280028Then trace your letter onto some iron on backing…p5280030I also took a 12″ square of fabric and ironed it down. Then I added her letter H, and a cute little heart (at her request!) Once they were all ironed down, I just satin stitched around the edges and we were done!p5280034

p5280044
Finished Product 🙂

Free backpack + Stash Fabric+ very easy = One happy kiddo with a backpack like no one else!

Of course, having four of these little freebies, I couldn’t stop with just one! So, I thought about all the little floating blocks I have…you know the one block that didn’t fit into your quilt top. Well, I thought this would be so cute to dress up with some left over blocks…Just like before, take your block and iron it to the fusible web. Square it up so your edges are nice and clean.p7100008Peel off the back and line it up. Then Press it down!p7100009Can you see the writing through the white fabric? Well, I can too! and it bothered me so, I added some things! a second block, and a little flower. I did a simple zig zag stitch around the entire thing and I LOVE this one! It turned out even better than I imagined!p7100013Necessity is the mother of invention right? and don’t we all LOVE a  happy accident??!!  This will become our new library book bag. So, I don’t have to pay another $5.00 in fines when we go back! 🙂 oops! I was also thinking that this would be a fabulous way to dress up those $1.00 reusable grocery bags that you can get at most grocery stores. Someone once mentioned that they felt weird taking a Walmart grocery bag into a Target. Well, if your bag is all dressed up and you cover the store name with a quilt block, then you are good to go! Take that bag into any store you like with no discomfort whatsoever!  Either way, keep your eyes peeled for fun things that can be made over in a jiffy. They are closer and more abundant than you think! Enjoy!

Happy Earth Day! ~Reuse your old T-shirts!

Paper or Plastic? How about neither. It takes as much petroleum to make 14 plastic bags as it does to drive a car one mile. These grocery bags are made from rescued T-Shirts. They are similar in size and shape to your average plastic grocery bag and can be used anywhere! They are quite durable, keep them in your purse or your car, it just takes a little at a time to get in the habit of recycling. It’s all about making a difference one small step at a time.

So, what do you do with your favorite T-shirts after they are too small, or worn out? Why, make reusable grocery bags of course! Here’s how I do it:

First choose a t-shirt…p4170162p4170153I find that small to mediums work best. If you want to use larger T-shirts you would either have a very big bag (not a bad thing!) or you would need to cut and sew the side seams. (Confused?) You’ll see in a minute.

Lay your T-shirt out on a hard flat surface (I am using my kitchen table), p4170154
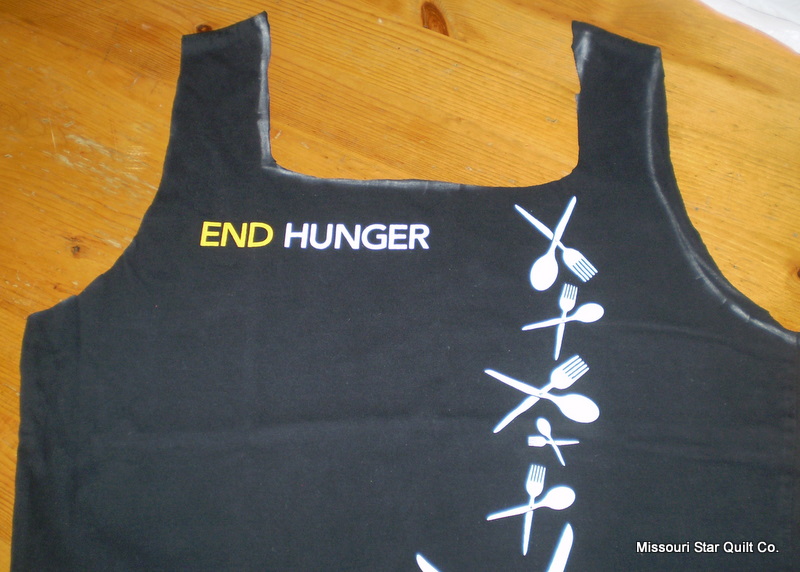
then lay your template…(any grocery bag will do. Pick one that has a size and shape you like.) on top pf your T-shirt.

Match the top of the bags handles with the shoulder seams.

Trace the opening around the neckline, and around the sleeves. (don’t worry, the chalk comes right off!) :)You are basically cutting out the neck and cutting off the sleeves to make your handles.p4170155

I usually fold my shirts in half, matching up all the seams and then do my cutting…this way both sides match. We leave the original side seams intact. (One less seam to sew!) 🙂 p4170157When that is done, cut off the bottom of the shirt. Again I use my walmart bag as a guide but, remember, your bag can be as big or small as you like.  When you have decided on a good length, cut it, then turn the shirt inside out, Sew or serge the bottom seam shut.p4170159 (If using a regular sewing machine do a straight stitch and a zig zag to make it nice and sturdy) If desired, you can also sew or serge around the handles.

Then take the bottom seam of the bag and fold it against the side seam like this..p4170161..you will have a little triangle, measure about 1 1/2 inches from the point and place a pin. (do this for both sides) sew a straight seam from pin to pin. You can leave this on or cut it off, its up to you. When you flip your bag right side out, you should have a nice squared bottom to your bag. And, its done! Nice job!p4180001Here is your finished product! p4180003
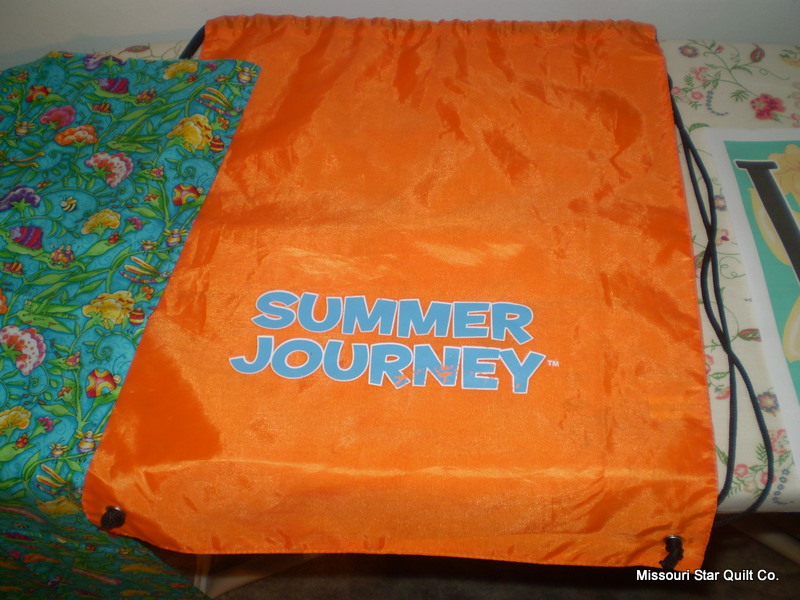
You can roll them up and keep them in your purse or under the seat of your car. You can tie them with hemp cord and give them as gifts! They’re great! Have a happy day!

Instant Ironing Board! – UPDATED

Sorry about that last post…We got so excited about posting it that it went threw without the pictures!  So here you go …I present….The Miracle ironing board!

Our shop is getting busy enough and big enough that the girls think I should sew in the back. Natalie made this cute corner for me to sew in. Today I was working on a block and realized I didn’t have an ironing board. A light when on! In the shop we carry a batting called insul-brite. I could make what amounts to a giant pot holder to iron on so…I used 2 pieces of insul brite, and cut the top the size I wanted .

Fabric and Batting
Fabric and Insul Brite

I then cut 2 pieces of fabric just a little larger that the insul brite. I put my fabric right sides together and sewed it up on 3 sides. I then turned the fabric right side out and slid in the insul brite.

Sliding in the insu-lbrite

I then top stiched all around the edge.

Top Stitching all around the top

I finished it by machine quilting the top.

Finished Product

Voila, I have a portable ironing board and a really big pot holder!