DIY Fabric Flag Holiday Decoration with Easy Gathering Technique – Step by Step Tutorial

During a recent Facebook Live video, we taught a simple technique for gathering fabric. It’s great if you don’t have a lot of time (or patience). You also have the option to find a gathering foot for your machine, but this way is my favorite! We featured a cute project we came up with just in time for Independence Day, so here are the step by step instructions to make it!

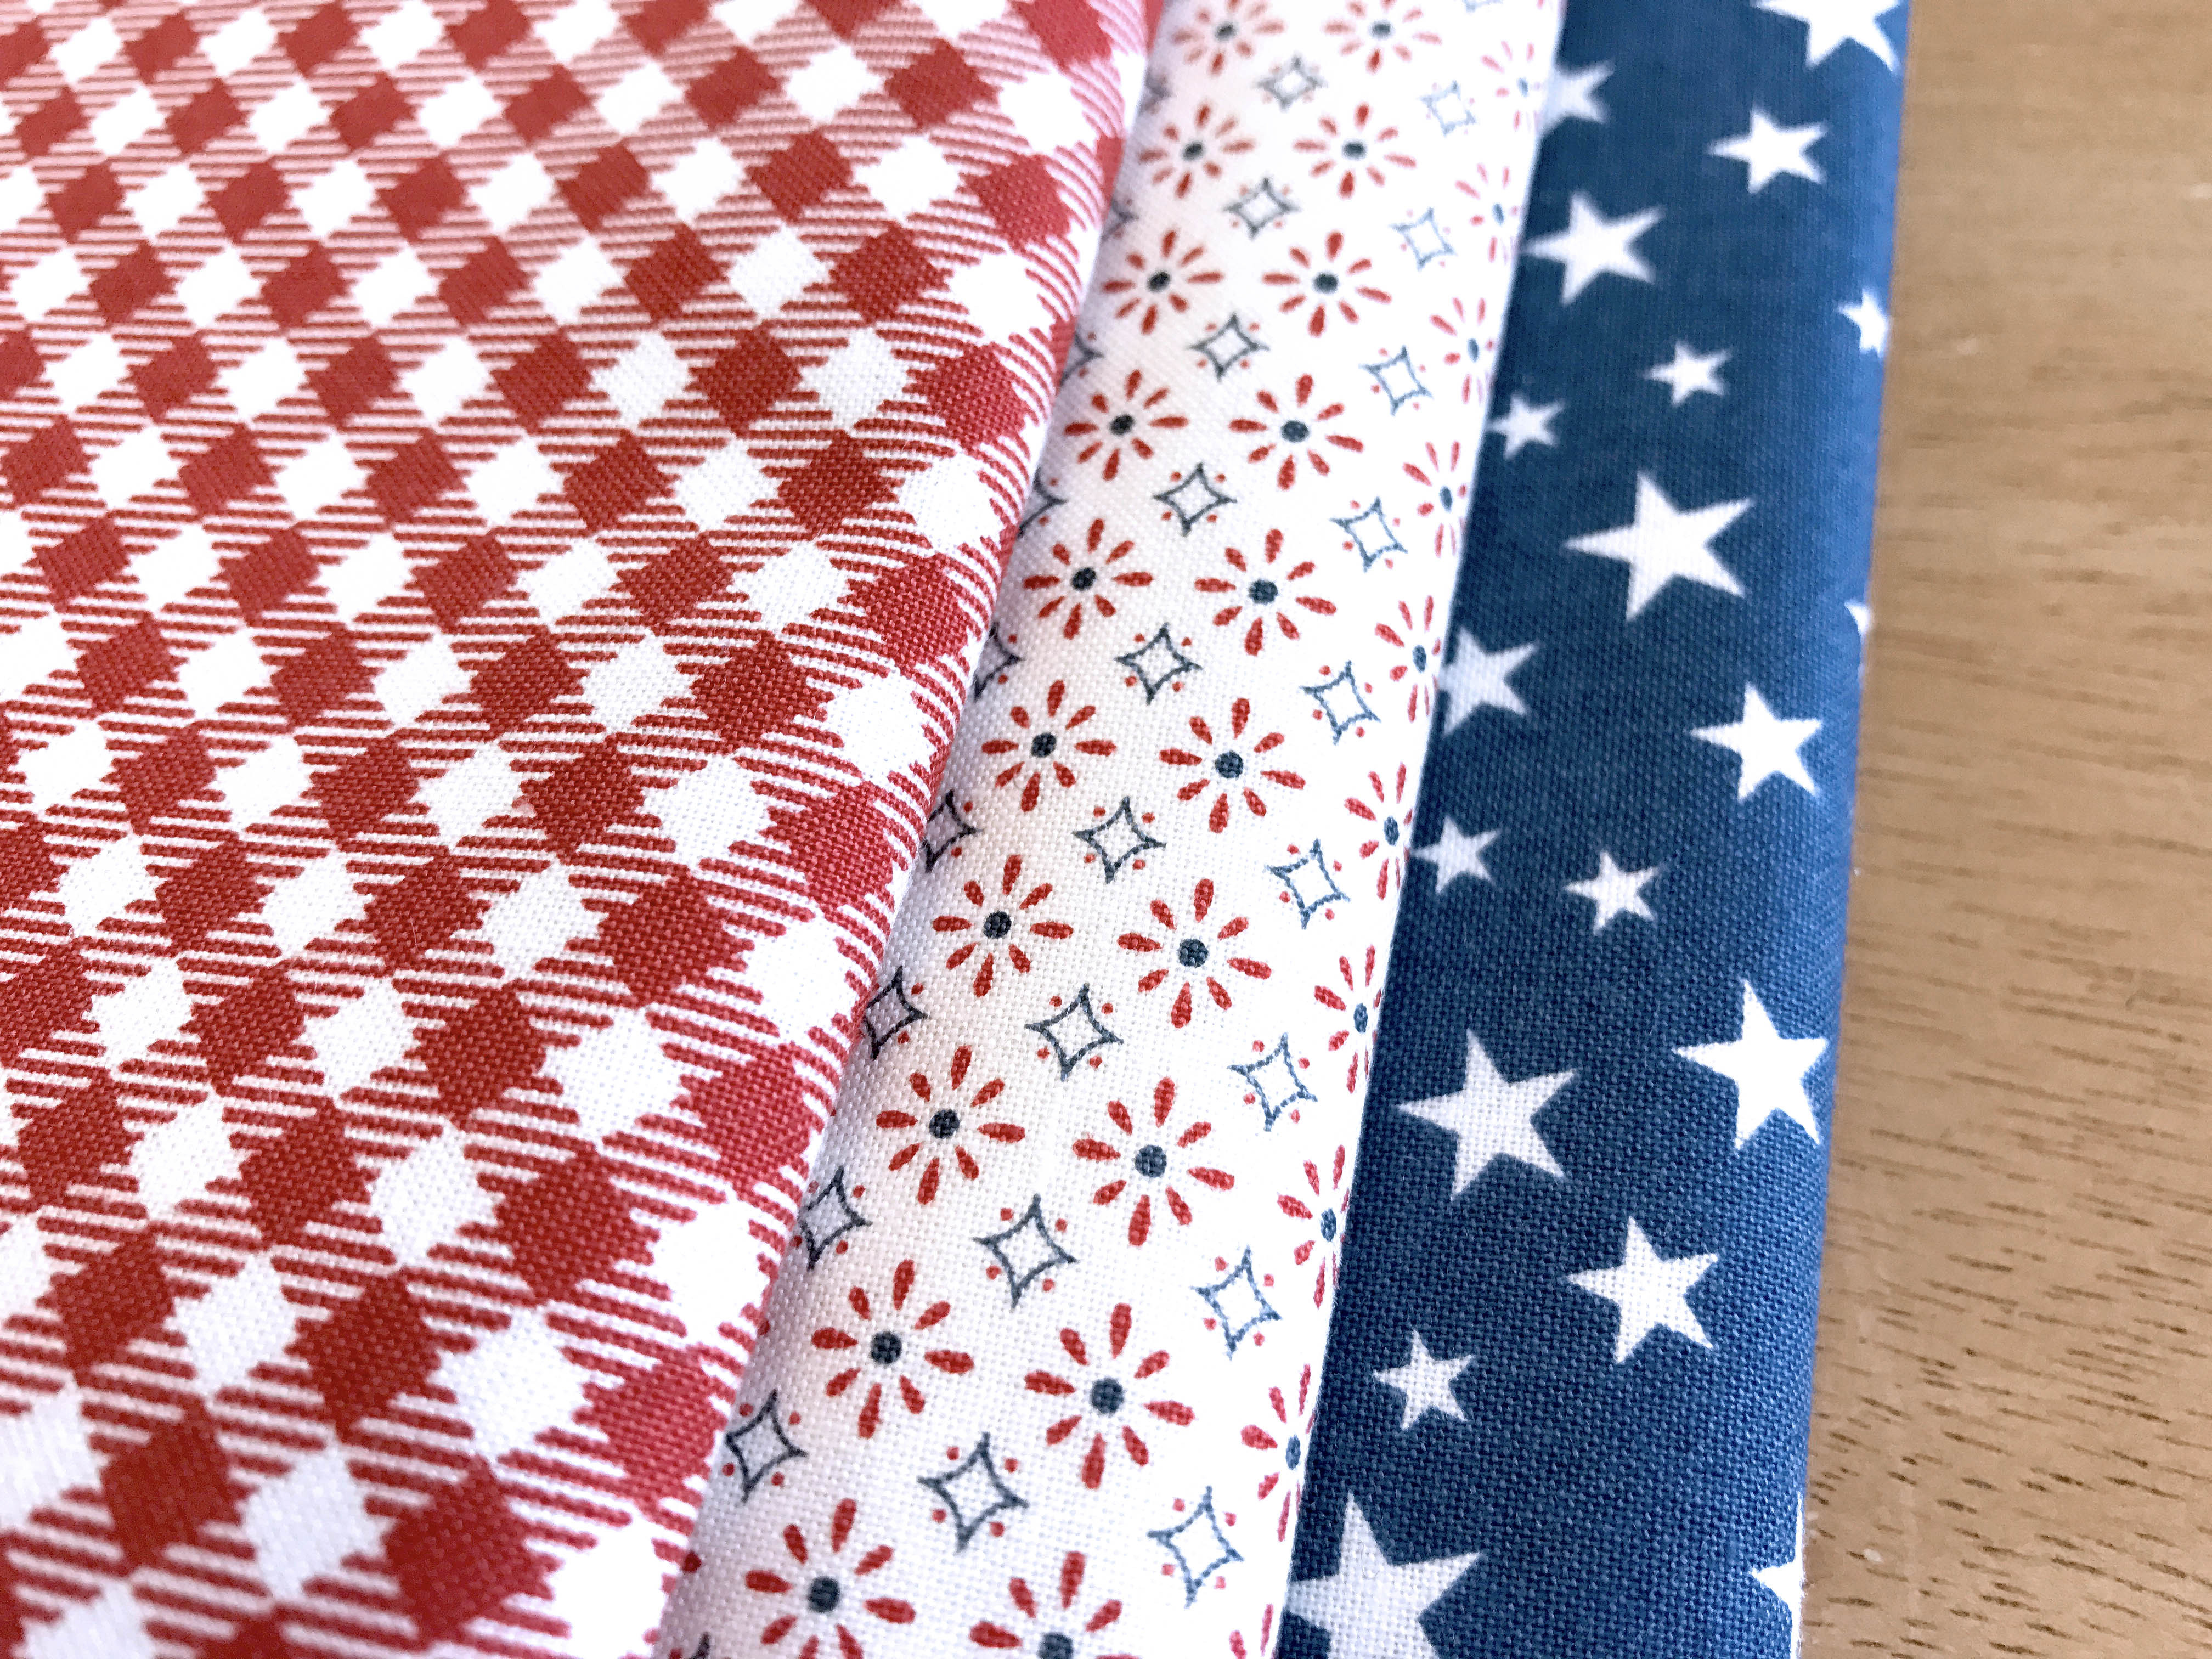
Let’s start with the fun part! Pick your fabric! We used fabrics from Freedom by Sweetwater for Moda (Picnic Apple Red Yardage and Bandana Vanilla Yardage) and Lost and Found America by Jen Allyson for Riley Blake Designs (Americana Mini Stars Blue Yardage)

You will need 1/4 yard of Blue, 3/4 yard of white, and 3/4 yard of red.

Additional Supplies:

  • 1 Fat Quarter (I used a neutral color that blends with my fabric choices)
  • Thread (& Sewing Machine)
  • Pins/Wonder Clips
  • Heavy Weight Thread (12wt would work great) or String or Dental Floss or Fishing Line (whatever you prefer)
  • Ruler/Cutting Mat/Rotary Cutter
  • Hot Iron

First, you will start by cutting your fabrics into 3.5″ strips! You need 7 red, 6 white, and 2 blue.

Set aside your red and white strips, and grab the blue strips. Stack the 2 strips and cut them them into thirds, so you get 6 strips that are approximately 3.5″ x 14.3″ (this does not have to be exact).

Take 3 of the red strips and 2 of the white. Trim off 14 inches from each strip. These will be the first 5 strips at the top of the project to show the stars and first 5 stripes. Put them right sides together and sew a 1/4″ seam to attach the 2 fabrics. Press the seams open (as pictured below).

Fold in about 1/4″ on each end and press (as shown).

At this point, you would fold the fabric in half lengthwise and press so the right side is facing out. At that point you will have 5 strips that look like this.

Repeat the previous step with the remaining red and white strips, so that they are all folded lengthwise with the raw edges folded in.

Once all of your strips are prepped like in the photo above, it’s time to add a top stitch to the ends! This will just give you a clean, finished look, so that your raw edges don’t show! Just like you would do a top stitch, get close to the edge and I like to backstitch for some extra security.

This is where the magic begins! It’s time to begin the gathering process! Set your machine to a loose zig zag (these are my settings).

For this next part, you need some kind of string. I used crochet cotton because I had it on hand, but a heavier thread would be great for this, like this Sulky 12 weight thread! You can also use dental floss, fishing line… anything strong that won’t get caught in your zig zag!

Line up the raw edges of your folded strips so that your zig zag won’t come off the edge, and line up the string with the small center marker on your foot. That will help you keep the string nice and centered, so it doesn’t get caught in your zig zag. You do not need to back stitch! Here’s how it should look.

Tip: Think about which side of your strip is the back and which is the front. If you put the zig zag on the back, it will make it harder for the string to accidentally show on your project!

Then, you just pull on one side of the string and gather your fabric together! It’ll twist and turn at first, but don’t let that worry you! That’s what pins and wonder clips are for! 🙂

Once all of your strips are prepped, you can work on the background fabric. I used a neutral colored fat quarter. Square it up to approximately 16×20. Use your iron to double fold each edge (except the top edge) toward the back. That means, fold 1/4″ inch in and press, then fold over and press a 2nd time. Top stitch over the left, right, and bottom edges (left and right sides first, then the bottom) and this will conceal your raw edges. On the top edge, you’re going to fold your edge toward the front side, press, and stitch down the edge. This will be important at the end, once you’ve stitched down all of your gathered strips.

To space your strips evenly, draw straight lines every 1.25″ starting from the bottom of your base fabric.. This is the line you will use to pin your gathered strips to the base fabric.

Tip: Use wonderclips to anchor the strips on each end, then pull your gather string to get even spacing in your gathering. Pin ever 2-4″. Notice that my gathering string is on the underside of the strip to make sure it’s nice and hidden.

To sew your gathered strips down, you will want to set your machine to a smaller/tighter zig zag than the one we used before. I set my stitch length at a 2 and my zig zag width at a 2.5.

Once you get all your strips sewn on, you will want to take the top loop of your background fabric and loop it forward over the raw edge of your top gathered fabric strip. Pin it in place and stitch over it to finish the top edge and create a loop for hanging your finished project!

Summer in the Park Tutorial Reboot Featuring Lee Ann Perry!

Revisited Quilting Tutorials from Missouri Star Quilt Co
Lee Ann Perry Tutorial Reboot
Hi! My name is Lee Ann. I’m a wife and mother of four. When I was expecting my third child, I saw some rag quilts on Etsy and thought they were adorable—but expensive. I mean, $65 for a little baby blanket?  
So I bought my first sewing machine and a set of fat quarters by Kaffe Fassett. I learned how to make my first rag quilt by watching a tutorial by Vanessa Vargas Wilson on YouTube. I was pretty happy with the result but my husband teased me a bit. ”Why spend $65 on a blanket when you can make it yourself for $300?”
But, I fell in love with sewing!  Putting colors together.  Feeling the fabric run through my fingers. And the finished project was an item that was both USEFUL and beautiful. I made several rag quilts before getting bored and wanting to learn more. That’s when I found the free video tutorials online by MSQC.
One of the first “real” quilts I made was from a pattern called Summer in the Park using a jelly roll, a line by Tula Pink, the Birds and the Bees.
Watching the videos made it easy for me to follow along—or watch a half dozen times if necessary, and sometimes it was! The finished quilt was so worth it.
IMG_4833
But, like many quilters, I don’t ever make the same thing twice! You’ve got to change it up a bit.
Recently I came back to this pattern and changed only two things.
In the tutorial, Natalie uses a brightly colored jelly roll and combines it with a jelly roll of white strips. When sewing them together, she sews two strip sets, 1) white, print, white, and 2) print, white, print.
So to change it up, I chose a jelly roll of Carolyn Friedlander’s Carkai. Instead of white, I used a darker CHAMBRAY fabric.  I also changed how I sewed my strips together. ALL of my 3 strip sets were sewed as: print, chambray, print.
 
The 3-strip-sets are then sewed to each other, right sides facing, into a “tube.”
84CCF2D0-E7F2-45F2-B6B9-5FD2CEFB8201
Now comes the really fun part—cutting the tubes into squares. You lay your tube down and cut triangles—when you open it up, they will be perfect squares!
The best ruler for this is the Triangle Square Up Ruler, 9 1/2” by Quilt in a Day. I don’t happen to have that ruler (mine only goes up to 6 1/2”), so I had to make do with my big square up ruler for squares. I put the point of my ruler right up to the seam but did not cross it. Then, I made sure both of the 8” marks touched the bottom seam before making a cut.
 IMG_4447
Continue cutting the tube, swiveling the ruler around the opposite way to maximize the number of cuts you can make.  I was able to get five finished 8” squares from each “tube.”
IMG_4448
When sewing the squares together, I made sure to nest the seams to make perfect points.
IMG_4451
I sent this quilt off to MSQC for machine quilting.  My local lady is great but she will not back anything with fleece.  MSQC does — Cuddle/minky too!  This is my first quilt backed with fleece and it’s pretty much the best thing EVER.
After it came back, I had to choose binding fabric.  I always “audition” a few colors first.
IMG_4442
After letting this quilt and the different options sit on my table for a few days, I ended up going with the same chambray I used in the quilt blocks.
My favorite binding tutorial is The Ultimate Quilt Binding Tutorial by MSQC.  No binding tool required!  I used to have one but I don’t use it anymore.  This method is the easiest!  But, I must confess, I had to watch this video EVERY SINGLE TIME a quilt needed finishing for at least the first ten quilts I made.
Here’s the finished result of my “reboot”.
FullSizeRender (10)---
And now that I’ve spent a few years piecing quilts…I’ve decided a $65 rag quilt is more than fair!  A bargain, really! But, I wouldn’t trade learning a new hobby for ANYTHING.  Quilting has become my quiet place and saving grace in my busy life.
lee ann perry pinnable
Thank you, MSQC for asking me to write this blog post and for teaching me how to quilt in the first place!
You can follow my quilty adventures on Instagram at leeannjperry.

New Friday Tutorial: The Super Simple Squares Quilt

MSQC New Tutorial on the Blog!

This Super Simple Squares Quilt is exactly what I've been looking for!

Yesterday I googled, “How to boil an egg.”

Don’t laugh! I have boiled an egg before. But sometimes the yolk is too soft, and sometimes it turns green. And the shell never, ever comes off nicely.  So I went seeking wisdom, and guess what? I actually learned a thing or two! (Add salt to the water; the eggs will peel like magic. True story.)

Today’s Super Simple Squares Quilt is as easy as boiling an egg – maybe easier- but you can count on Jenny to show you the slickest, most efficient way to make it.

This Super Simple Squares Quilt is exactly what I've been looking for!

I know you collect charm packs just waiting for the perfect easy project you could make with them… that is exactly where this tutorial comes in. It’s tried and true and requires very little thought/design ability. It’s quick, easy, and beautiful! That makes it especially perfect for those last minute holiday gifts or donation quilts!

This Super Simple Squares Quilt is exactly what I've been looking for!

Click on the button below to watch the tutorial and get all the supplies to make this quilt!

This Super Simple Squares Quilt is exactly what I've been looking for!

Quilt Snips Mini Tutorial: The Garden Party Quilt Block

Quilt Snips Mini Quilting Tutorials

garden-party-thumb

We have a new Quilt Snips Mini Tutorial for you today! It’s our Garden Party Quilt Block and you won’t believe how easy it is to make! All you need is some charm squares and some 1.5″ squares of white fabric to snowball the corners!

You can watch the Garden Party Quilt Snips video as well as the full Garden Party Quilt Tutorial HERE!

If you try out this Garden Party pattern, make sure to share a photo of your project on social media (Facebook, Instagram or Twitter) using #gardenpartyquilt and #msqcshowandtell!

Happy Quilting!