More than a Blanket: Quilts are Art!

The Sunbeam quilt by from Annabel Wrigley for MODBLOCK.

Many have wondered, “Are quilts art or craft?” Well, the answer can be yes to either. Confused yet? Let’s start with the definition of art. In the Oxford dictionary art is said to be, “The expression or application of human creative skill and imagination, typically in a visual form such as painting or sculpture, producing works to be appreciated primarily for their beauty or emotional power.”

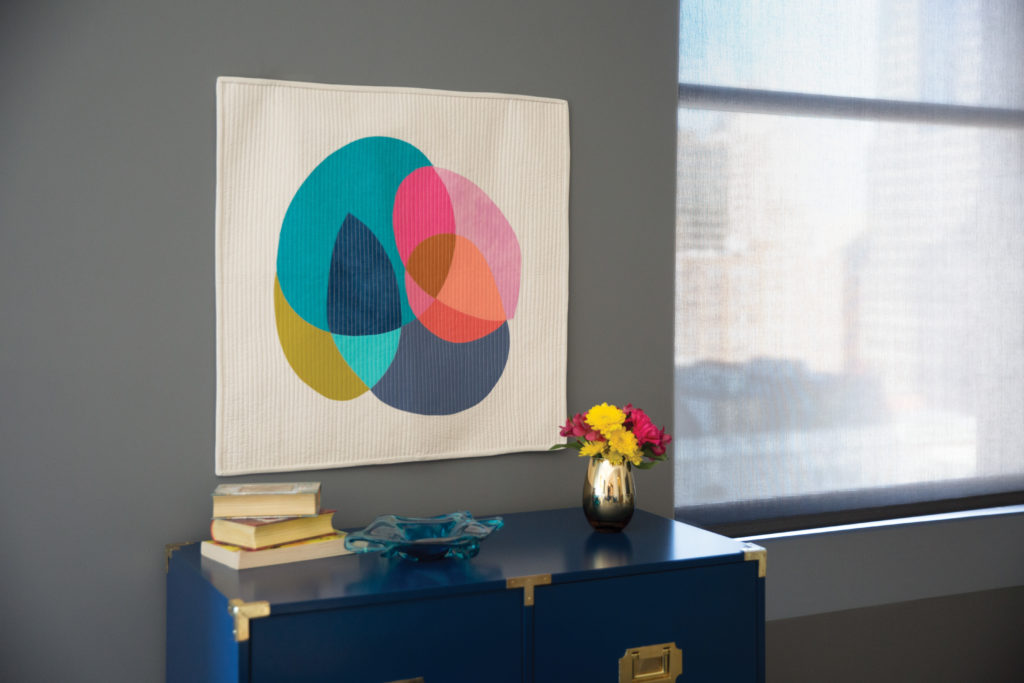
In that sense, quilts can be considered an artform. Although quilts are created to serve a purpose, most often to keep us warm, they are also made to be nice to look at. It takes skill and imagination to create a quilt. In addition to this, many quilts are created to celebrate a special occasion, mourn a loss, mark time passing, and so on. They are literal representations of love. Emotion is stitched into every square inch.

Contrary to this definition, are some quilts made without great skill or imagination? Sure. Are some simply utilitarian, without much thought given to the design? Yes. But these early attempts are a first step in learning how to make quilts that could be considered art. The first time we create anything is a trial period. There should be no high expectations. It’s a time to build skill and learn from experience. As we grow, we become more creative in our approach to quilting, gaining confidence in our design choices, and more skilled in quilting techniques. No matter where we begin, we can always improve.

The Oberlin quilt by Heather Jones for MODBLOCK.

Quilts can also be considered a craft. The definition of craft is, “An activity involving skill in making things by hand.” Simple enough. Quilting is a skill that can be learned by anyone and it can be fun to do even if we don’t view it as an artform. Regardless of what our intent is when we make quilts, they can be both incredibly beautiful and useful. Let’s hear what our customers had to say about quilts being art or craft:

“They are both. When I was in school, many many years ago we could make a quilt in our home economics class as a sewing craft and make another in art class as art.” -Denise Vasel

“In my 3-dimensional design art class in college, we were given the assignment of turning linocut prints we made into quilts. I would say there isn’t much distinction in my mind between craft and art. It’s all art.” -Denise Fox Eskridge

“Both. Craft because you are making something and art because the material, pattern and colors you use makes it unique.” -Paula Herbst

“A quilt is art that you craft.” -Sharon Crouch

“Both, art and craft. You create your own concept, pattern, and color, and craft because it is handmade.” -Pat Trueblood

“They can be both. I think some people are confused because a quilt is used. It’s functional art. It’s consider myself an artist.” -Julie Tierney

“Craft, art, and love.” -Debbie Torrey

“Both but also much more. They are art in the selection of color, fabric, and design. They are craft in the construction and quality of quilting. On top of all that, they are heart, and love, and passion.” -Victoria Hubbard

“Both. Quilting is a work of art and it’s like putting a puzzle together. I never knew I could be so artsy and crafty. Love love love it!” -Alice Hayden

“I was disappointed to have an art teacher tell me that quilting was a craft not art. I believe she is wrong. I have seen so many works of art made from fabric.” -Leslie Savitsky

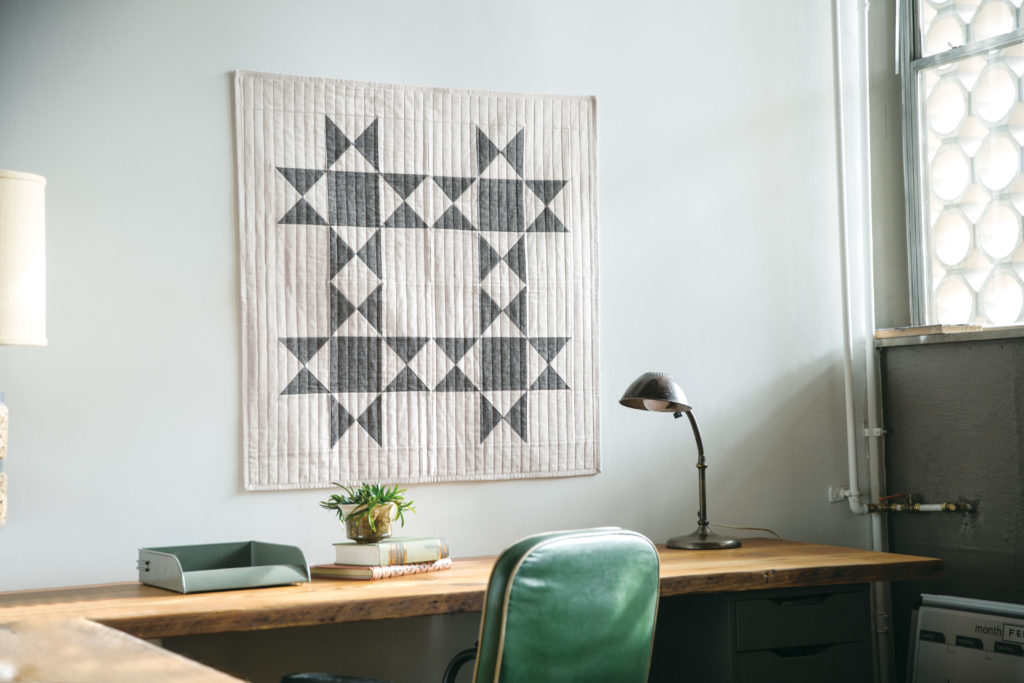
“Quilting is an art. When you thoughtfully and methodically pick out a pattern and figure out an eye-catching layout and fabric placement for a quilt, that’s art.” -Suzanne K. Einspahr

We completely agree! You are all wonderfully skilled, artistic quilters and we love seeing what you make. Share your beautiful creations with us at #msqcshowandtell and keep on creating your beautifully crafted works of art!

DIY Fabric Flag Holiday Decoration with Easy Gathering Technique – Step by Step Tutorial

During a recent Facebook Live video, we taught a simple technique for gathering fabric. It’s great if you don’t have a lot of time (or patience). You also have the option to find a gathering foot for your machine, but this way is my favorite! We featured a cute project we came up with just in time for Independence Day, so here are the step by step instructions to make it!

Let’s start with the fun part! Pick your fabric! We used fabrics from Freedom by Sweetwater for Moda (Picnic Apple Red Yardage and Bandana Vanilla Yardage) and Lost and Found America by Jen Allyson for Riley Blake Designs (Americana Mini Stars Blue Yardage)

You will need 1/4 yard of Blue, 3/4 yard of white, and 3/4 yard of red.

Additional Supplies:

  • 1 Fat Quarter (I used a neutral color that blends with my fabric choices)
  • Thread (& Sewing Machine)
  • Pins/Wonder Clips
  • Heavy Weight Thread (12wt would work great) or String or Dental Floss or Fishing Line (whatever you prefer)
  • Ruler/Cutting Mat/Rotary Cutter
  • Hot Iron

First, you will start by cutting your fabrics into 3.5″ strips! You need 7 red, 6 white, and 2 blue.

Set aside your red and white strips, and grab the blue strips. Stack the 2 strips and cut them them into thirds, so you get 6 strips that are approximately 3.5″ x 14.3″ (this does not have to be exact).

Take 3 of the red strips and 2 of the white. Trim off 14 inches from each strip. These will be the first 5 strips at the top of the project to show the stars and first 5 stripes. Put them right sides together and sew a 1/4″ seam to attach the 2 fabrics. Press the seams open (as pictured below).

Fold in about 1/4″ on each end and press (as shown).

At this point, you would fold the fabric in half lengthwise and press so the right side is facing out. At that point you will have 5 strips that look like this.

Repeat the previous step with the remaining red and white strips, so that they are all folded lengthwise with the raw edges folded in.

Once all of your strips are prepped like in the photo above, it’s time to add a top stitch to the ends! This will just give you a clean, finished look, so that your raw edges don’t show! Just like you would do a top stitch, get close to the edge and I like to backstitch for some extra security.

This is where the magic begins! It’s time to begin the gathering process! Set your machine to a loose zig zag (these are my settings).

For this next part, you need some kind of string. I used crochet cotton because I had it on hand, but a heavier thread would be great for this, like this Sulky 12 weight thread! You can also use dental floss, fishing line… anything strong that won’t get caught in your zig zag!

Line up the raw edges of your folded strips so that your zig zag won’t come off the edge, and line up the string with the small center marker on your foot. That will help you keep the string nice and centered, so it doesn’t get caught in your zig zag. You do not need to back stitch! Here’s how it should look.

Tip: Think about which side of your strip is the back and which is the front. If you put the zig zag on the back, it will make it harder for the string to accidentally show on your project!

Then, you just pull on one side of the string and gather your fabric together! It’ll twist and turn at first, but don’t let that worry you! That’s what pins and wonder clips are for! 🙂

Once all of your strips are prepped, you can work on the background fabric. I used a neutral colored fat quarter. Square it up to approximately 16×20. Use your iron to double fold each edge (except the top edge) toward the back. That means, fold 1/4″ inch in and press, then fold over and press a 2nd time. Top stitch over the left, right, and bottom edges (left and right sides first, then the bottom) and this will conceal your raw edges. On the top edge, you’re going to fold your edge toward the front side, press, and stitch down the edge. This will be important at the end, once you’ve stitched down all of your gathered strips.

To space your strips evenly, draw straight lines every 1.25″ starting from the bottom of your base fabric.. This is the line you will use to pin your gathered strips to the base fabric.

Tip: Use wonderclips to anchor the strips on each end, then pull your gather string to get even spacing in your gathering. Pin ever 2-4″. Notice that my gathering string is on the underside of the strip to make sure it’s nice and hidden.

To sew your gathered strips down, you will want to set your machine to a smaller/tighter zig zag than the one we used before. I set my stitch length at a 2 and my zig zag width at a 2.5.

Once you get all your strips sewn on, you will want to take the top loop of your background fabric and loop it forward over the raw edge of your top gathered fabric strip. Pin it in place and stitch over it to finish the top edge and create a loop for hanging your finished project!

Fun Stuff Monday….

This weekend was busy with family stuff, hanging out- cooking- eating-cleaning.  You know, the FUN stuff!!  It is rarely dull around here when we all get together!!  🙂

We had a lot of this going on:   img_8492

That led to these being made:

And OH MY- these were good!  (carrot cake cupcakes, with cream cheese frosting!)

img_8485

I swear…they were GOOD!  🙂

Of course us girls couldn’t get away without a little crafting on the side…..

So a few of these were made:

ctjhvjhg1We just had a blast making them…..we used the fabric covered button kits, and made hair ties and clips out of them!  (for back to school, of course!)  We will do a whole write up tutorial on them later and show you just how fun and easy they are to do!!  I can’t wait to make more!

img_8452 Found some AWESOME vintage sheets….  Now we are trying to decide what to make….Skirts-shirts-quilts-  Decisions, decisions!!  🙂  Any ideas?  Please sharee.  {we like sharing}  🙂

Oh, and one more WIP.  (yes, I know….I have quite a few of those)  I am so excited about it though….It is going to be amazing.

img_8370

Do you understand now what I mean?!!?  Is this NOT the coolest picture frame!?!?  Oooh, I had so many ideas for it….I have settled on what I am going to do….now to finish it!

This week, I swear, I will have it ready to show you.  🙂

SO, how was your weekend?  Did you fill it up like crazy, or did you just hang out and relax?  DO you have a million WIP’s (like me) or are you keeping up with your stuff!??!  I’d love to know…..let’s discuss!

Happy Monday!