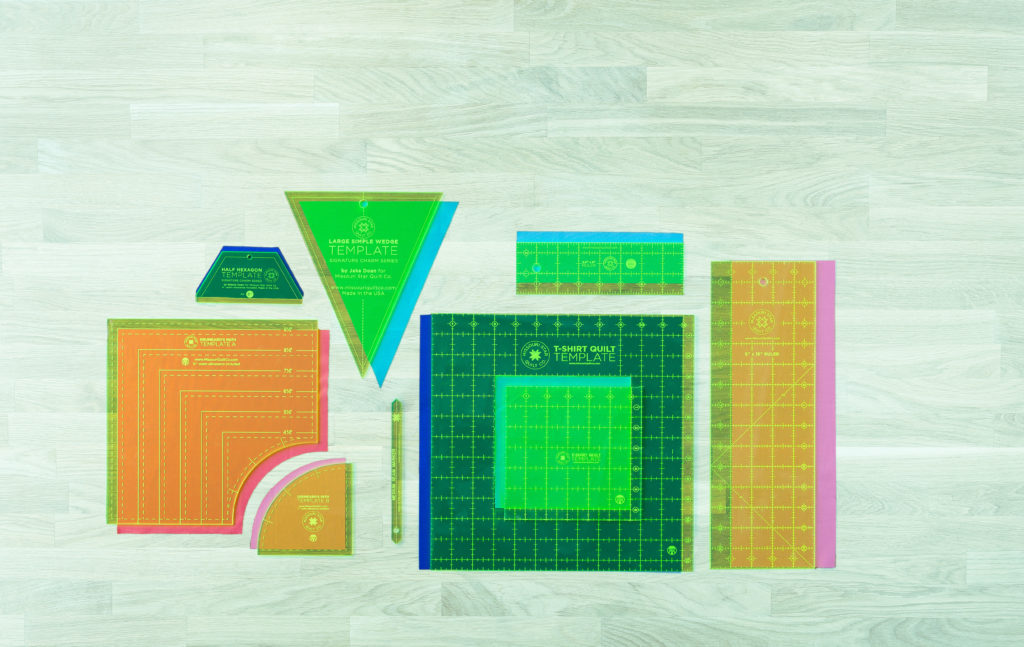
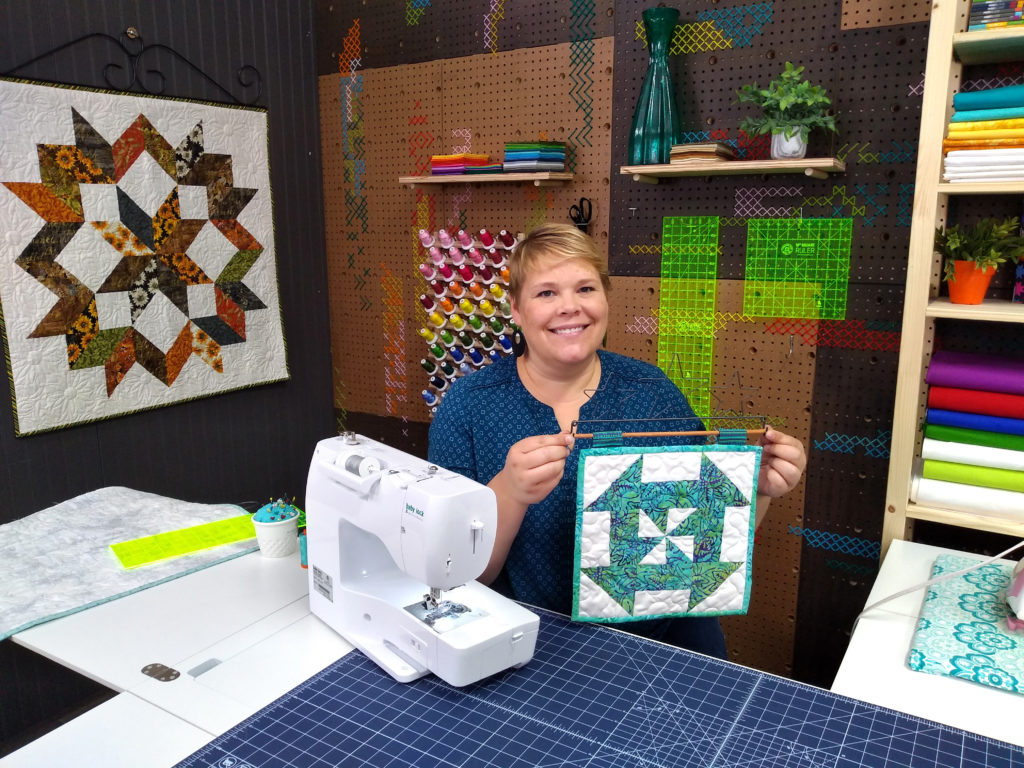
A variety of Missouri Star exclusive templates and notions.
You’ve gathered your supplies, you’ve studied your basic skills, and you’ve even put together your first quilt block, but what comes next? Using templates and notions to create one-of-a-kind quilting designs is even more simple than you may have imagined. In fact, if you’re using a ruler to line up your cuts, then you’re already experience in the process! The Merriam-Webster dictionary defines a template as “something that establishes or serves as a pattern”, so that handy ruler you’ve been using is the first step in mastering the template process!
The most familiar template for all of us is the trusty 5″ x 15″ ruler. This simple straight line device is used in quilting to cut an even and straight line, but they come in a variety of different sizes! If you’re sewing a big project, consider using a bigger ruler. Many quilting rulers are designed exclusively to feature one inch blocks in a transparent plastic so you will always be certain that you’re cutting and measuring precisely.
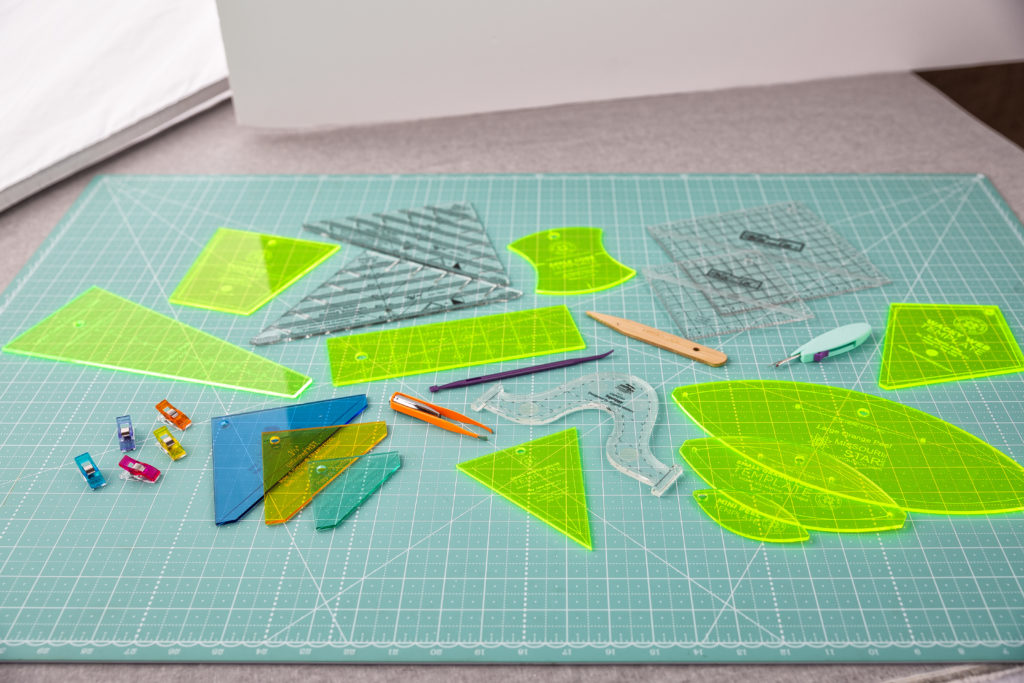
An assortment of templates and notions displayed upon a gridded mat for quilting.
This is just the beginning of the world of templates and notions! Consider the Dresden Plate block for example, it’s a time-honored traditional quilt block that demonstrates expertise in crafting and has long been a staple of the quilt world:
“The popular name for this quilt, Dresden Plate, reflects the romance of the Victorian Era with its love of elaborate decoration on household items and décor. Dresden, Germany was a center of 19th century romanticism movement in art, one that included the fine decoration of porcelain. The plates were embellished with elaborate design using flowers, fruits and foliage. The beautiful plates would surely have been admired by women of the early 20th century.”
Thanks to new quilting innovations however, the Dresden Plate has never been easier to create with a template. Using the Missouri Star Large Dresden Plate Template for 10″ Squares, Jenny demonstrates how to create this gorgeous vintage block in her Dresden Blooms quilt tutorial.
The Dresden Blooms quilt created with the Missouri Star Large Dresden Plate Template for 10″ Squares.
The fun doesn’t stop at just dresdens! Templates and notions are designed to make your quilting career easy and approachable. Whether you’re quilting with curves or using a notion to push out the corners of your project, take some time to research the available options to streamline the process. There is no limit to the ingenuity being utilized within the crafting world, so the next time you’re dreaming up some inspiration for your next project, consider challenging yourself to improve your skills by adding a new element to your quilting with a template.
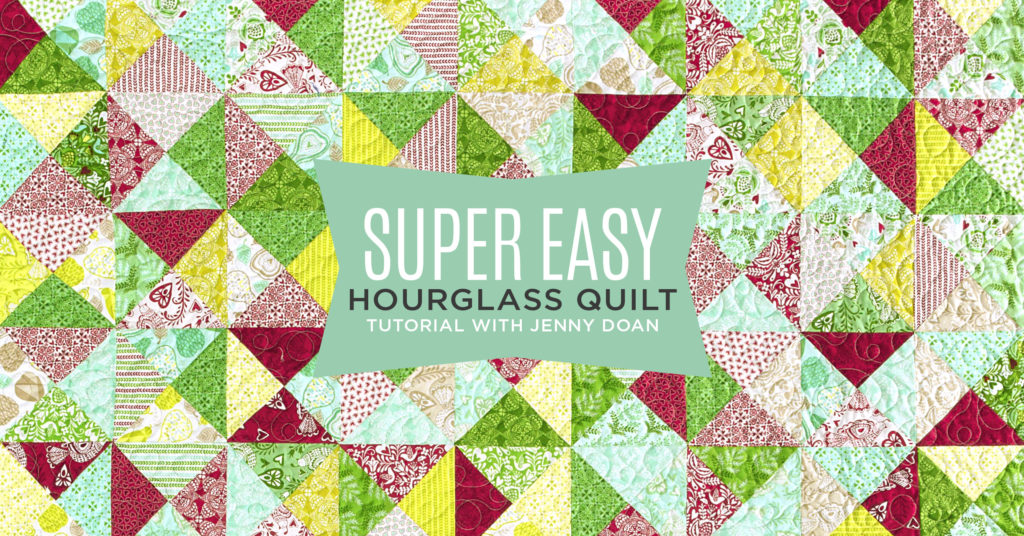
The Super Easy Hourglass Quilt is a great place to start learning your first quilt block! This project comes together easily using Charm Packs (5″ squares of precut fabric).
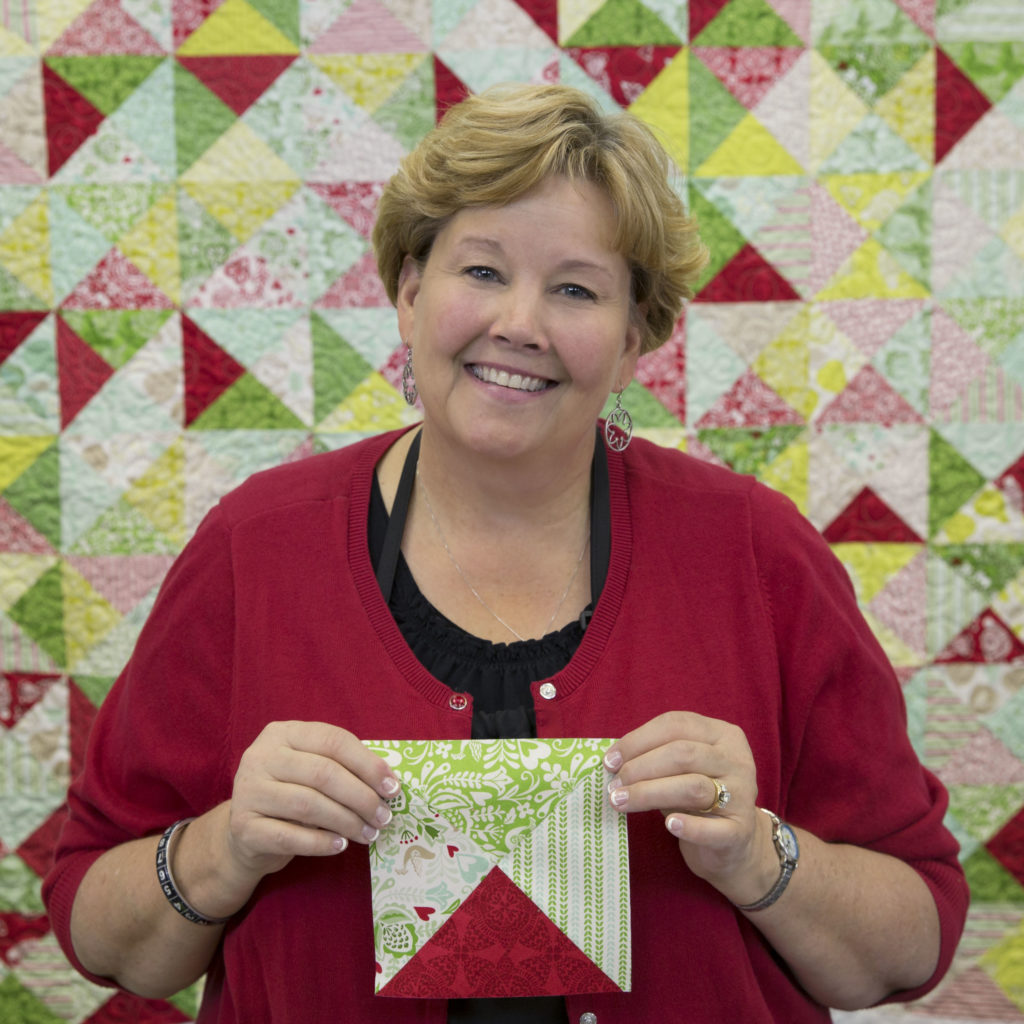
You’ve finally made it! You have your supplies in hand and you have a great knowledge of precut quilting fabrics so it’s time to create your very first quilt block! Before we begin, remember Jenny’s favorite phrase, “finished is better than perfect”. Your first quilt block might not be perfect (maybe it will!) but what is most important is that you learned new skills along the way and have a finished block that YOU created!
If you’re more of a visual learner and would like a video tutorial to follow along with as you create your first blocks, you can find all of the information on the Hourglass Quilt included in this blog post in Jenny’s Super Easy Hourglass Quilt tutorial and, for a quicker version, our Quilt Snips mini tutorial!
In today’s post, we are focusing on creating the first few blocks of the Hourglass quilt. We won’t be finishing the entire quilt top today, but if you continue your block making, you’ll soon have enough to create a finished quilt! We’ll get into binding, backing, and quilting later, but for now, let’s piece our first block!
The Super Easy Hourglass quilt block will measure 5″ x 5″ when complete.
For this project we’re going to be working with Charm Packs. If you haven’t already read Building Blocks: All About Precut Fabric, take some time to get to know your materials before diving into creating your first block. Once you’re ready, grab your favorite Charm Pack and let’s get stitching! You will need:
Remember we’re not tackling the full quilt today, just the first block. If you’re wanting to push your sewing skills a bit further, gather the supplies for the Super Easy Hourglass Quilt from the list HERE.
Creating Your First Block
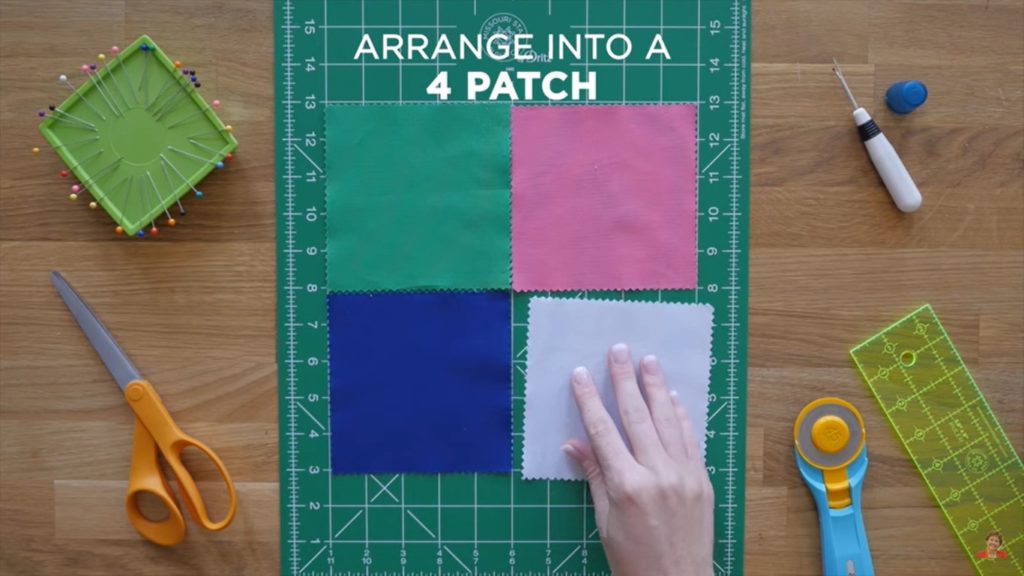
Arrange four 5″ squares of precut fabric together to create a large square.
Start by arranging four 5″ squares from your Charm Pack into a Four-Patch. This is a very simple and basic quilt block style and a great place to get started! Select four 5″ squares that vary in color or design and remember—we’ll be cutting these four-patches up very shortly so the layout will change as the hourglass block develops.
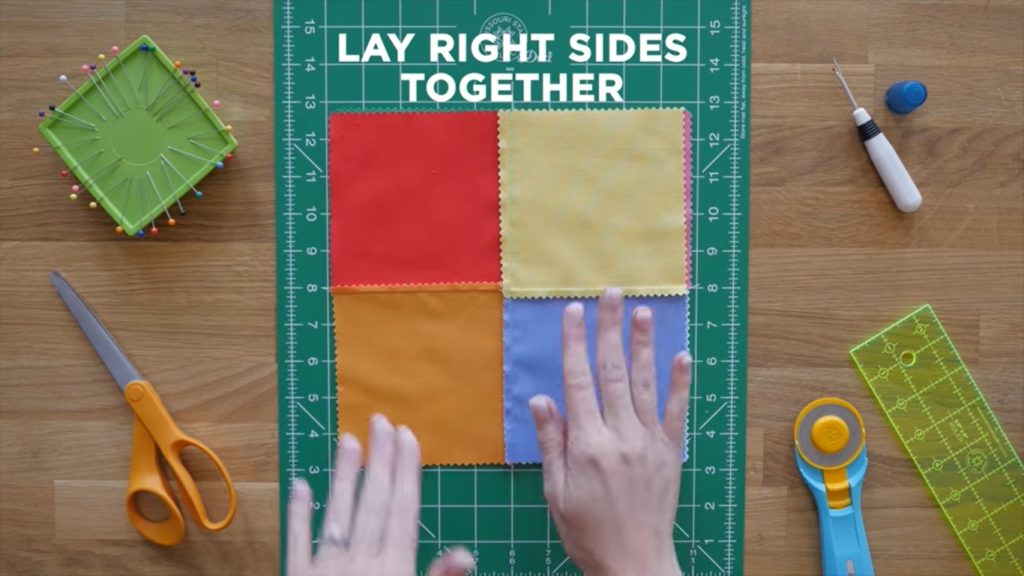
Once you have laid out four squares (hard work so far, right?) all you need to do is sew them together! Flip two squares of your four-patch over so that the right sides of the fabric are touching, as shown below.
Sew the side seams together by sewing down the side of the two squares on top of each other)
Next, sew straight down one side of each set of squares, creating two sets of two squares, using a 1/4 inch seam. Open and press the two sets flat, then line them up on top of each other with right sides facing. Match up the middle seams and sew the two sets together to create a four-patch.
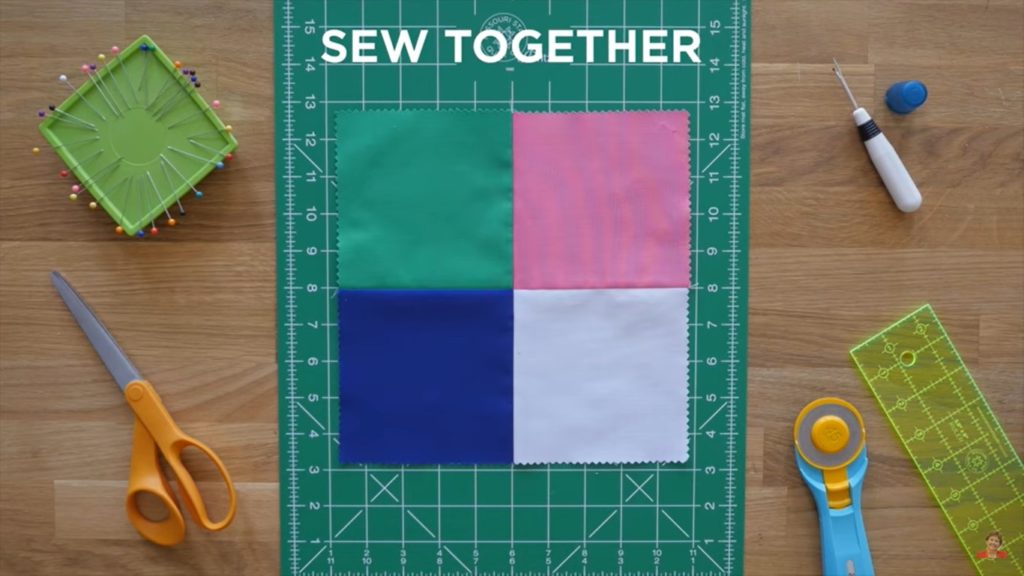
Sew all four squares together to create a Four-Patch quilt block!
Once your four squares are sewn together, press your block flat with your iron. Believe it or not, you’ve created your first quilt block! This Four-Patch block is oh-so simple and versatile on its own, but with a little more creative energy, we can turn it into a simple Hourglass block! To do so, follow the instructions above to create a second Four-Patch block, just be sure to mix up your fabric choices! Once the second Four-Patch block is complete, press it flat and lay it on top of your first Four-Patch block with the right sides of the fabrics facing each other.
Lay the newly created second Four-Patch on top of the original (right sides facing).
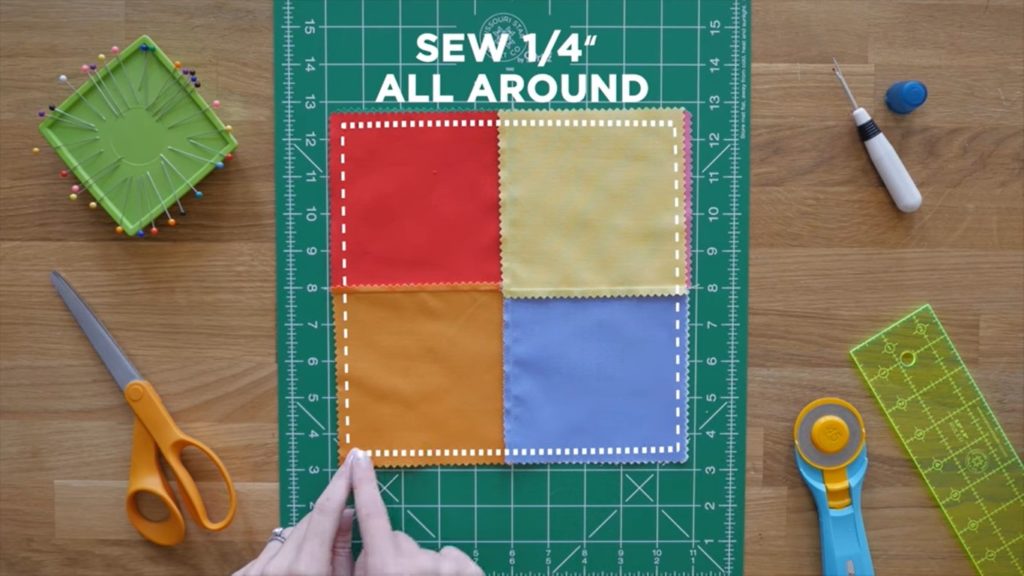
Take your blocks over to your sewing machine, keeping them lined up (you can stick a few pins into your blocks to hold them together if needed), and begin to sew all the way around the squares with a 1/4″ seam.
Sew all the way around the two blocks to bind them together.
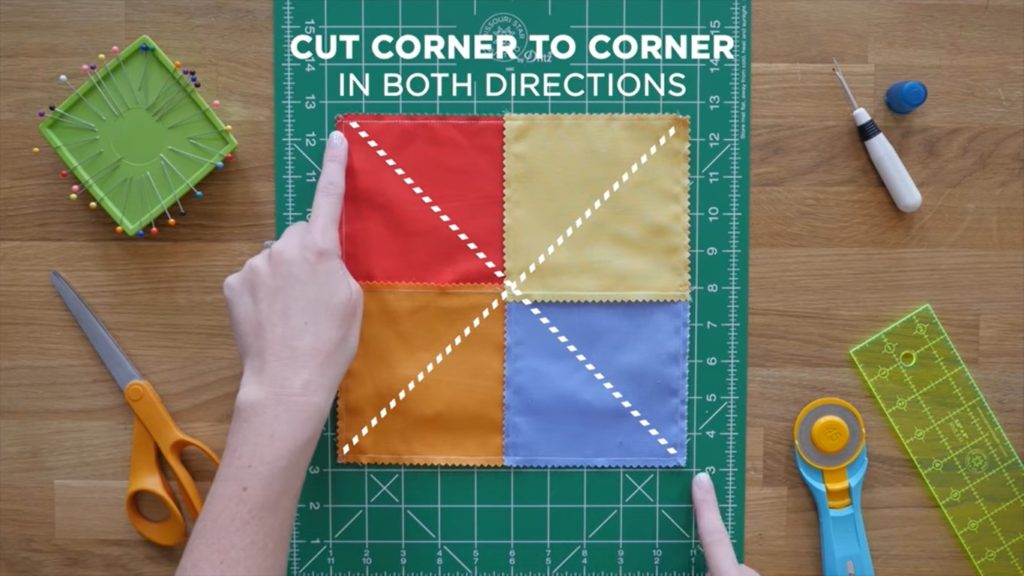
Your two Four-Patch blocks should be sewn together now and held tight. Now comes the fun part! Grab your rotary cutter and ruler and make two diagonal cuts from corner to corner on both sides of the sewn-together block. Use extra care when crossing over the middle of your block as the seams will be slightly more difficult to cut. Use your 5″ x 15″ ruler as a guide to ensure that your cuts are straight and even!
Cut corner to corner in both directions using your rotary cutter, cutting mat and ruler
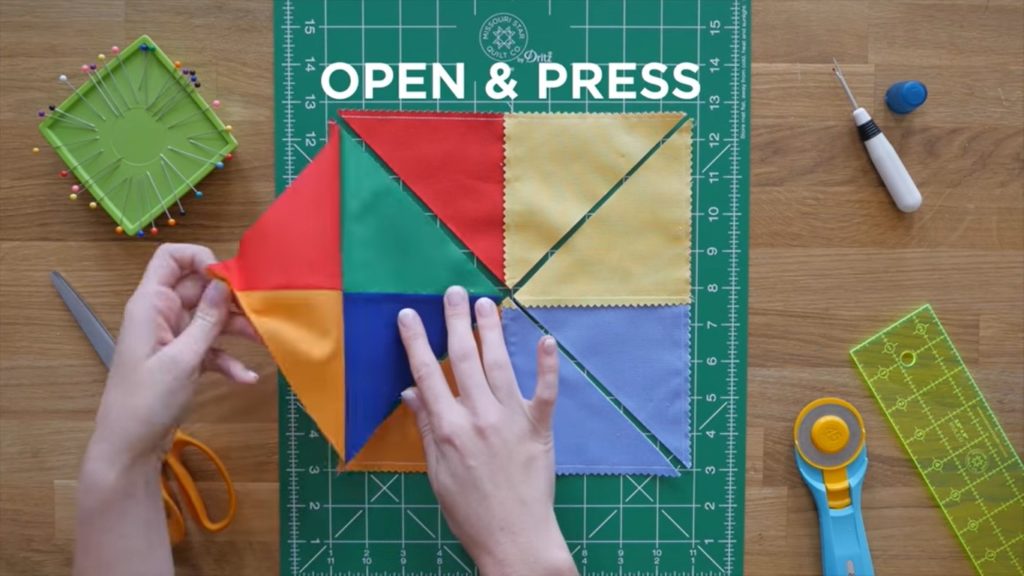
Now all that’s left is to open your newly created Hourglass blocks and press them flat! Using this method, you’ll actually create FOUR hourglass blocks at a time.
Open and press your newly created Hourglass blocks!
Take a moment to admire your work and be proud of what you’ve accomplished, you’ve not only created your first quilt block, but you altered that block to create four more unique quilt blocks! At this point you’re ready to tackle your very first quilt. If you need a little extra help, don’t panic! Check out Jenny’s full tutorial or the Quilt Snips mini tutorial below for some extra visual aids. Not everyone learns in the same way or at the same speed, so take your time and have fun!
Wouldn’t it be nice if we all had large quilting studios with plenty of space for cutting, designing, ironing, fabric storage, and multiple sewing machines? Yes, that would be ideal, but it just isn’t the reality for most of us. The truth is, many sewists are squeezing their hobby into tight spaces and we’re here to help you fit everything you love about quilting into whatever space you have to make creating a pleasure again.
Back to Basics
When you think about it, all you really need to sew is a place to set your machine and work with fabric. A sewing machine isn’t that big in and of itself. It could comfortably fit on a side table or a portion of your dining room table. If you’re struggling for cutting and ironing space, think about converting a folding tray table into a temporary cutting and pressing table that you can fold away when you’re through. You can even use a sturdy ironing board with a mat on top for cutting—and it’s height adjustable! As for supplies, they can be packed up into a tote with a handle that you can pick up and put away when you are finished sewing.
Stash Storage
Finding space for a sewing machine is just the beginning. Quilters all know that maintaining a small (or large) fabric stash is key—it can be a source of inspiration, but it can also be a headache to manage all that fabric. So, where to start? Pull out every box and bin and literally gather up every piece of fabric you own. Make a HUGE pile! Once you’ve done that, the magic begins.
Sort your pile of fabric into three categories: keep, donate, or sell. This can be tough for many of us who love every piece of fabric that comes our way, but if we’re honest with ourselves, there is fabric in our stash that will never be used and it can be used by someone else.
Once you’ve whittled down your stash a bit, take the time to fold it neatly and store it once more. Chances are, you’ve already cleared up some space. Way to go!
When you go to put your fabric away again, consider how you like to access it and display it. Maybe you have a shelf for pretty precuts that you like to look at or deep bins for larger cuts. Be wise as you put your fabric away so you can easily access it later on.
Tips for Fabric Storage in Small Spaces
Below, you’ll find top storage tips from four of our favorite quilters. Of course, Jenny and Misty pitched in their favorite tips as well as our senior copywriter, Nichole, and our educational producer, Liz!
• Try a Dresser “I can fit tons of fabric and notions in my drawers without worrying about shelves getting messy. My dresser also doubles as my cutting table.” -Liz
• Keep It Visible “I keep scraps of the same color in clear bins so I can see what fabrics I have and use them up.” -Nichole
• Hang It Up Larger cuts of fabric or panels can be hung up in the closet on hangers for easy access later on.
• File It Away Put an old filing cabinet to use for more than old papers and fold your fabric so that it drapes neatly over the empty paper files. When you open up the drawers, you’ll be treated to an organized fabric stash!
• Shelve It Utilize shelf space for fabrics by either folding them up neatly and stacking them, or you can cut down pieces of cardboard and wrap fabric around the cardboard like mini bolts that can be stored vertically on the shelf like books.
• Organize by Project “I don’t have a lot of stash to organize, but I do have fabric with specific projects in mind. I have quite a few clear project bins that I use to keep all the needed fabric for each project together. It makes it easy to clean up and store when I want to work on something different for a little while. They’re only a few inches deep and about 12″ square, so they’re easy to stack up and store, but I can still tell quickly what’s in each bin.” -Misty
Notions Storage
Sewing notions may be small, but they sure can pile up, too! Before you go to organize your notions, do a similar kind of whittling down like you did with your fabric. It’s easy to keep doubles and even triples of everything as quilters and those items may just be taking up space. Take a look at all your notions and decide what to keep or donate and then move on to setting up your space for success.
Because notions are easy to lose track of, it’s important to organize them in a way that is visually appealing and accessible. You know those neat peg boards that have been used as garage organization for tools? Why not use them for sewing! Storing notions vertically opens up space on your sewing table. You can also hang a couple shelves over your sewing table and arrange your notions up above your workstation to keep your table clear.
Jenny’s sewing studio is packed with everything she could need to create her next project and she says, “I like drawers for thread and rulers, although I prefer a hanging pegboard rack for the rulers I use often. I also like containers that are decorative and useful.” Like our cute little thimble containers! We just can’t get enough.
And don’t forget about pins! Jenny always says, “You can’t have too many pin cushions and we agree.” Liz mentioned that she likes to keep, “several pin cushions and put different kinds of pins in each—keeping them organized and being able to grab a whole pile of the ‘right’ ones for whatever I’m working on.” What a great idea!
Finally, when you’re organizing your workspace, think of the overall layout and how everything works together. If it’s a tight space, you may not have to walk far to your pressing station from your sewing machine, but do you prefer it on the right or on the left? Or are you always tripping over the iron cord? Keep these considerations in mind when setting up your space so that you’ll always feel comfortable and your creativity will flow easily. Another great tip from Liz is, “Think about laying out your ‘golden triangle’ of workspace. You can learn all about this on home improvement shows about kitchen layouts with an oven/sink/fridge, except our golden triangle of sewing is cut/press/sew—make that layout work for you and you’ll love even a tiny space!” Wise words indeed.
No matter what size space you sew in, you can make it work for you with some careful consideration about your fabric stash, sewing supplies, and overall layout. Share your beautifully organized sewing spaces with us at #msqcshowandtell. We can’t wait to see what you’ve done with the place!
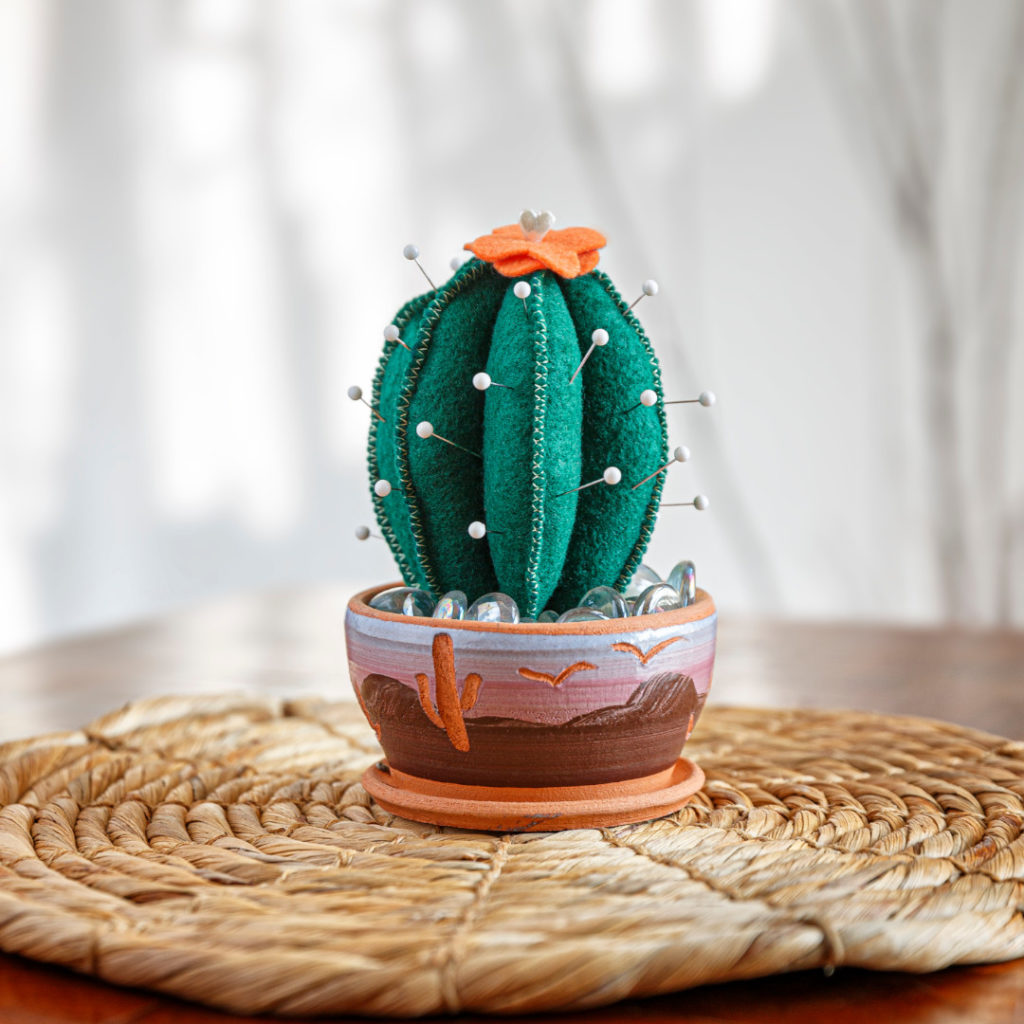
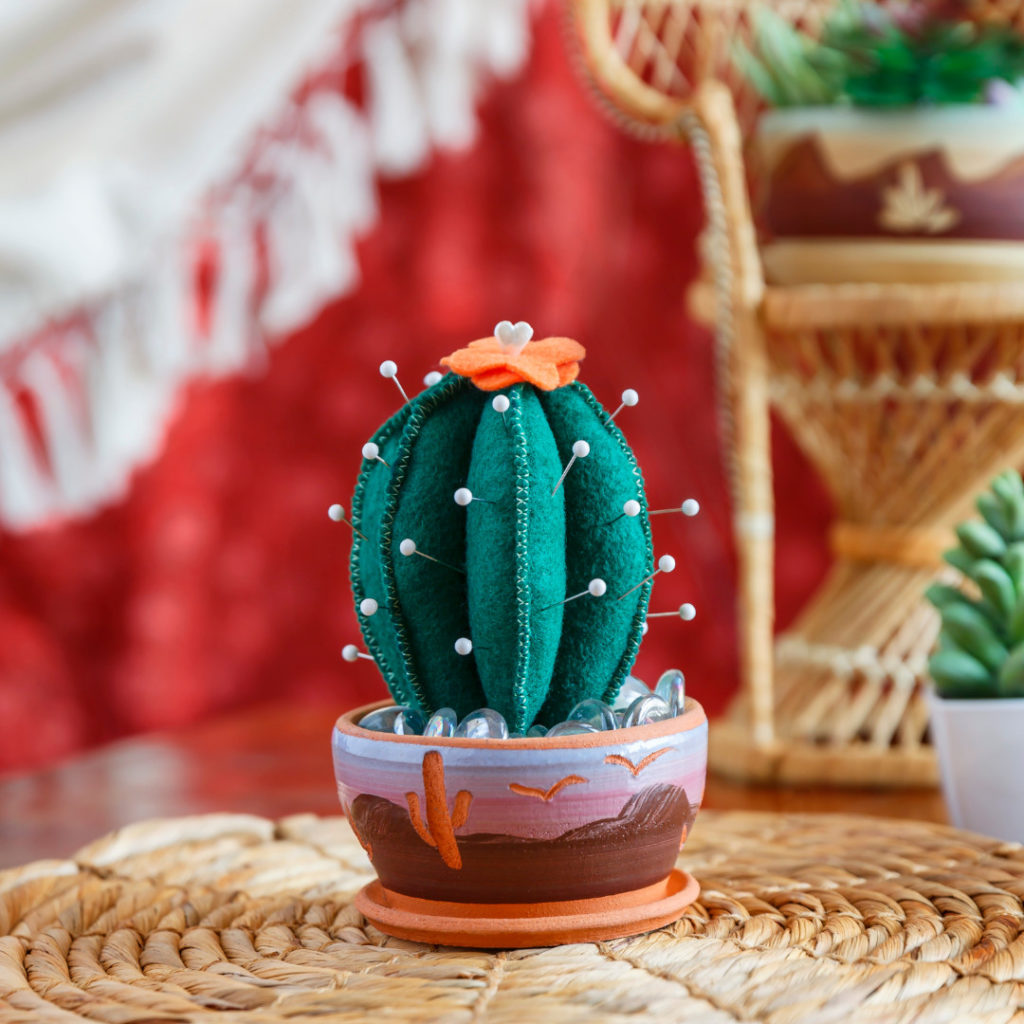
The Cactus Pincushion from Missouri Star Live displayed in a terracotta pot.
Long gone are the days of your grandmother’s red tomato pincushion! In the latest installment of Missouri Star LIVE, Courtenay demonstrates how to make a unique cactus shaped pincushion that will not only add a modern elegance to your sewing room, but will keep all of your pins safely tucked away for future use. Whether you’re “planting” your cactus pincushion in a traditional terracotta pot, or celebrating your love for Missouri Star by using a Thimble Container, this handy project is a must-have addition to your sewing studio.
Cut out the paper cactus blossom template. Use the template to trace and cut 2 cactus blossoms from the accent felt scrap. Set these aside for the moment.
Hint: Because you are sewing through layers of felt, you may need to change your needle to a larger size and sew slowly to ensure even stitching.
Lay 1 petal shape atop another, right sides out. Using a medium zigzag stitch, sew around the curved edges, leaving the bottom edge open. Repeat with pairs of the remaining petal shapes to make 3 units.
On only 1 of the sewn units, measure 1¾” from the widest point of the curved edges and mark a vertical center line.
Stack the 3 sewn units, aligning the edges, with the marked unit on top. Use Wonder Clips, binder clips, or pin as needed to hold the stack together. Sew the 3 units together along the marked center line, backstitching at the beginning and end.
Pin a fabric flower to the top of your Cactus Pincushion for a beautiful final touch.
FINISHING
Stuff each of the 6 tubes you just created with fiberfill.
Hint: The eraser end of a pencil or small dowel comes in handy to stuff the skinny tubes (Don’t forget you may find a wooden rod in your Poly-fil bag!).
Lay 1 cactus blossom atop the other at a 45° angle so that the ends of all 8 petals are visible.
Sew the blossoms together by hand, slightly gathering the top petals so they have 3 dimensions.
Sew the cactus blossom to the top of the cactus.
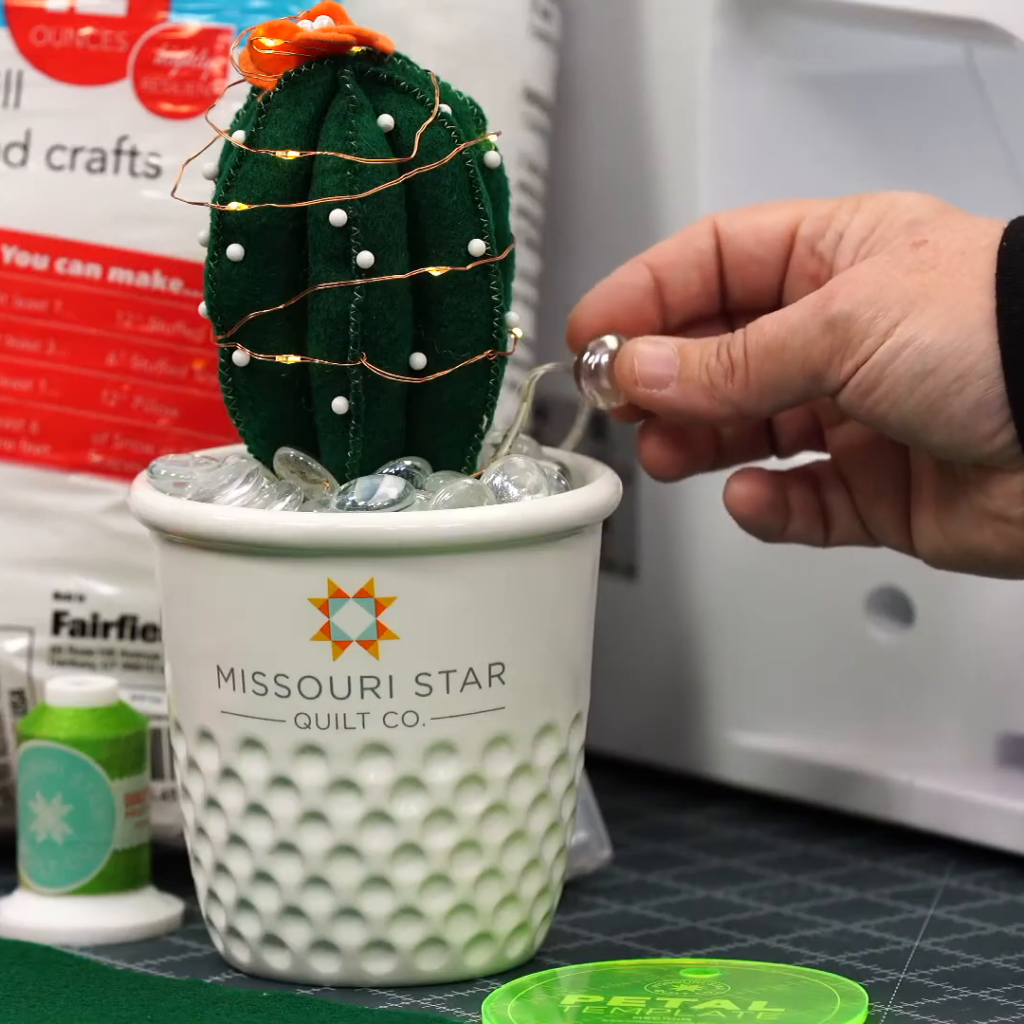
Cut the styrofoam cube as needed to fit inside the thimble container. Use the glue to adhere the sytrofoam to the inside of the pot. Use additional glue to adhere the cactus to the top of the styrofoam. You can fill the pot around the styrofoam with aquarium rock or even glue some rocks around the base of the cactus to finish “planting” your cactus.
Stick in some of your favorite pins and your cactus pincushion is sure to prickle your fancy!
Needing some more help? Download our Free Printable Pattern or Join Missouri Star’s very own Courtenay Hughes as she demonstrates how to create this adorable, quick and easy project on the replay of Missouri Star LIVE!
Misty Doan is many things. She’s a mom, wife, city councilwoman, model, quilter, Missouri Star LIVE host, and now… a designer!
Misty recently created this quilt pattern, Into the Woods! Check it out HERE!
Get to know Misty and all about her inspiration behind her latest creation and her favorite holiday traditions!
Where do you look for inspiration in your work?
Inspiration strikes in all different ways for me. But, everything I make or design is usually with a specific person or purpose in mind. So I think a lot about that- Who is it for? What do they love? What would make this quilt meaningful to them? What would make this project stand out? I like to challenge myself during the design process by asking lots of questions and that helps guide me to the final result.
What are your must have tools for working on quick kit projects?
Before I sit down to start on any quilt project, I always make sure I have my diagonal seam tape on my machine, a seam guide handy, and a few bobbins wound and ready to go. I do all my cutting first, label my pieces with trusty post-it notes, and then I can just sit and sew, sew, sew!
What tips do you have for new quilters?
Finished really is better than perfect. Take your time, enjoy the process, and remember- it’s only fabric and thread. Jenny always says, “Sewing is a learned skill. Sew an hour today and tomorrow you’re an hour better!”
What are your favorite holiday traditions?
There are almost too many to name. We try to make every holiday special at our house, but Christmas is especially magical. We always decorate the day after Thanksgiving- singing along to our favorite Christmas music and decking the halls together. The kids also make handmade gifts for each other every year that they exchange on Christmas Eve, so Jake and I love helping them with that. (It’s always a trick to keep their plans a secret from the others.)
Which projects do you work on specifically for Christmastime?
I always try to make handmade gifts for a few special people each year. What I make is different each year, depending on who it’s for, but there’s something truly special about making time to make something with someone special in mind.
What inspired Into the Woods? Why did you choose those three blocks?
My boys have been spending a lot of time playing in the woods behind our house lately. They’re always adventuring and exploring- bringing back treasures that they find and building forts. I recently made a quilt with my daughter and loved spending time helping her- so it seemed like it was time to make something that the boys would love. The quilt really seemed to design itself once I started. I knew I wanted to use the simple wedge to make the rows of trees, so that’s really where it all started. Then, I decided to include the log cabin blocks as a nod to the ramshackle fort that they’re so proud of building. And lastly the bearpaw blocks just naturally seemed to tie it all together.