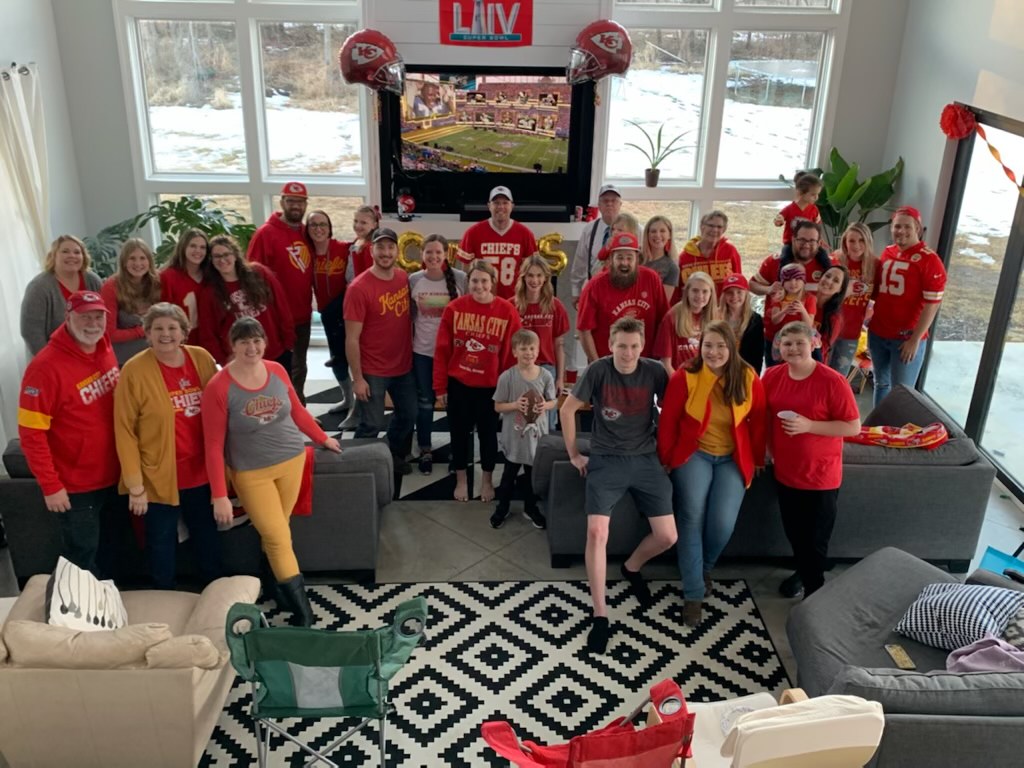
The Doan Family celebrating last years big game in February 2020.
Does your family have football traditions? Here in Hamilton, Missouri we love to celebrate our favorite Kansas City football team and we are so excited to see them bringing more attention to the great state of Missouri once again. Whether your family goes to the backyard to throw around the pig skin or serves up an incredible halftime meal, we hope that you have a chance to enjoy your festivities of choice safely!
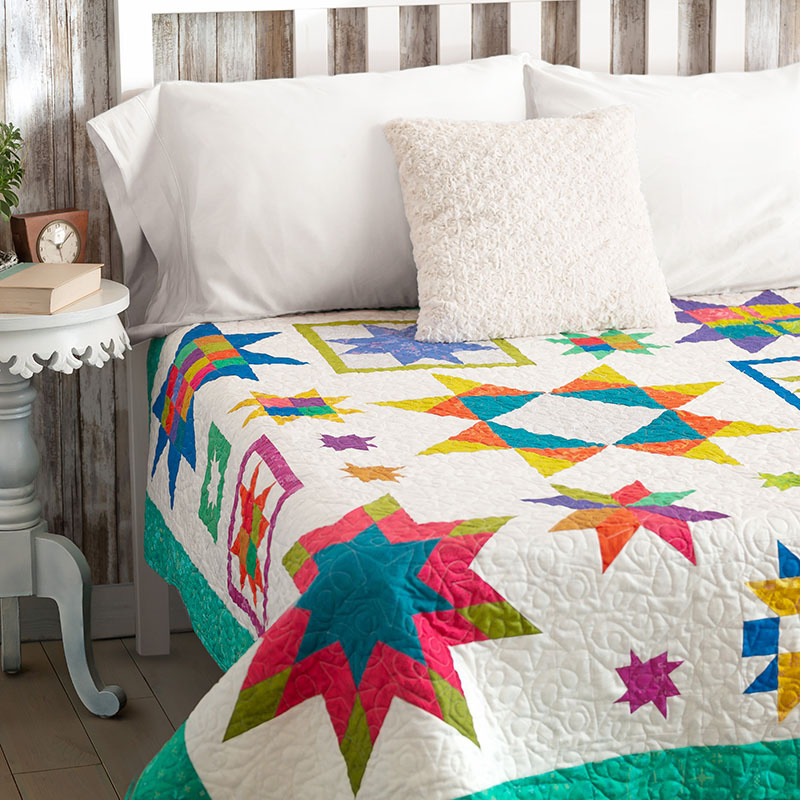
For those of us looking to make changes this year and celebrate smaller, there are still plenty of fantastic options to do so! What football fan wouldn’t want to celebrate the final victory of the year under a warm and cozy Blipper? Get crafting with a quick turnaround in mind with our Last Minute Gameday Projects featured HERE!
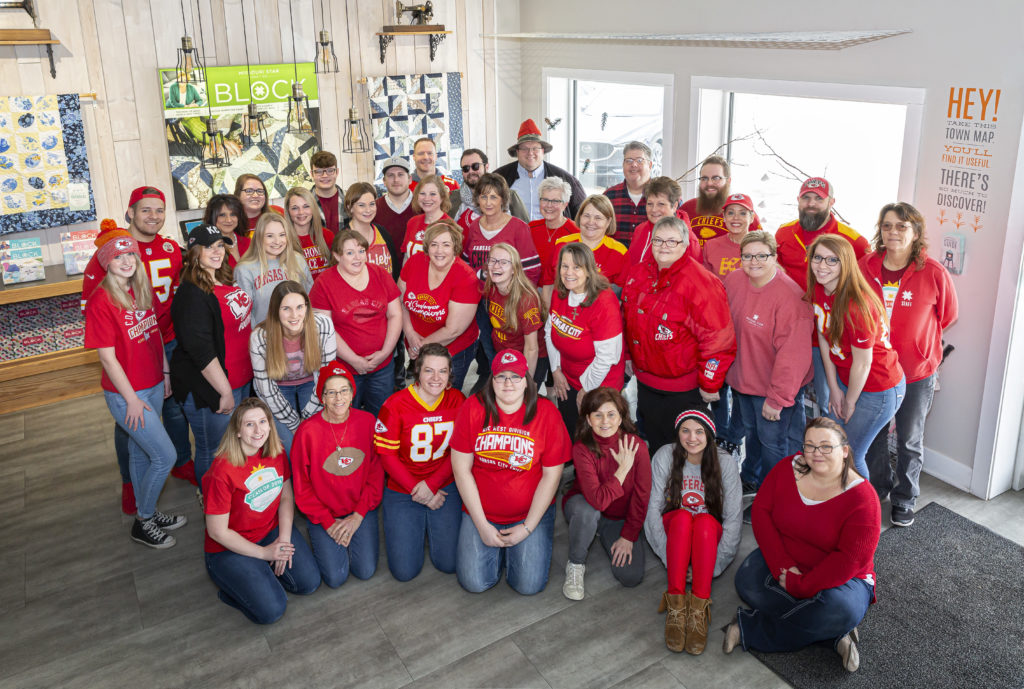
Missouri Star Quilt Co. employees gathered last year to show their support by wearing red.
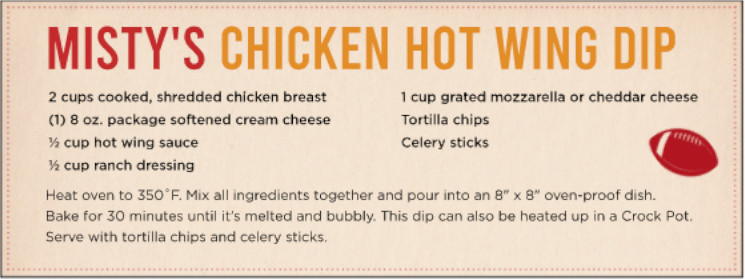
Football is a big deal in the Doan household, as Misty stated in a recent issue of BLOCK Magazine, “Every Sunday is a party at our house when it’s football season – and more importantly, when the Chiefs are playing! We all wear red, of course, and everyone brings food to share, from delicious barbeque to tasty Mexican dishes and cute little appetizers. We also have a floating Chiefs football helmet that has become part of the gameday superstition. My husband Jake likes to say, ‘if it’s spinning, we’re winning!’ I LOVE FOOTBALL!”
While we can’t gather in the big groups we once did, you can still make the big game extra special. If you’re crunched for time, surprise your household with a simple treat straight from Misty Doan’s kitchen!
Misty’s Chicken Hot Wing Dip recipe from BLOCK Magazine Volume 7 Issue 5.
However you’re celebrating this weekend, we wish you all the best! If you’re planning to spend your time quilting rather than cheering (or a combination of both for the multi-taskers out there) we hope you share your football creations with us by using #msqcshowandtell on all of our social media pages!
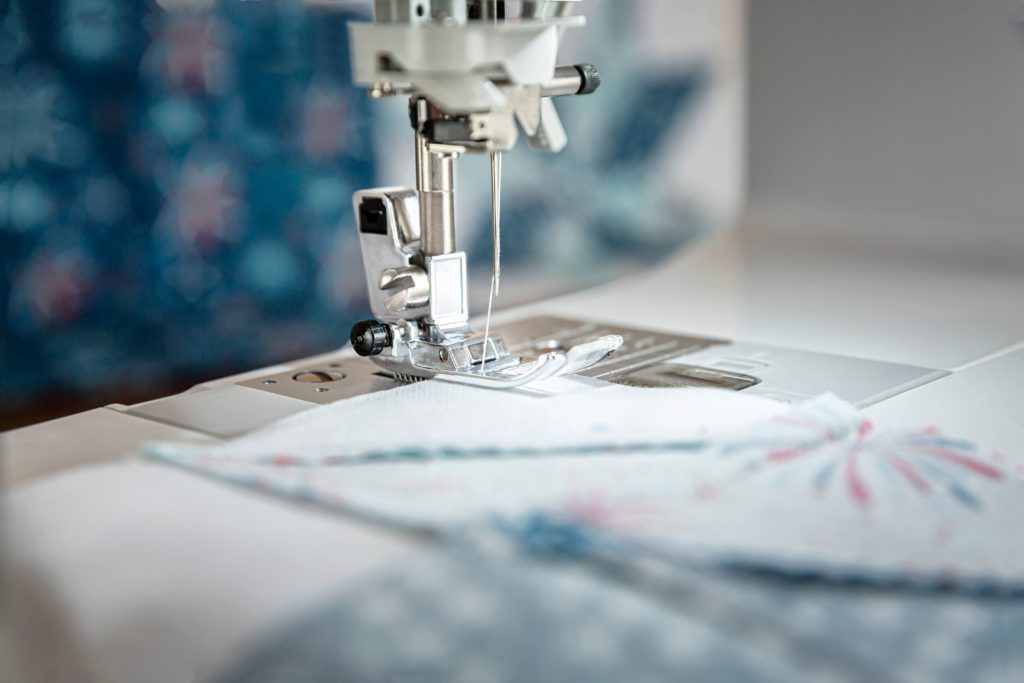
A sewing machine in action from BLOCK Magazine Volume 7 Issue 3.
If you’re interested in learning about the basics of quilting, then you’re in the right place!
Getting started with something new is usually the hardest part. Quilting can be a laborious process — it requires many steps that can seem really overwhelming when you’re new to it all! Many beginner quilters can get stuck when thinking about piecing together their first blocks, but we’re here to help! Today we’re going to be talking about the steps before you start piecing. A good foundation is the key to success, so before you dive in and start stitching up your first creation, let’s learn about the very first steps in your quilting journey!
Jenny Doan always says “finished is better than perfect” and we can’t agree more! No one will notice if you lost a point or if you had to add back fabric with an extra seam after a cutting mistake or if you had to rip out the stitches in your block one too many times with your handy seam ripper (we’ll learn more about this tool soon!). Finishing a quilt or project is a huge accomplishment and you should never let your fear of imperfection get in the way of creating! So, let’s start with the basics and build our foundation and you’ll be sewing confidently in no time!
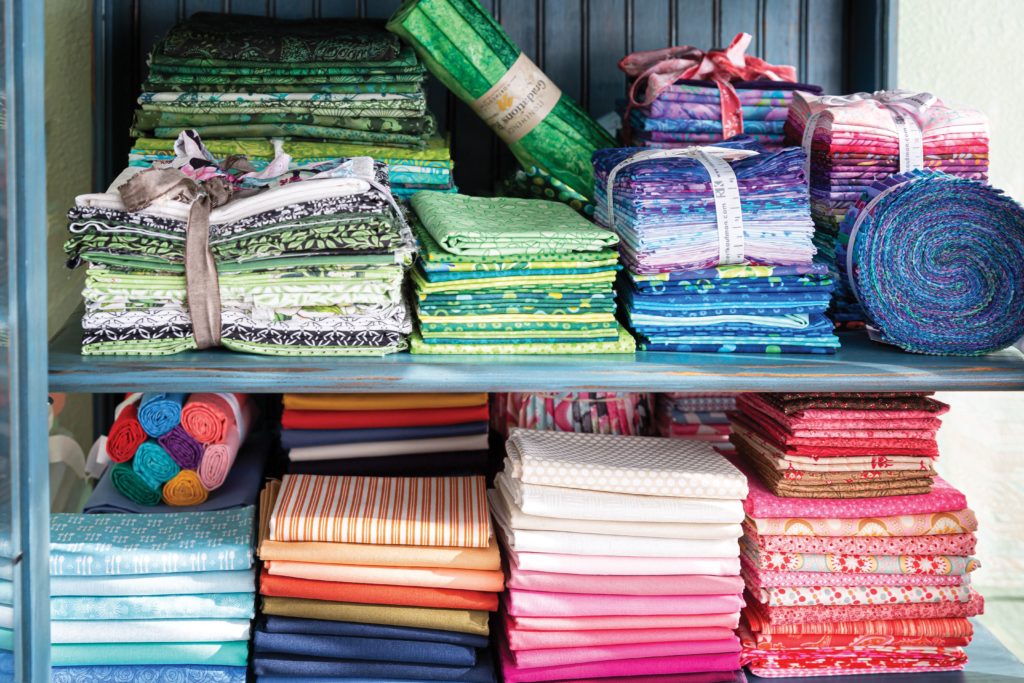
Fabrics
Fabric comes in all kinds of shapes, colors, cuts and styles. Photo from BLOCK Magazine Volume 7 Issue 1.
When it comes to buying fabric for your first quilt, pre-cuts are a good place to start! They come ready to go in various sizes in bundles of fabrics that coordinate with one another. If you haven’t had the chance, you can learn more about pre-cuts in our previous Building Blocks blog post. If you aren’t ready to take the leap into buying pre-cuts yet or you have other fabrics in mind for your project, have no worries! Virtually any fabric can be used for a quilting project.
The Memory quilt, for example, utilizes old neckties and shirts to create a quilt to honor a dear one’s existence. These materials are not designed for quilting projects, but with a little creative energy and ingenuity they come together to make a fantastic project that makes a truly powerful gift to honor the memory of a loved one. Old denim jeans, fabric scraps, recycled materials, t-shirts, and more can be materials used in your projects! So the next time you open your closet, keep in mind what you can repurpose to add a unique and modern touch to your quilting project.
You have many options for materials to use in your projects, but keep in mind that some materials are trickier to use than others. If you are just entering the world of sewing, we recommend choosing a material that is 100% cotton!
Cutting & Measuring
A selection of Rotary Cutters in various shapes and sizes on top of a gridded cutting mat.
Now that you are getting comfortable with choosing fabric and learning about all the choices you have, let’s talk cutting that fabric! The old adage “measure twice, cut once” has never been so pertinent. In many projects, the fabric measurements are very important to get right, so that the rest of the work goes by smoothly! Quilting can be a precise art form, so it’s best to get used to measuring out your fabrics and cutting as accurately as possible in order to get the best results. There are a few handy tools that can aid in making this process the easiest it can be!
You’ll need a rotary cutter, a cutting mat, and a ruler. Scissors are very helpful in the sewing process, but when cutting up fabric as accurately and quickly as possible, rotary cutters are our go to — especially when paired with a gridded cutting mat. These mats come blocked out in one inch squares to assist in your fabric measuring and cutting! By learning how to sandwich your fabric between your mat and ruler and using the marked, premeasured guides on those tools, you can soon become comfortable with using your rotary cutter and making as accurate cuts as you can! It takes practice, so don’t be discouraged if you make mistakes along the way. No one is a master in the beginning!
Pressing
Irons and pressing mats come in a variety of styles and designs.
The last item that we suggest getting familiar with that will help in the quilting process is something that you likely already have in your house – an iron! Irons are an integral part of the entire quilting process — they are with us almost every step of the way! You may already be comfortable with the iron you have at home and if you are not, don’t fret! They usually are pretty quick to learn and may just take a little studying and practice to find the settings that work best for you. Ironing makes many steps of the quilting process easier and soon you’ll figure out how much or how little ironing you like to do during your quilting process! Everyone is a little different — some people utilize the steam feature on their iron often, some people iron every little piece, and some iron rarely. It’s all personal and a part of the learning process!
Remember to always iron on a safe surface — an ironing board is great if you have one, but if you want a space closer to your sewing area, you can always purchase an ironing mat or even make your own! You’ll be ready to press in no time and create beautiful smooth fabric that’s ready for the next step, piecing!
In our next segment, we will be talking all about piecing. Take this time to familiarize yourself with your quilting tools and measuring and cutting fabric. Remember, these basic steps, although simple, will make all the difference when creating your first quilt project. We can’t wait to see what you create!
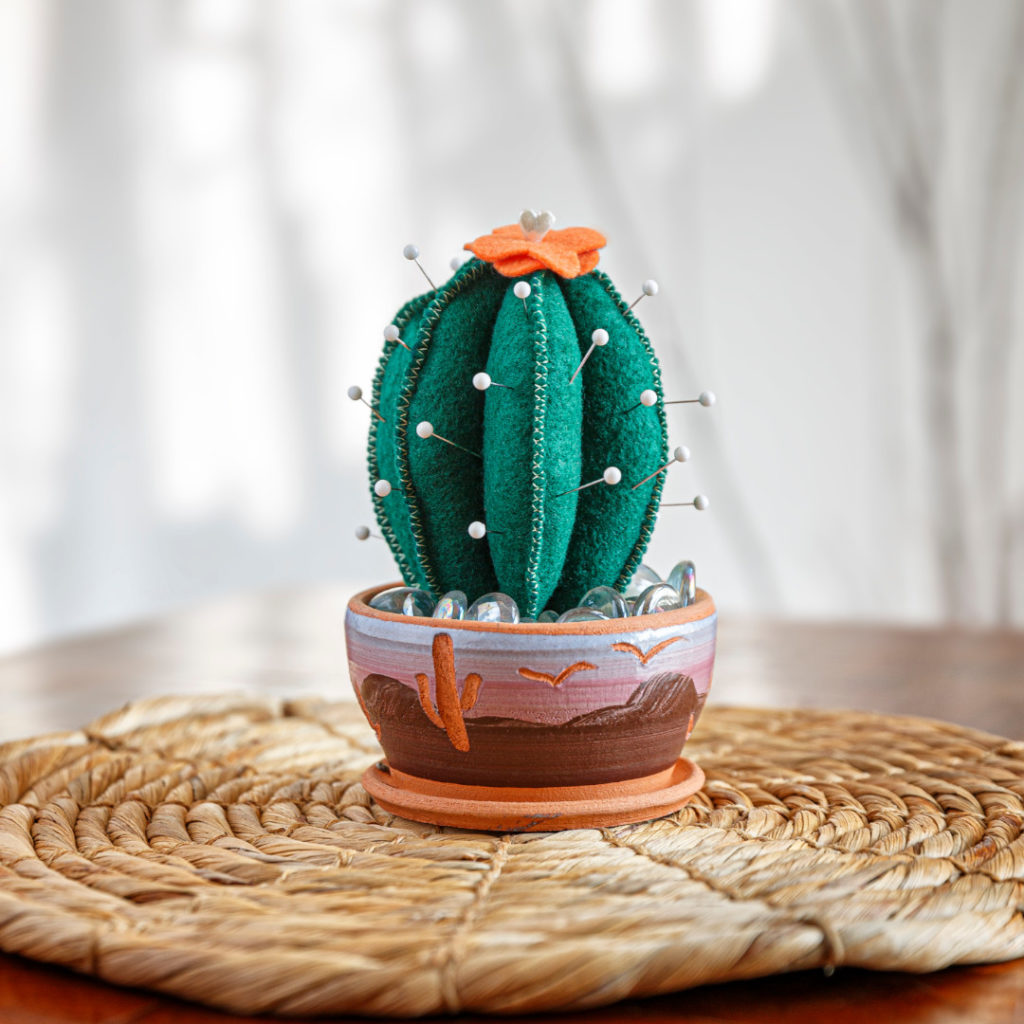
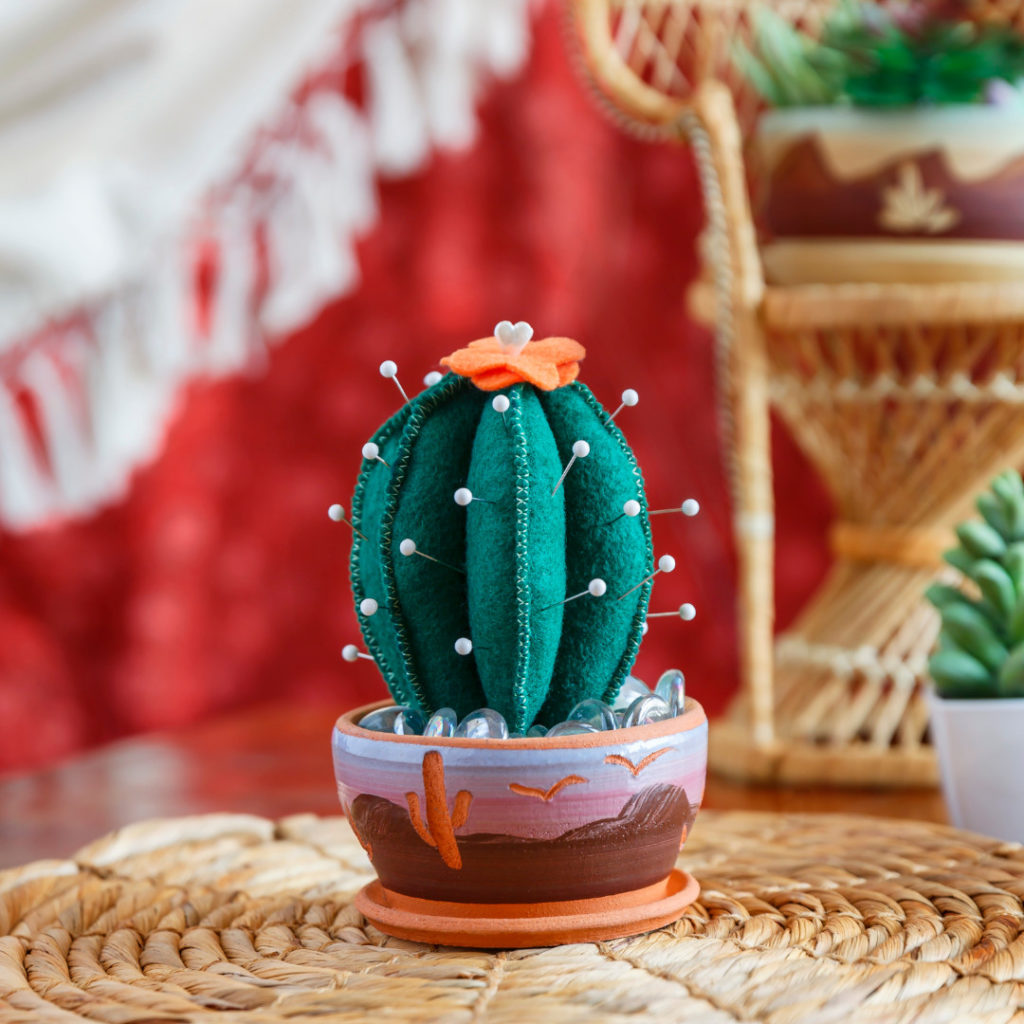
The Cactus Pincushion from Missouri Star Live displayed in a terracotta pot.
Long gone are the days of your grandmother’s red tomato pincushion! In the latest installment of Missouri Star LIVE, Courtenay demonstrates how to make a unique cactus shaped pincushion that will not only add a modern elegance to your sewing room, but will keep all of your pins safely tucked away for future use. Whether you’re “planting” your cactus pincushion in a traditional terracotta pot, or celebrating your love for Missouri Star by using a Thimble Container, this handy project is a must-have addition to your sewing studio.
Cut out the paper cactus blossom template. Use the template to trace and cut 2 cactus blossoms from the accent felt scrap. Set these aside for the moment.
Hint: Because you are sewing through layers of felt, you may need to change your needle to a larger size and sew slowly to ensure even stitching.
Lay 1 petal shape atop another, right sides out. Using a medium zigzag stitch, sew around the curved edges, leaving the bottom edge open. Repeat with pairs of the remaining petal shapes to make 3 units.
On only 1 of the sewn units, measure 1¾” from the widest point of the curved edges and mark a vertical center line.
Stack the 3 sewn units, aligning the edges, with the marked unit on top. Use Wonder Clips, binder clips, or pin as needed to hold the stack together. Sew the 3 units together along the marked center line, backstitching at the beginning and end.
Pin a fabric flower to the top of your Cactus Pincushion for a beautiful final touch.
FINISHING
Stuff each of the 6 tubes you just created with fiberfill.
Hint: The eraser end of a pencil or small dowel comes in handy to stuff the skinny tubes (Don’t forget you may find a wooden rod in your Poly-fil bag!).
Lay 1 cactus blossom atop the other at a 45° angle so that the ends of all 8 petals are visible.
Sew the blossoms together by hand, slightly gathering the top petals so they have 3 dimensions.
Sew the cactus blossom to the top of the cactus.
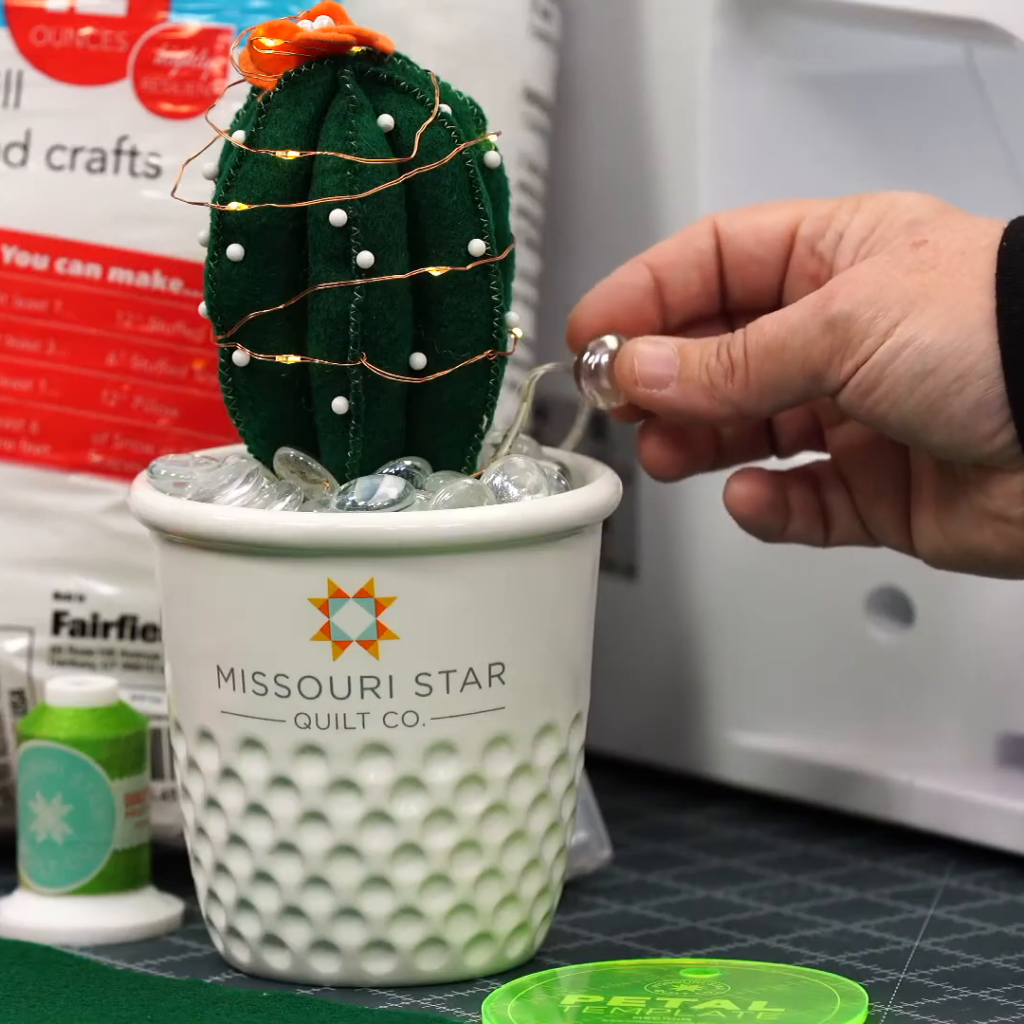
Cut the styrofoam cube as needed to fit inside the thimble container. Use the glue to adhere the sytrofoam to the inside of the pot. Use additional glue to adhere the cactus to the top of the styrofoam. You can fill the pot around the styrofoam with aquarium rock or even glue some rocks around the base of the cactus to finish “planting” your cactus.
Stick in some of your favorite pins and your cactus pincushion is sure to prickle your fancy!
Needing some more help? Download our Free Printable Pattern or Join Missouri Star’s very own Courtenay Hughes as she demonstrates how to create this adorable, quick and easy project on the replay of Missouri Star LIVE!
Christmas time at Missouri Star Quilt Co. Main Shop in Hamilton, Missouri.
Ready or not – Christmas is coming! The holidays are such a special time for crafters because it lets us share our creative gifts with friends, family and those in need. There is no better time of year to warm the hearts of your near and dear with a homemade gift (that just happens to show off your crafty abilities).
Shorter days and holiday activities can make it feel like there isn’t time to make handmade gifts (it’s already December!). While tackling a brand new quilt may be daunting, there are many festive projects that can be created quickly and bring cheer to those who receive them. And in a year like 2020, when social distancing means breaking time-honored traditions for the safety of our friends and loved ones, there is no better gift than something made from the heart and by your own hands.
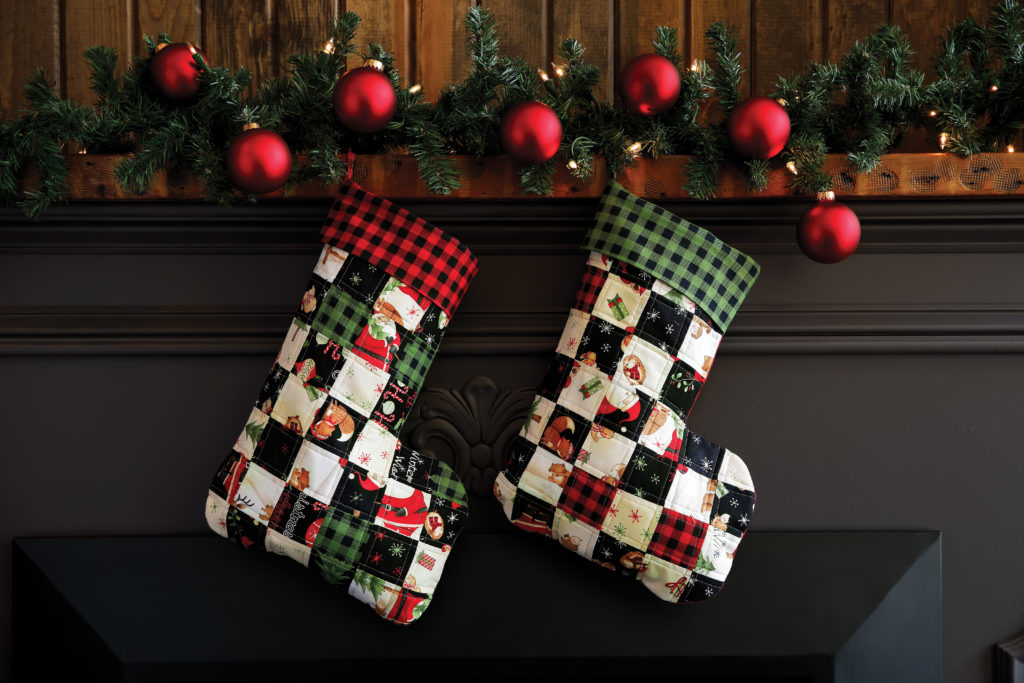
Create an awe-inspiring mantle display by gifting a Christmas Stocking that can be used for years to come!
What is more classic than a Christmas Stocking hung by the chimney with care? This holiday gift has an extra bonus – it’s already gift wrapped! Stitch up a quick and easy Quilted Christmas Stocking using 2.5 inch strips of precut fabric, and then fill them with all kinds of handy quilting notions, Missouri Star Gift Cards and sewing thread for a merry gift to the maker in your life! Even if sewing isn’t your recipient’s passion, that beautiful, handmade holiday stocking will become a part of their traditions every year.
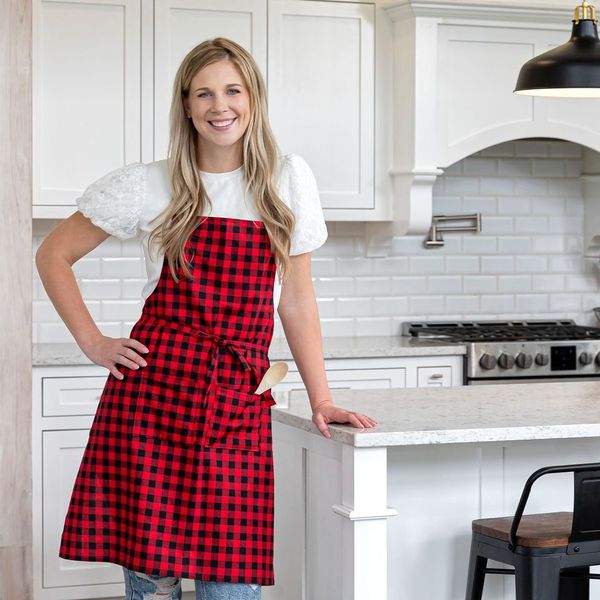
Misty relaxes in the kitchen in a cute red-checkered One Yard Apron.
A lot of the Christmas season takes place in the kitchen with holiday baking, festive family dinners and plenty of hot cocoa! The incredibly simple One Yard Apron is the perfect gift for the hostess in your life. It’s such a fast, easy project, you can use it to teach the kiddos in your life the joy of handmade gifts – with only one yard of your favorite fabric!
Basics can be beautiful, like this easy holiday Mug Rug.
This little Mug Rug is such an easy project, you’ll probably make a few for yourself along the way! Using a pack of 5″ squares of precut fabric, these cute table-savers keep your Christmas cocoa cozy. As a holiday bonus – this fast little gift is perfect for beginners!
When selecting your fabric, it’s not just about snowmen and snowflakes. Keep in mind the mug rug will serve as a protective layer for a hot drink, and also might soak up spilled drinks after enthusiastic cookie dunking! Avoid light fabrics that stain and try a thick flannel fabric such as a Woolies Flannel Holiday Warmth Charm Pack by Bonnie Sullivan for Maywood Studio. If you’re feeling ambitious, swap out the charm pack for a Layer Cake (10″ square of precut fabric) and create gorgeous table protectors for your holiday feast!
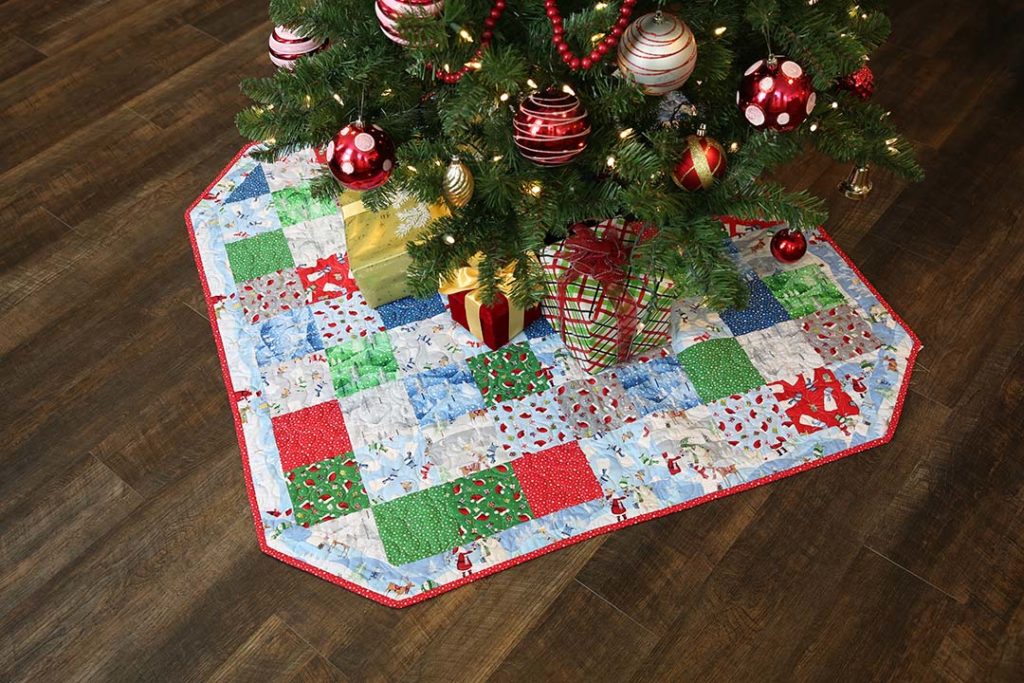
Light up their Christmas with a quilted tree skirt they can use every year.
More so than all the other decorations, the Christmas tree is always the focal point of the holiday season – that’s where the presents go! Gifts get the perfect showcase when arranged on a quilted fabric Tree Skirt. This little quilt for your tree comes together simply with 5″ squares of precut quilting fabric.
The fabric is what makes this project shine! Of course you can design the exact skirt to suit your holiday style if you want to whip this up for yourself. If you’re making it for someone else, consider solids or batiks so it’s more likely to match their decorations. Season’s Splendor Batiks Stamps by Kathy Engle for Island Batik is a perfect combination of festive Christmas colors and classic motifs.
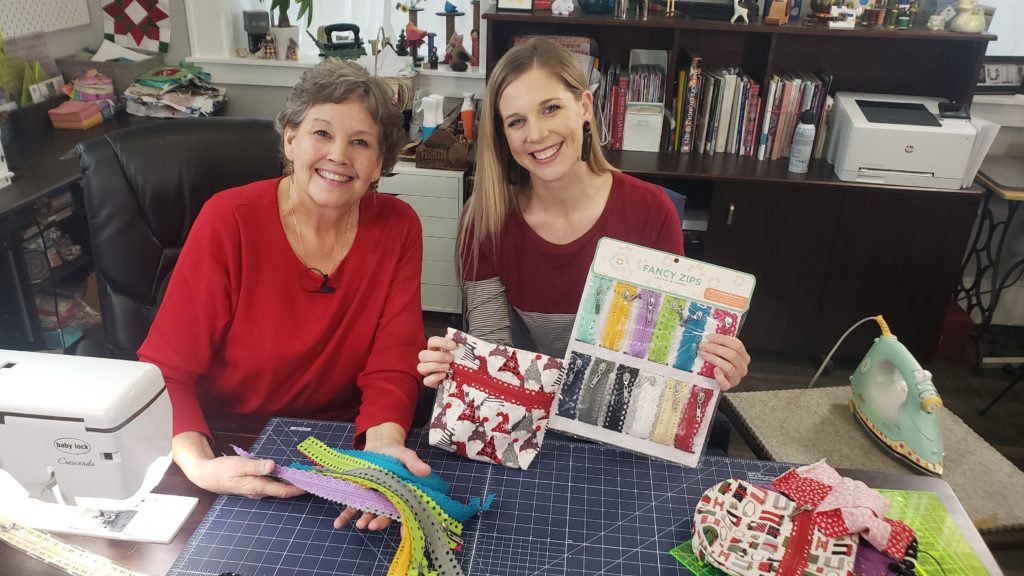
With festive new MSQC Fancy Zips, the Easy Zipper Pouch from Missouri Star Live is useful gift for anyone!
Give the gift of functionality this Christmas with the Easy Zipper Pouch, featuring the all new Missouri Star Fancy Zips! In this Missouri Star LIVE, Jenny and Misty teach us how to stitch up this extremely useful project that, with a little festive fabric from your stash, makes a thoughtful last minute gift idea. There are so many uses for this handy little bag. Add some vinyl to the interior for a cosmetics bag or add some batting for a notion holder!
You’ll need cut yardage no smaller than 14″ in length (the necessary length to add a Missouri Star Fancy Zip). For a festive holiday bag, select a beautiful cut of Christmas fabric by the yard. If you need a little extra help with this project, you can purchase a digital download of the Easy Zipper Pouch pattern so that you can start stitching immediately!
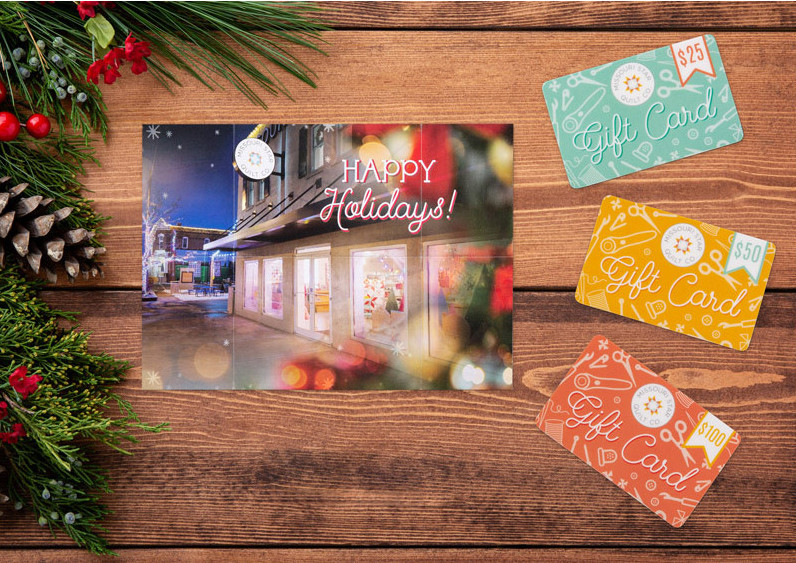
MSQC gift cards in festive gift card holders offer holiday cheer to your favorite maker!
If it’s the night before Christmas and you’re still having doubts, keep it simple and crafty and gift card it out! If there’s a quilter on your list who has it all, give them the gift of choice with a Missouri Star gift card! Available in both physical gift cards (definitely consider a holiday gift card holder for big MSQC fans!) and digital gift cards (that can be emailed same day), this last minute gift idea will save Christmas when your crafting time has run out.
As we look back over the past twelve months, we’re simply amazed! We were touched by the love from our followers, the support of our customers, the kind hearts of each and every one of our hardworking team members, and the selflessness within the quilting community. Despite this challenging year, we’ve been able to accomplish so much together.
Thanks to you, Missouri Star is celebrating yet another great year of quilting! It’s been filled with inspiring stories from quilters all around the world, brand new products created with you in mind, exciting tutorials that have inspired many, and some unforgettable, first-ever online events!
Let’s celebrate the end of 2020 by looking back on some of the good things that happened this year:
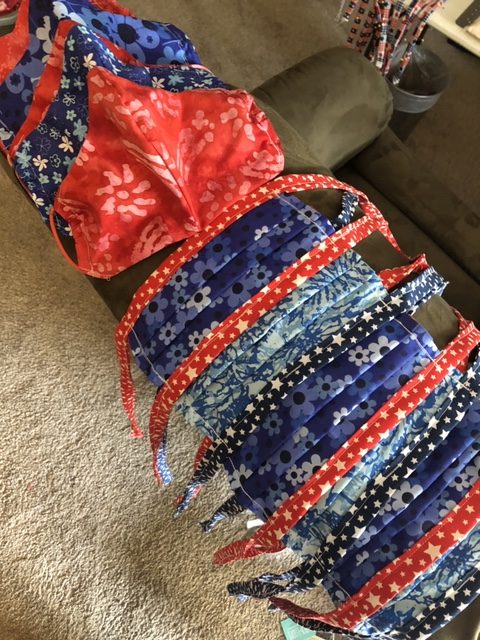
FACE MASKS
Wow, quilters! Thanks to your passion for sewing and your big hearts, you were able to play an important part in the fight against a global pandemic. Since March 1st of 2020 – 56,973 of you have purchased fabric from Missouri Star specifically to create masks to help keep your communities safe! That is amazing – thank you!
In the comments below, tell us about all the ways you were able to help your community this year! Here’s what we did for ours:
Close to 6,500 yards of fabric has been donated to area groups and non-profit organizations who are making masks for healthcare workers
We have donated 350 N95 masks to the local regional hospital and 2 local businesses who provide food delivery and cleaning services for our community
We provided tutorials for creating masks to keep you safe
TOP TUTORIALS
MORNING STAR
Jenny Doan demonstrates how to make a beautiful Morning Star quilt using 2.5″ strips of precut fabric (jelly rolls). This pretty star pattern was designed by Tara Faughnan for ModBLOCK. It’s an easier version of the old block known as Morning Star, Lone Star, or Star of the East.
Jenny teaches us how to make an easy version of the classic Carpenter Star using 10″ squares of precut fabric (layer cakes). This traditional quilt is often made with squares and diamonds, but Jenny uses half square triangles because they’re so quick and easy and don’t require y-seams!
We introduced a brand new tutorial series by Jenny’s daughter, Natalie, that’s a fresh take on finishing quilts. Follow along with her and get beautiful results every time!
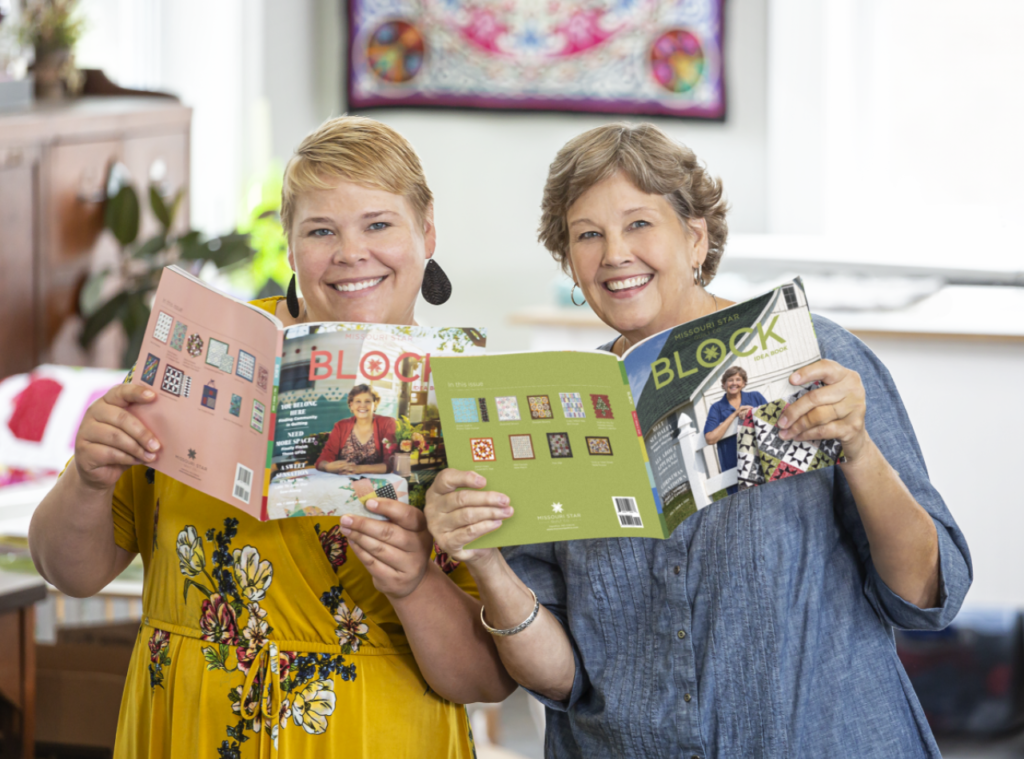
This year, the BLOCK team released a brand new design to BLOCK Magazine. New cover look, more educational content, more stories from our readers, and more!
DIGITAL BLOCK
Each issue of BLOCK comes with an interactive digital version! It’s kind of hard to wait for each issue to arrive, so we wanted to give you an early treat.
We recently released our first-ever special edition of BLOCK Magazine. It’s a compilation of the last seven years with 25 of our favorite patterns and over 200 pages of quilt-y fun!
This year we introduced two new sew-alongs to make quilting easier than ever. As you follow along, month by month or piece by piece, your quilt will take shape! By the end, you’ll have a lovely quilt that’s handmade by you!
Inspired by her children’s love for the outdoors and their adventurous personalities, Misty created a gorgeous quilt designed with them in mind! Get the pattern and join her Facebook group >
BIRTHDAY BASH – AT HOME
This year we celebrated Birthday Bash like never before! Thank you for stitching along with us for 12 wonderful years and joining the party from the comfort of home. It was an experience we’ll never forget! Relive the Best Moments >
DONATIONS
Thanks to your support, we were able to donate $10,000 to the Breast Cancer Research Foundation! All through October, we fought breast cancer one stitch at a time by shopping pink! Learn more >
Project Linus is an organization that provides love, security, and comfort to children who are seriously ill, traumatized, or are just simply in need of a handmade blanket. As one of the many ways we’re trying to spread kindness this year, we chose Project Linus to receive a $5,000 donation from us at Missouri Star. Learn more >
THANK YOU FOR YOUR SUPPORT TO MAKES THESE DONATIONS POSSIBLE!
GIVE LOVE
You are one of our biggest sources of inspiration! Although it’s been a tough year for many, you continue to show optimism and spread joy through all the kind things you do.
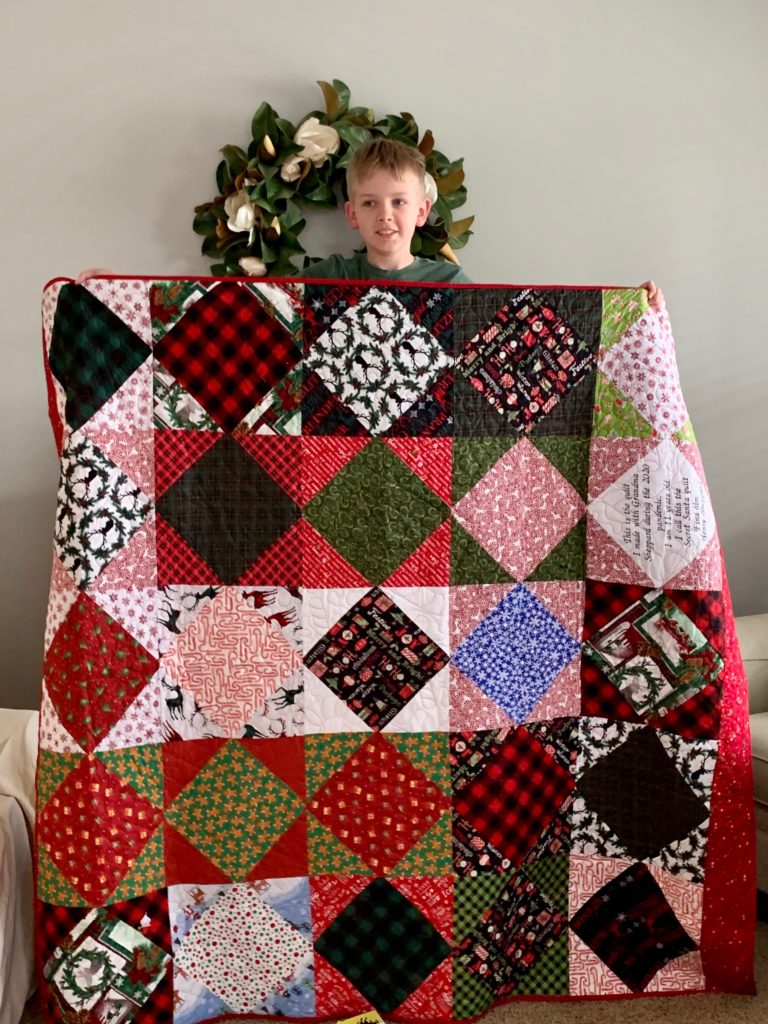
“I’m 11 years old. My Grandma taught me to sew. This is my very first quilt! I used 10 squares. I had it quilted at Missouri Star. I Love my Grandma! It was the best day. Ever. (It was my idea to have her embroider a Secret Santa for people to find.)” – the grandson of Laurie S.
“For several years now I have been donating quilts to the Linus Project. I get to be very creative and I try to think about the kids that will receive a quilt and make them more than just something to snuggle under… I average about 10 quilts a year.” – Wendy G.
“We are a small group of ladies that support needs of nursing homes… We have made over 60 fidget pads, over 30 clothing protectors, over 20 baby dolls with blankets, crocheted over 40 caps, covered over 40 Small pillows, for wheel chairs, 100s of masks… Love these ladies and their servant hearts!” – Nancy D.
“I volunteer with the “Helping Hands” sewing group my church. We make various items from donated fabric and yarn… lap quilts for first responders to give to children in trauma situations, bed quilts and kitchen goods for our missionary families, quilts for orphanages, and window curtains for loft houses our church builds for homeless families.” – Cindy M.
Quilters, thank you for being an inspiration to us and the world. We look forward to seeing all the great things you’ll continue to do in the new year!